
Hey all, thanks for stopping by Bitterroot DIY!
For more project ideas, you can find me on Pinterest. And to stay up to date with the latest shenanigans, follow me on Instagram.
Mirrors, mirrors, mirrors – they add so much to a home. They make the space feel bigger and brighter and are such a nice decoration. But, as we all know, they can definitely rack up a bill! So if you’re looking to update the mirrors in your house, or have been shopping around to add some new mirrors, you can save a pretty penny by doing them yourself.
This post contains affiliate links. See my full disclosure here.


I recently found some plain, unframed mirrors for a great deal and was able to update them easily by adding a simple frame. Follow along below for the quick details!
Tools & Supplies:
- Mirror
- Miter Saw
- Table Saw
- Drill
- Flat Corner Brackets
- Tape Measure
- Square
- Clamps
- Wood Glue
- Black Silicone II
- Minwax Special Walnut Stain
- Minwax Wipe-on Poly
- Pencil
- Safety Glasses
- Ear Protection
Lumber:
- 1 | 1 x 4 – length for your mirror
Step 1.
Cut four boards to length with a 45° perpendicular miter on the ends.


Cut the boards 1” shorter than the length of the mirror (measuring along the short side). This accounts for ½” grooves along each side of the frame so you can insert the mirror into the frame.
The above boards were for a 36″ square mirror, so the short side of each frame board is 35″.
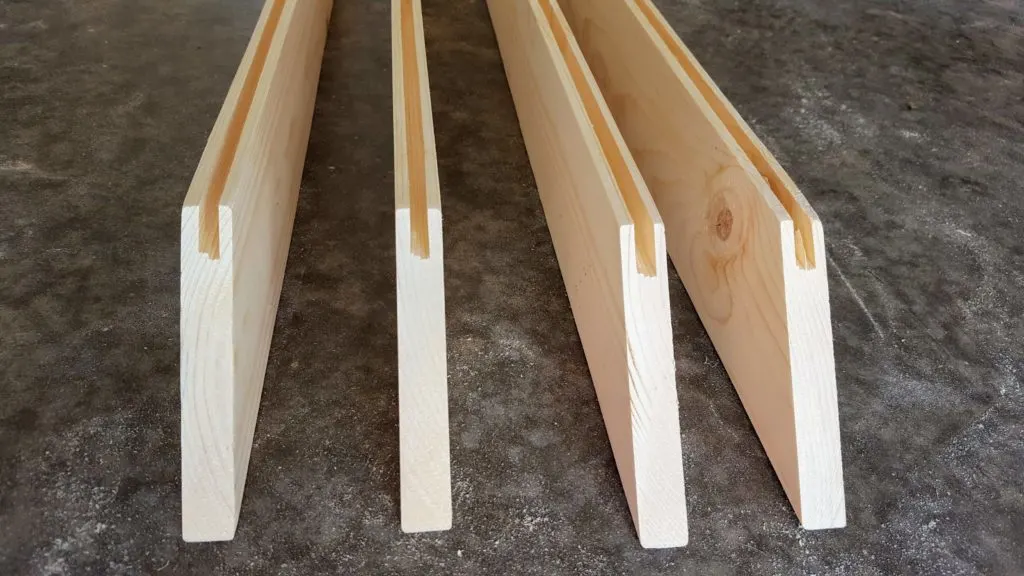
Step 2.
Cut ½” grooves along the short side of each frame board.


Step 3.
Sand and finish as desired. I used Minwax Special Walnut Stain and Clear Gloss Minwax Wipe-on Polyurethane.
Step 4.
Position the frame pieces around the mirror and pop them into place. This may take some finagling to get everything lined up correctly along the mitered ends.
Step 5.
Attach the frame pieces together with wood glue and corner brackets. Be careful not to get wood glue on the mirror as it can wreck the silver and damage the mirror.


For an industrial styled mirror, place the corner brackets on the front face of the frame. If you want to keep a plain wood frame, attach the frame pieces with corner brackets on the back of the frame.
Step 6.
Seal the back mirror edges with Black Silicone II to help hold the mirror in place.


If desired, you can also run a bead of silicone along the front edges of the mirror frame to create a nice, clean edge. Take care to use Black Silicone II – it is safe to use on mirrors and will not damage the silver as some other silicone or glue can.

And that’s that – a rustic industrial mirror!
Yes, the top photos show four boards cut at the same length and this mirror clearly has different length sides … I framed three mirrors at the same time and took nice photos of this tall mirror, rather than the square ones. But they’re all framed the same way!
The important part is to measure and cut as you go for your particular mirror.


As always, I would love to hear from you so let me know if you have any questions and/or comments. I’ll get back to you as soon as possible!
![]()
![]()

