
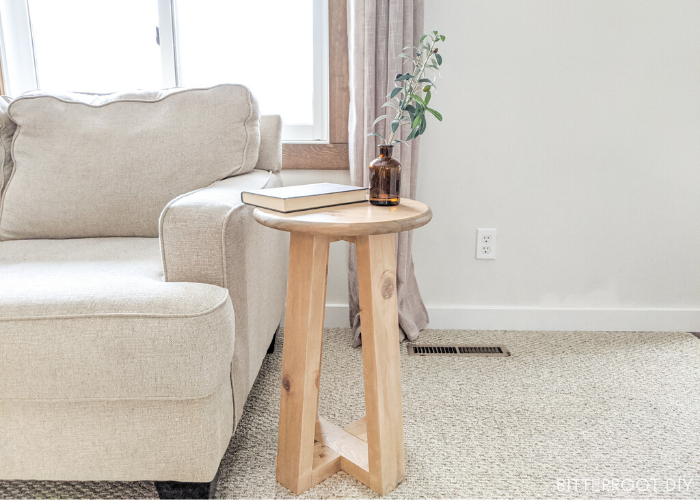
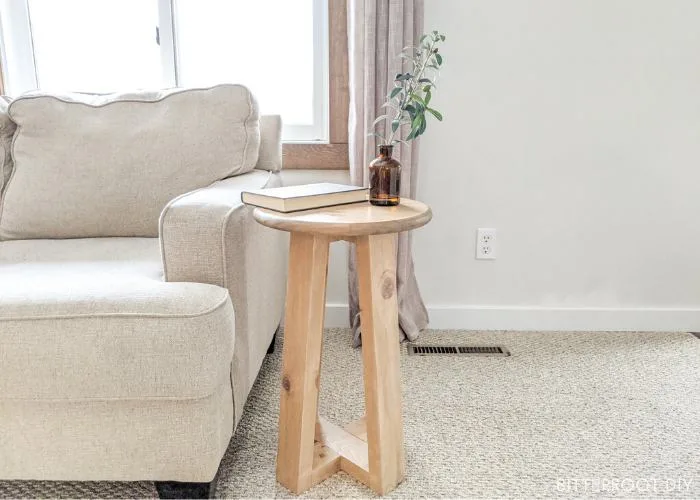
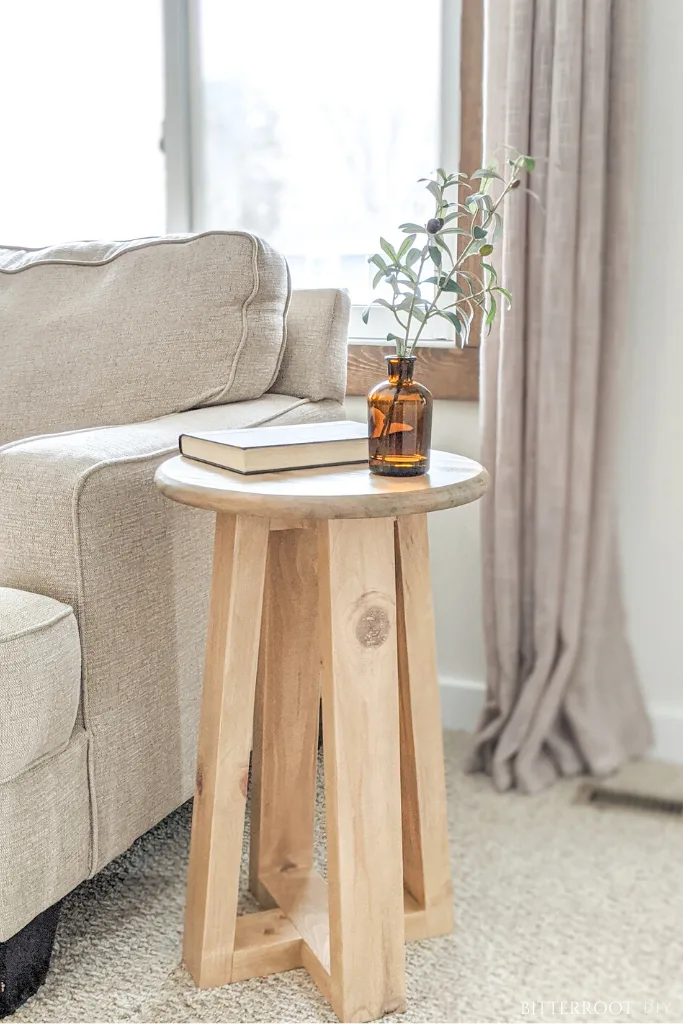
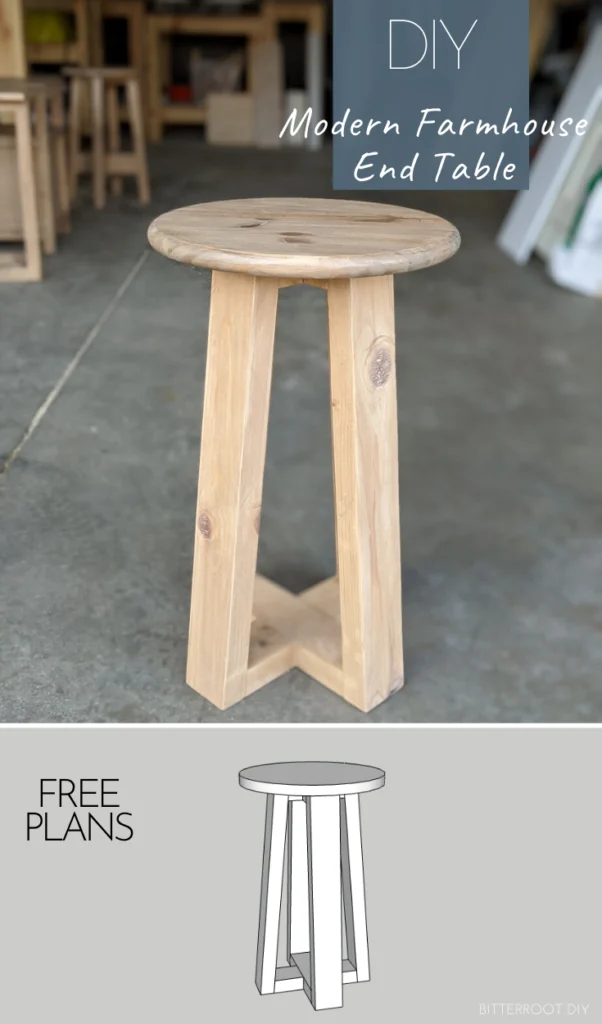
Build a modern farmhouse DIY end table with these free plans using just 2x4s and a pine round from Home Depot.
This post contains affiliate links. If you make a purchase from one of the links, I may make a small commission at NO EXTRA COST to you. This helps keep the tutorials and plans free here at Bitterroot DIY. Thank you for your support! See my full disclosure here.
I’m not exactly sure why, but I went on a crazy end table kick the last couple weeks. We’ve been considering new end tables for our living room but couldn’t decide on a style, so I just went ahead and built a few! Here’s the first set of plans – a modern farmhouse DIY end table.
The best part? All you need is 2x4s and a 15″ round top (or you can make your own tabletop).
Enjoy the plans!
TOOLS & SUPPLIES
- Miter Saw
- Drill
- Table Saw (optional)
- Kreg Pocket Hole Jig
- 2 1/2″ Pocket Hole Screws
- 3/4″ Corner Braces (optional)
- Tape Measure
- Clamps
- Wood Glue
- Pre-Stain
- White Wash Stain
- Early American Stain
- Water Based Polyurethane in Glossy
- Stain Pads
- Polyurethane Brush
- Speed Square
- Pencil
- Safety Glasses
- Ear Protection
LUMBER:
- 2 | 2 x 4 @ 8′ (you’ll end up with extra)
- 1 | 15″ Edge Glued Pine Round (or you can make your own tabletop)
Cuts:
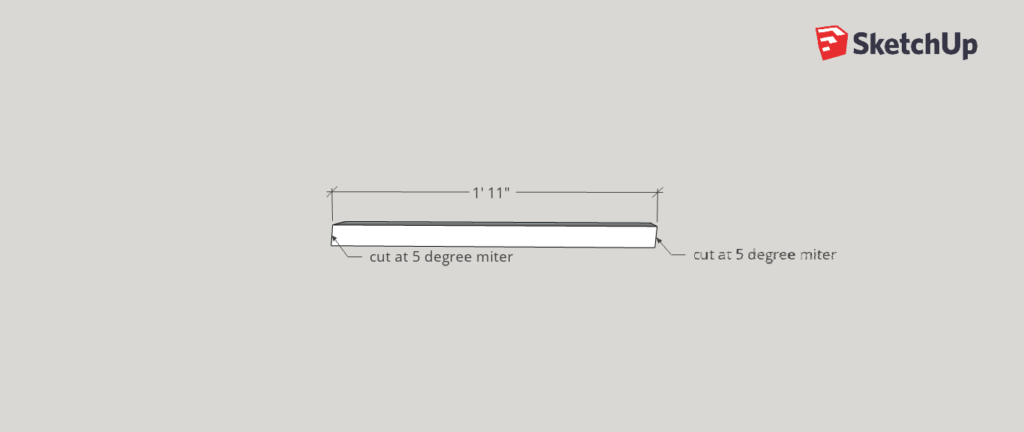
- 4 | 2 x 4 @ 23″ with a 5 degree parallel miter on each end (legs)
- 2 | 2 x 4 @ 9 3/4″ with a 5 degree perpendicular miter on each end (bottom frame)
- 2 | 2 x 4 @ 6″ with a 5 degree perpendicular miter on each end (top frame)
This is optional, but I ripped the rounded edges off my 2x4s to make the table look a little more square. A standard 2×4 is 3 1/2″ wide. To get rid of the round edges, rip 1/4″ off each long side. That leaves you with 2x4s that are 3″ wide. I wrote the following plans for 3″ wide 2x4s, but all you have to adjust is the width of the half laps if you keep the rounded edges (explained below). Everything else can stay the same.
DIY End Table Leg Cuts:

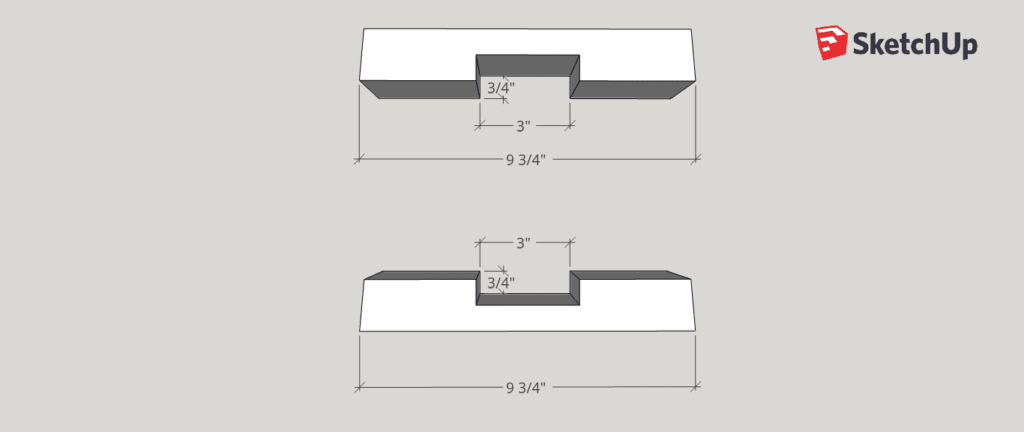
DIY end Table bottom frame cuts:
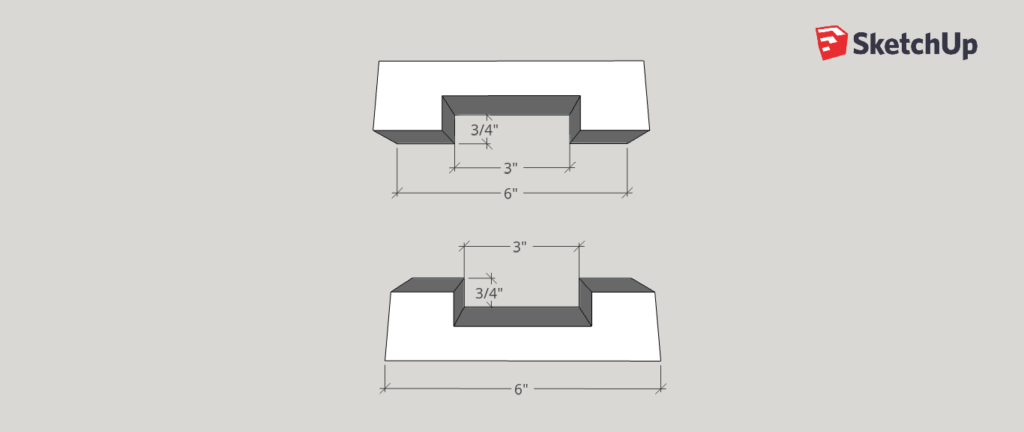
Once you cut the 2x4s for the bottom frame, cut 3″ half laps through the center of each. I used my miter saw to cut them, but you can also use a circular saw, table saw, or router.
**In case you missed it, I shared a tutorial to cut half laps with a miter saw over on my Instagram page – make sure to head over there for more tips and tricks like this!

If you do not feel comfortable cutting half laps, you can cut each board into two separate pieces and use pocket holes to put them together. I cut half laps since the boards are so short and it gets difficult to drill all the pocket holes.
DIY End Table top frame cuts:
Repeat the same thing to cut half laps in the top frame 2x4s.
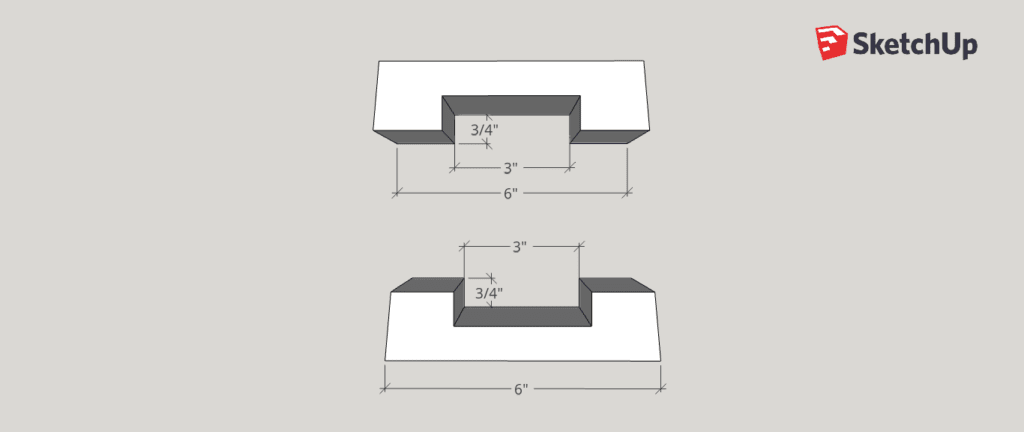
If you do NOT rip the rounded edges off the 2x4s, cut the half laps 3 1/2″ wide so they’ll fit together properly.
Step 1.
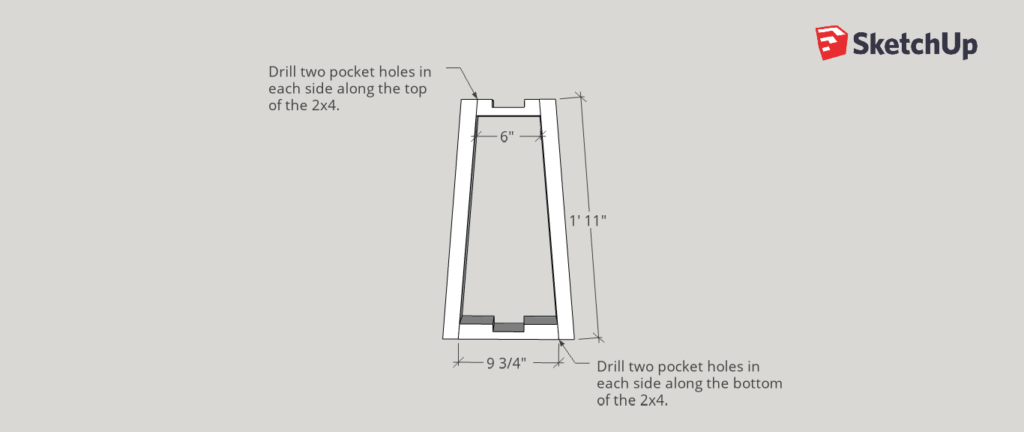
Build two frames as shown. Use wood glue and 2 1/2″ pocket hole screws to attach the top and bottom 2x4s to the legs.


Drill two pocket holes on each end of the 2×4 frames. Place the pocket holes on the top of the top 2×4 to best hide them.


Drill the pocket holes on the bottom of the bottom 2×4 to best hide them.


Repeat the same process to build the second frame. The half laps face the opposite direction on the second frame:

Because that top 2×4 is so short, drill the pocket holes into the side of the half lap. Set the pocket hole jig up as usual and it will still direct the drill correctly. It will look like this on both sides:
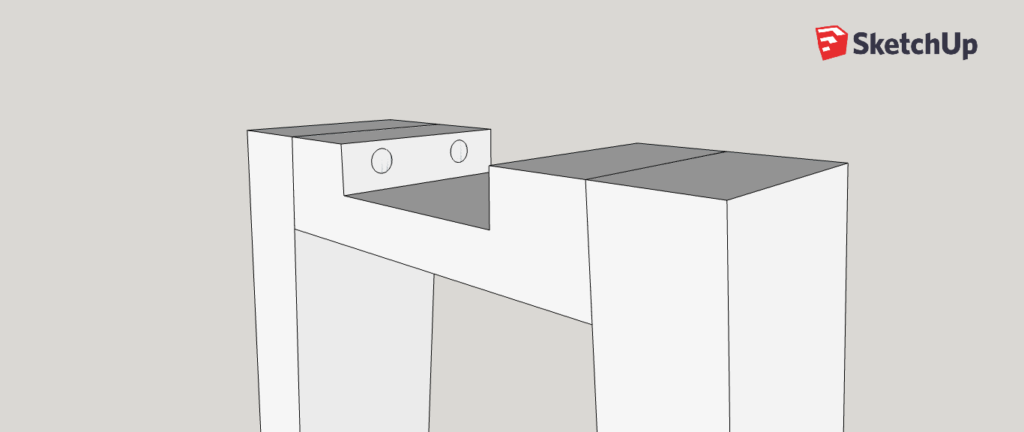
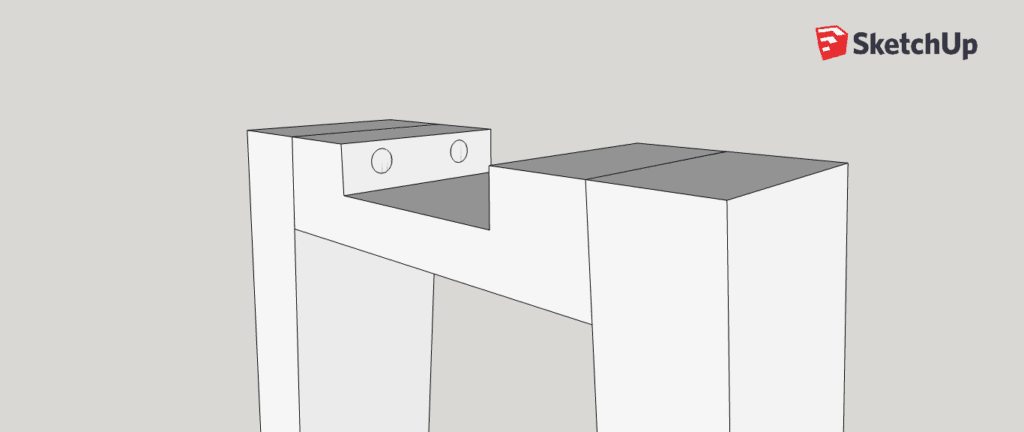
You may be wondering why I didn’t just drill the pocket holes along the bottom and avoid the half lap – the drill won’t fit to attach the 2×4 to the legs since the top is only 6″ wide. However, if you have a right angle drill attachment, you could totally get away with it!
Step 2.
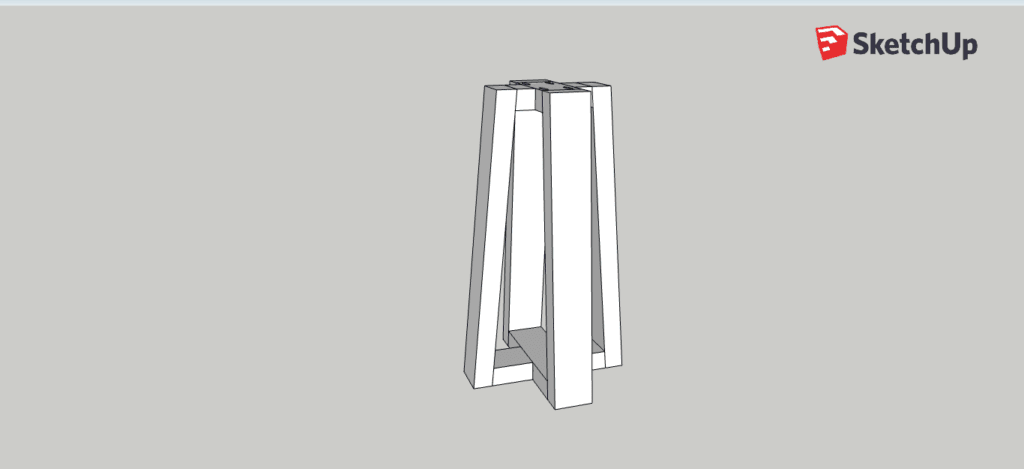
Once you’ve assembled both frames, apply wood glue to the half laps and sandwich them together.


There you have your table base!

Step 3.
I used an edge glued pine round from Home Depot for the tabletop. The pre-made edge glued pine rounds are quick and easy, but you could also make your own – totally up to you!
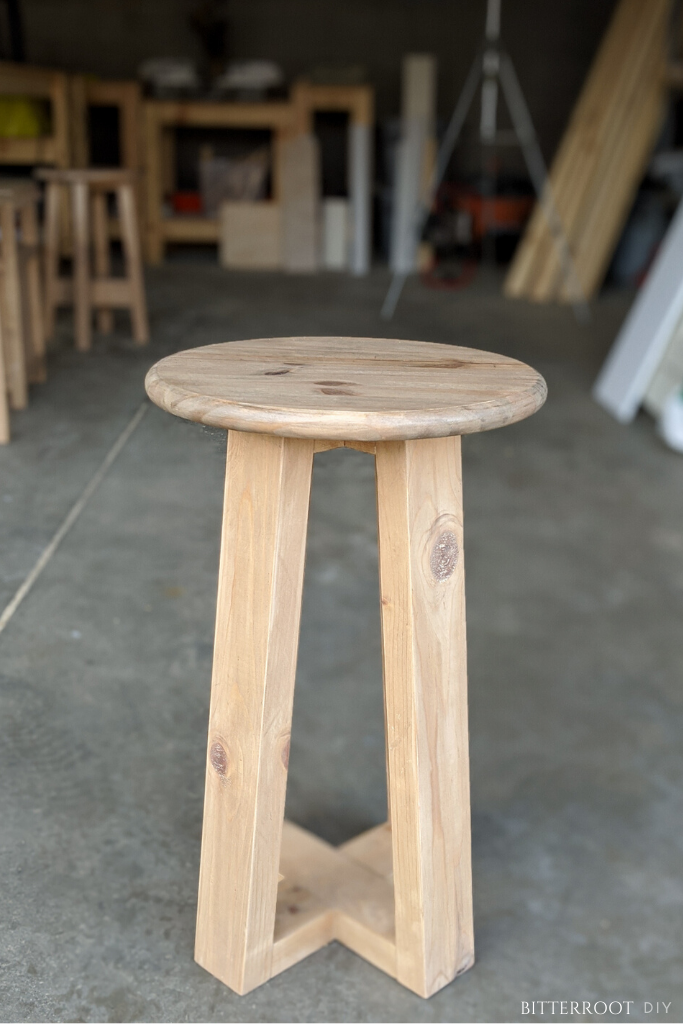

To avoid working around so many corners, sand and stain the frame and tabletop before attaching the top. I stained this table with my new favorite stain combination – prestain, white wash pickling, then early american – and sealed it with glossy water based polyurethane.
Attach the top to the base however you prefer. I usually use 3/4″ corner braces or figure 8 fasteners but kept things simple this time and went with 2″ screws through the bottom of the frame into the bottom of the tabletop.

Please let me know if you have any questions and I’ll get back to you as soon as possible.


For more project ideas, you can find me on Pinterest. And to stay up to date with the latest shenanigans, follow me on Instagram.

Sleep Center
Monday 22nd of March 2021
It looks amazing! Excellent job!
Lindsey
Monday 16th of November 2020
Could you sub the 2x4's with 2x3's? I have a lot of scrap 2x3's and this would be a great way to use them up. I would just want the bottom and legs to give the table top the same amount of stability and support. Your thoughts?
tylynn_sattler
Monday 7th of December 2020
Sure. You'll just have to adjust some of the dimensions, but it'll still be plenty strong.
Sarah Cook
Wednesday 21st of October 2020
Hi! I'd love to make this for my daughter's room but I want it to be 26"(ish) high. How does that change my cuts/angles?
tylynn_sattler
Friday 23rd of October 2020
I'd cut the legs to 26" instead of 23". Everything else can stay the same and should be just fine!
Sarah Cook
Wednesday 21st of October 2020
Actually, no less than 26" high. Thanks so much for your input!
Hadley Baker
Tuesday 29th of September 2020
Curious what the total cost is on materials? If I were to build this to sell, what would you deem to be a reasonable asking price?
tylynn_sattler
Thursday 1st of October 2020
I don't give estimates on cost since price of materials can fluctuate so much depending on your location.
Liz
Wednesday 8th of July 2020
Love this design! Do you think it could be modified to use as larger table bases for a 75" rectangular table base? The design is so clean and simple! I'd love to hear your thoughts!
tylynn_sattler
Thursday 9th of July 2020
Yes definitely! If you want to send me an email with your ideas, I'd love to draw up plans for it. I'd just ask for the final photos to use in a post for this site so others can build it as well. My email is [email protected]