
Fix up your old flat panel doors with this easy DIY Closet Door Makeover.


You know the traditional flat panel doors that every older home likes to sport?
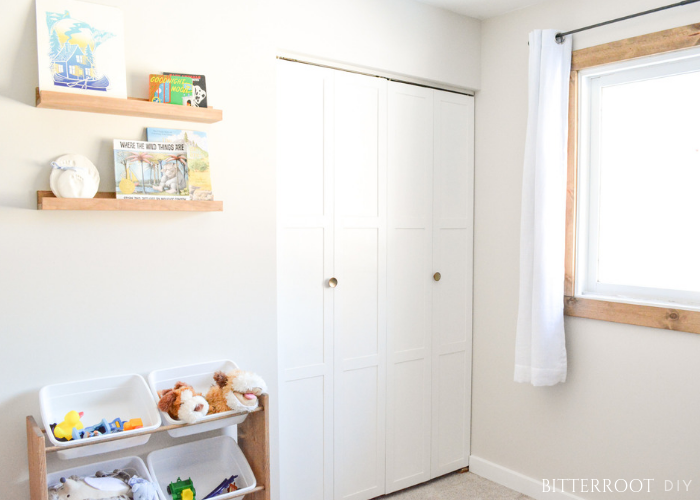
Yeah, those. Every closet in our house has those. When I started renovating Weston’s room, I knew they needed a face-lift. Though I would have loved to buy brand new doors, it just wasn’t in the budget for us. So I decided to give the doors a little DIY makeover. For about $5, I transformed the doors into modern bi-fold beauties:

This post may contain affiliate links. If you make a purchase from one of the links, I may make a small commission at NO EXTRA COST to you. This helps keep the tutorials and plans free here at Bitterroot DIY. Thank you for your support! See my full disclosure here.
It took longer than just putting up brand new ones. But for $5, I’ll take it!
You may wonder why the two pictures above don’t exactly match. Well, they’re two different rooms. I lost all my “before” photos from Weston’s room makeover, so the “before” of the closet doors is actually a photo of the closet doors in my daughter’s nursery. The photo below is the “after” of the doors in her room (I also moved her closet during the makeover).
But both sets of doors were the same dark brown, flat panels to start. I did the same makeover on both of them and it worked like a charm!


Tools & Supplies:
- Miter Saw
- Circular Saw (or Table Saw)
- Construction Adhesive
- Wood Filler
- Primer
- Paint of your choice
- Paintable Caulk
- Clamps
- Door Knobs
- Tape Measure
- Pencil
- Safety Glasses
- Ear Protection
Lumber:
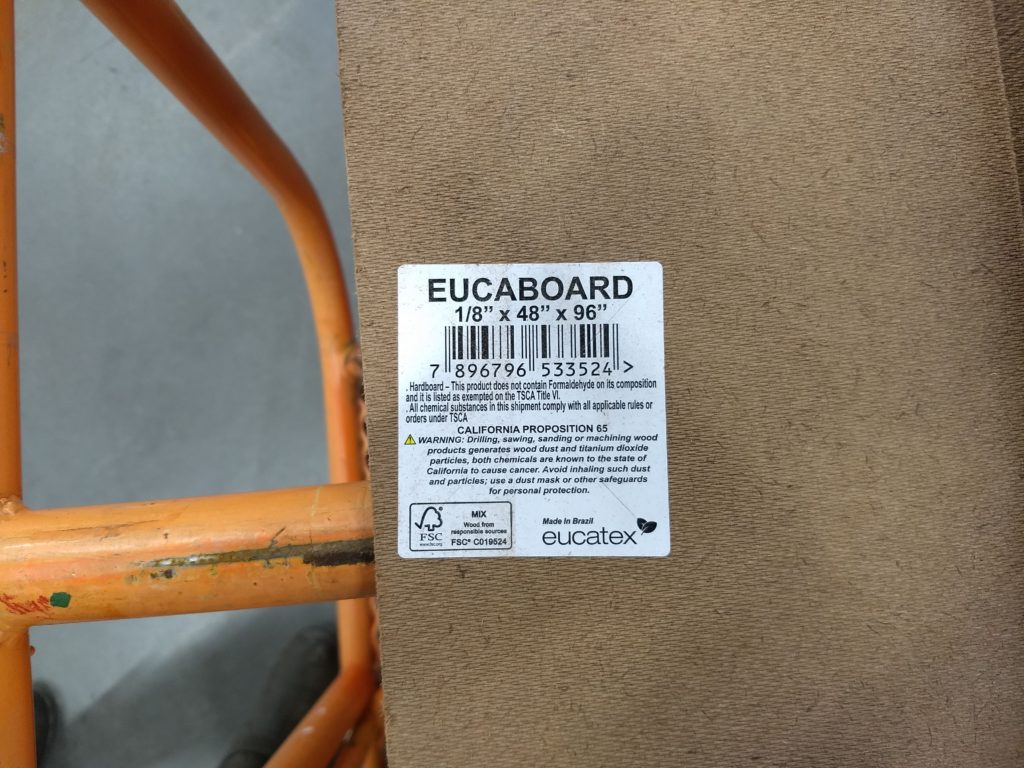
- 1 | 4′ x 8′ Sheet of 1/8″ Eucaboard
Step 1.
I’ve seen closet door makeovers with 1/4″ plywood (like this one from Shades of Blue Interiors), which works great. But I decided to use 1/8″ eucaboard for these doors since it’s a little cheaper. I also liked the 1/8″ thickness rather than 1/4″. I found 1/8″ thick 4′ x 8′ sheets at Home Depot for about $7!

First, rip the eucaboard into 2″ sections with a table saw or circular saw. Then measure the height of your door and cut the vertical pieces to the appropriate height. Put the vertical strips in place to measure the length for the horizontal pieces. Cut each of the horizontal pieces to the appropriate length. Measuring as you go minimizes any error so the new overlay fits together nicely. You will need four vertical pieces and eight horizontal pieces per door.
Step 2.
Remove the closet doors and scuff them up with a light sanding. Be careful not to over-sand. The goal is just to scratch the surface to give the primer something good to grab. I used 220 grit sandpaper to scratch the original finish up without taking off much material.


Use a tack cloth or rag to wipe all the dust off the doors after sanding. It’s important to get the surface as clean as possible so the adhesive sticks properly.
Step 3.
Apply the construction adhesive to the back of the eucaboard and stick it in place.


Use clamps and/or a combination of weights to hold the new pieces in place while the adhesive sets. Clamps work best. However, if you’re like me and don’t have enough clamps to hold everything down, grab some heavy stuff and start piling it on!
The nice thing about closet doors is that you only have to add the new overlays to one side. Since the back of the door is toward the inside of the closet, all you have to do is paint it!
Step 4.
Once the adhesive dries, use a small putty knife to fill any gaps with wood filler.


Let the wood filler dry completely and then sand it down as smooth as possible.


You can see the main door creeping in the side of the photo there … I did the same makeover on it but with a different pattern.
Step 5.
Prime the backs and fronts of the doors.


I used my favorite primer from Rustoleum. It says you can use it without sanding, but I always lightly scuff surfaces for good measure. It’s up to you, but I’ve had excellent luck with that method.

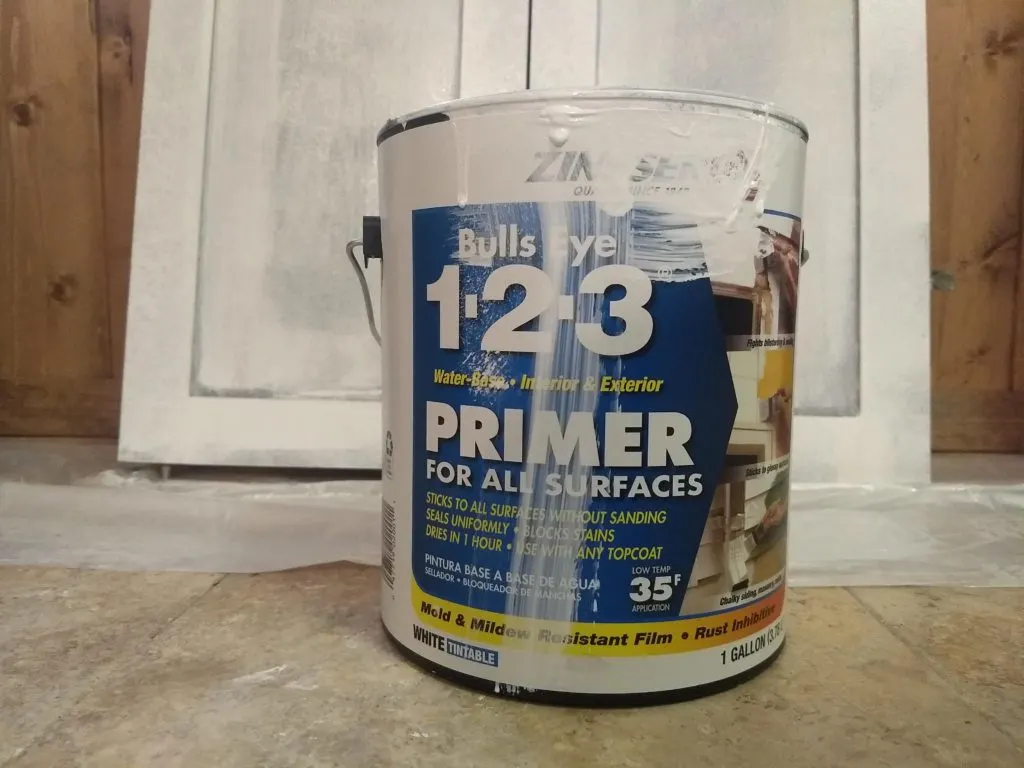
Let the primer dry completely.
Fill all the seams with paintable caulk to smooth the transition between the existing panel door and the new eucaboard overlays. Let it dry according to the manufacturers instructions before painting.
Step 6.
Paint the doors the color of your choice! Start with the back of the doors and then do the fronts. The front is the most important surface, so I always do it last to make sure it looks perfect.
I used Sherwin-Williams Urethane Trim Enamel in ‘Extra White’. It matches all the trim in our house and is clean and crisp.
Step 7.
Last, but not least, hang your “new” doors back up and install the knobs. You can use the original hardware, or I found these cute ones on Amazon!


Isn’t it amazing what you can do with some boards and paint!? I think this is one of my favorite DIY hacks yet!
Please let me know if you have any questions and I’ll get back to you as soon as possible!
| Tylynn |
Thanks for stopping by!
For more project ideas, you can find me on Pinterest. And to stay up to date with the latest shenanigans, follow me on Instagram.

