
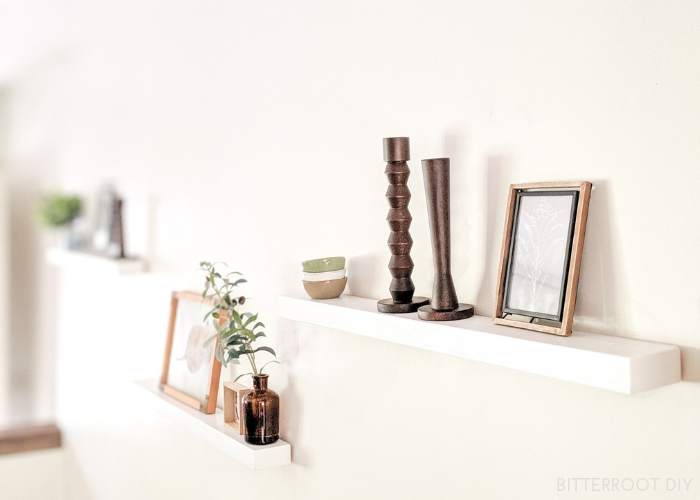
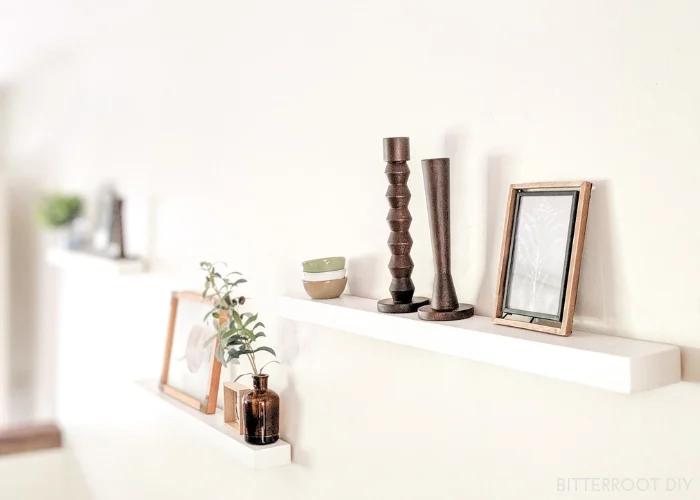
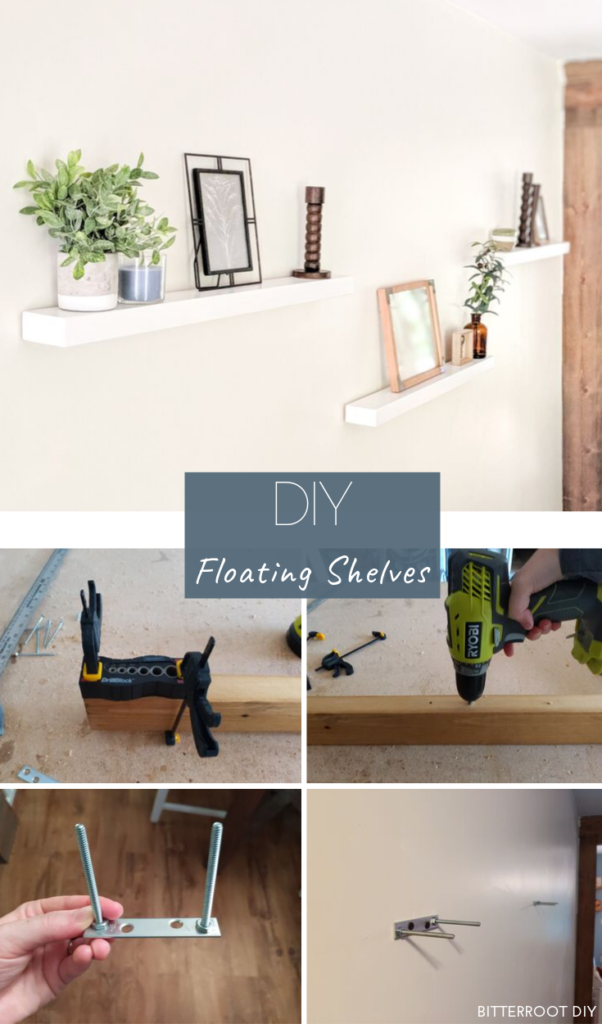
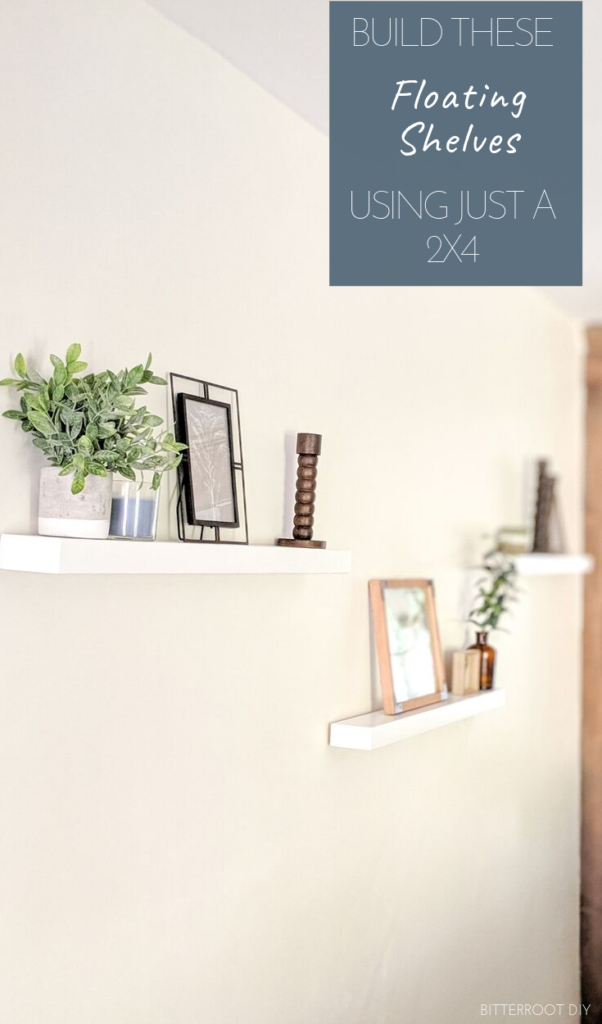
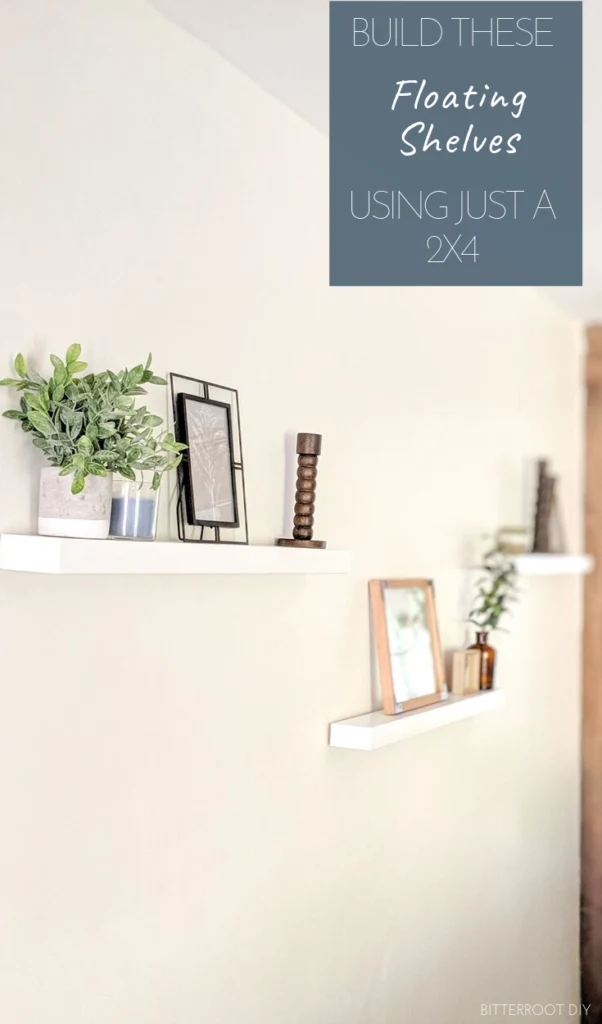
Build your own DIY floating shelves for under $10 with just 2x4s and mending plates.
This post may contain affiliate links. If you make a purchase from one of the links, I may make a small commission at NO EXTRA COST to you. This helps keep the tutorials and plans free here at Bitterroot DIY. Thank you for your support! See my full disclosure here.
Floating shelves – let’s just say that this project didn’t go as smoothly as I had hoped. HOWEVER, I definitely worked all the kinks out and can confidently say that this tutorial will lead you to many successes building your own DIY floating shelves!
If you follow along on Instagram, you saw the whole fiasco in real time. Needless to say, there was some troubleshooting along the way. So, for the purposes of this tutorial, I’m going to explain HOW YOU SHOULD DO IT – NOT AS I DONE IT … it’s a “do as I say, not as I do” sorta situation.
That said, my whole reason for doing floating shelves like this instead of the million other possible ways you can find online was so I could make them really narrow. I didn’t want them to stick out very far from the wall since it’s above our staircase and is already a cramped area. If you’re looking to make a little wider floating shelf, I recommend using these floating shelf brackets from Amazon. I was planning to use them, but couldn’t find any short enough for 2x4s – thus the mending plate and machine screws. They use the same step-by-step process that I did for these 2×4 floating shelves.
I’ve written the plans for ONE 2 1/2′ shelf. I made three total for this wall. Adjust as necessary for your house.
Enjoy the plans!
Tools & Supplies
- Miter Saw
- Drill
- Drill Block (or a drill press if you have one)
- Orbital Sander
- Tape Measure
- Clamps
- Stud Finder
- 3″ Mending Plates (available on Amazon or any hardware/home improvement store)
- #10 x 2 1/2″ Machine Screws and Nuts (available at any hardware/home improvement store)
- Toothpaste
- Level
- Pencil
- Safety Glasses
- Ear Protection
Lumber:
- 1 | 2 x 4 (adjust for how many shelves and the length you want)
Cuts:
- 1 | 2 x 4 @ 30″ (adjust to the length you want)
Step 1.
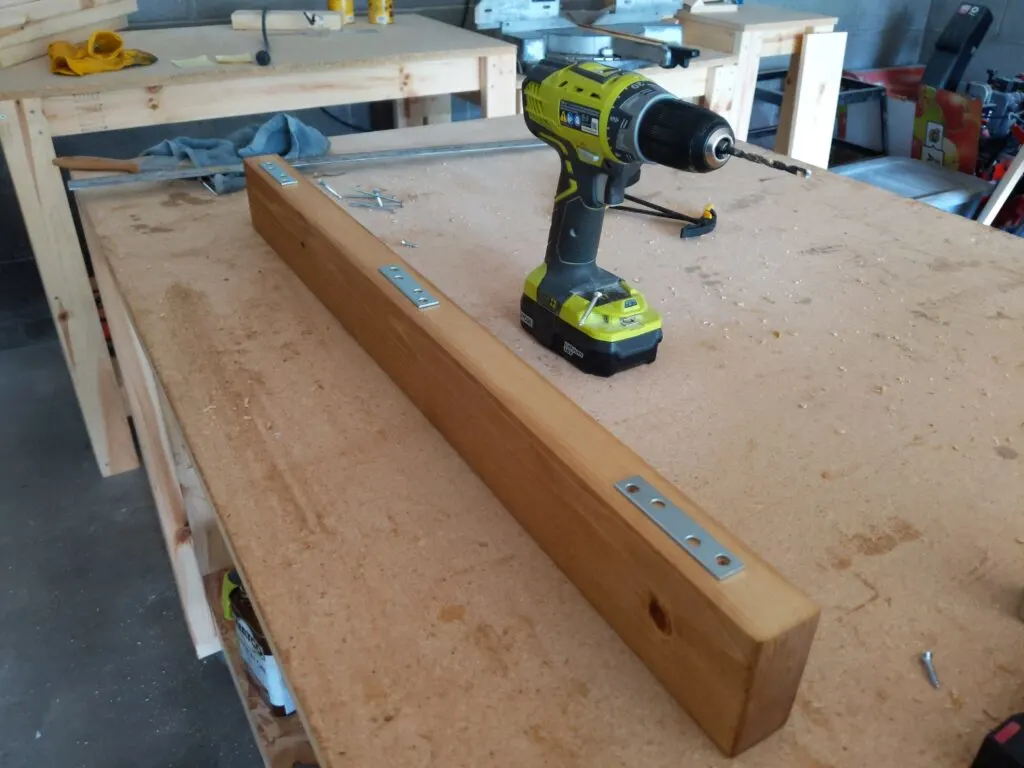
Insert 2 1/2″ machine screws through the outside slots of the mending plate and secure them with a nut.

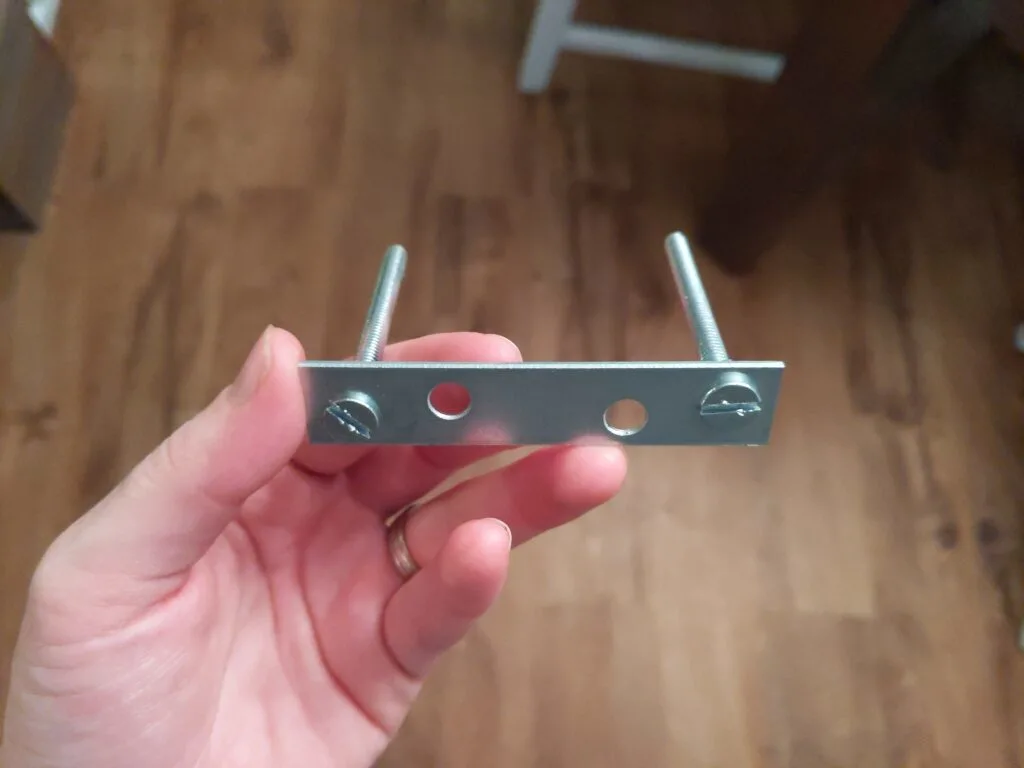
These will be your mounting brackets. I made two for each 2 1/2′ shelf.


Step 2.
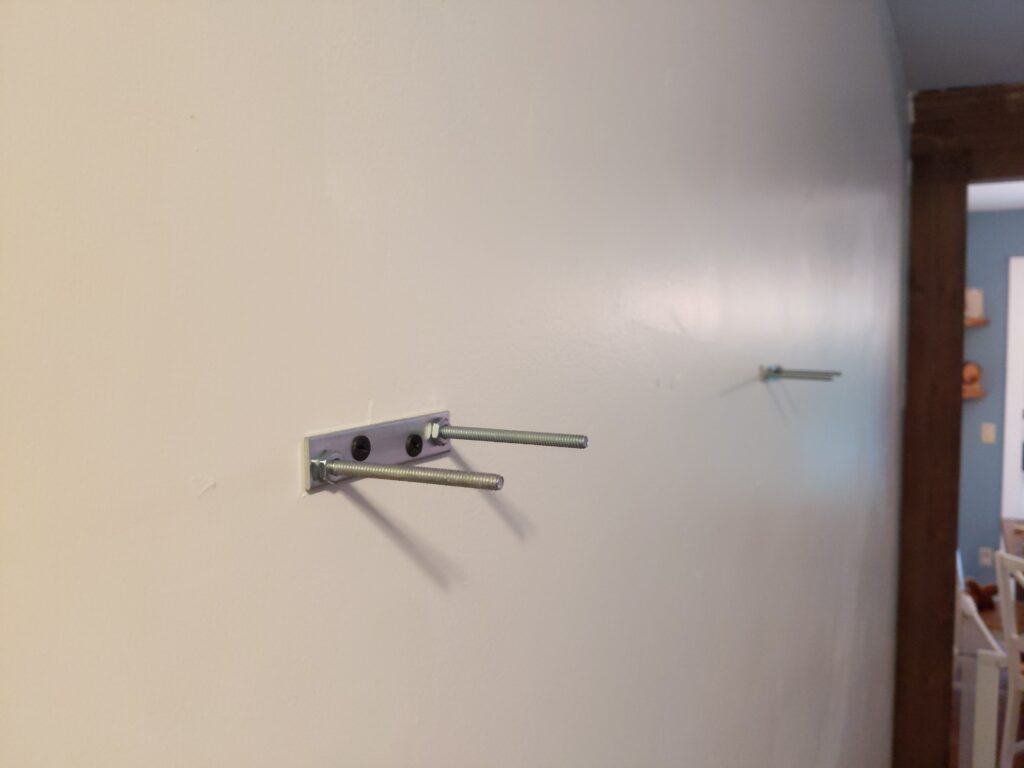
So here’s where I would recommend doing things a little differently than I did. I drilled out holes for the machine screws on the back of the shelves before installing the plates on the wall. When I took the shelves inside to figure out where to put them on the wall, none of the mounting brackets hit studs. Since I had already drilled everything, I ended up using heavy-duty drywall anchors behind the plates. The shelves are plenty strong with anchors, however, they still deflect a little bit when I try to wobble them. It might be that our house is really old so the drywall is weak, but I recommend doing things the opposite just in case.
My recommendation – figure out where you want the shelf and install the mounting brackets on the studs, wherever they happen to be in the vicinity of where you want the shelf. After you install the mounting brackets, hold the shelf up to them and mark the location of the machine screws. Once you’ve marked the locations for the machine screws, drill the pilot holes in the back of the shelf accordingly.
** Tip: To mark the locations for the pilot holes, apply toothpaste to the ends of the machine screws, hold the shelf up in place, and press it into the screws. The toothpaste from the machine screws should transfer onto the board, marking the location for each of the pilot holes.

Depending on where you want to mount the shelves, the studs may not be centered along the back of the shelf – you might have one farther to the right and another close to the center, etc. However, since you’re using a 2×4 (which is very sturdy), it’s not a big deal if the mounting brackets are not perfectly spaced along the back. The 2×4 won’t bend and deflect if the mounting brackets are a little off-center.
If you’re confident in your drywall and anchors, go ahead and use them. This is just my recommendation based on how things went, but I won’t claim that it’s the best way to do it!
Step 3.
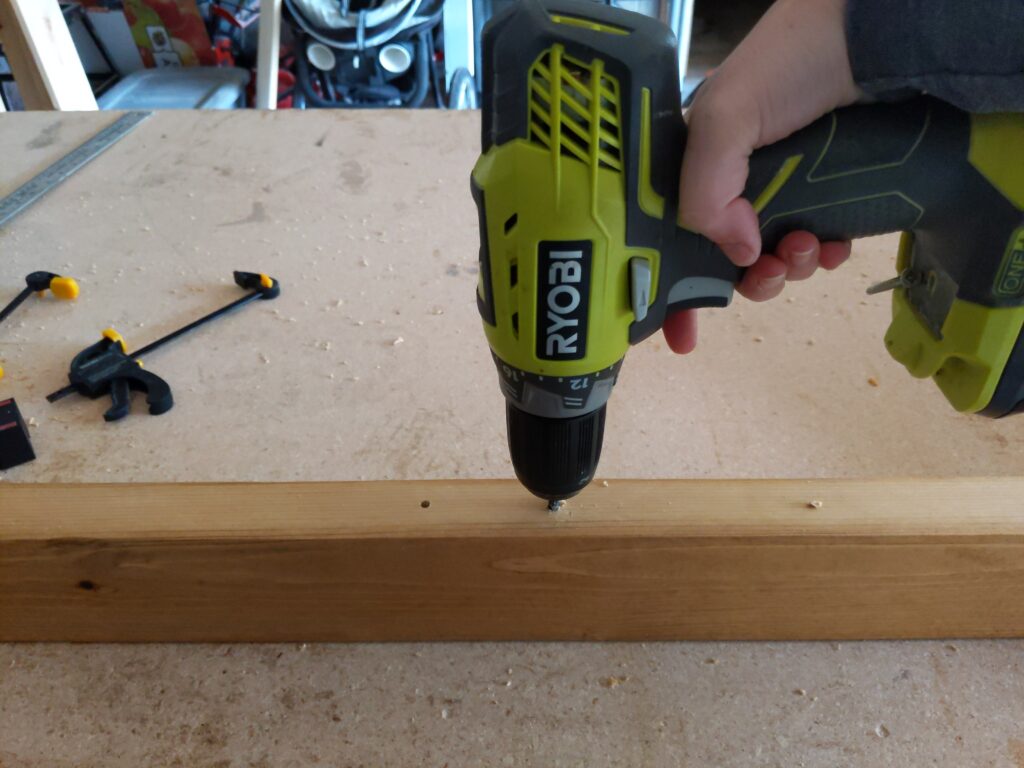
Drill the pilot holes for mounting the shelf to the machine screws.
It’s important to drill the pilot holes perfectly straight so the shelf will sit straight on the wall.

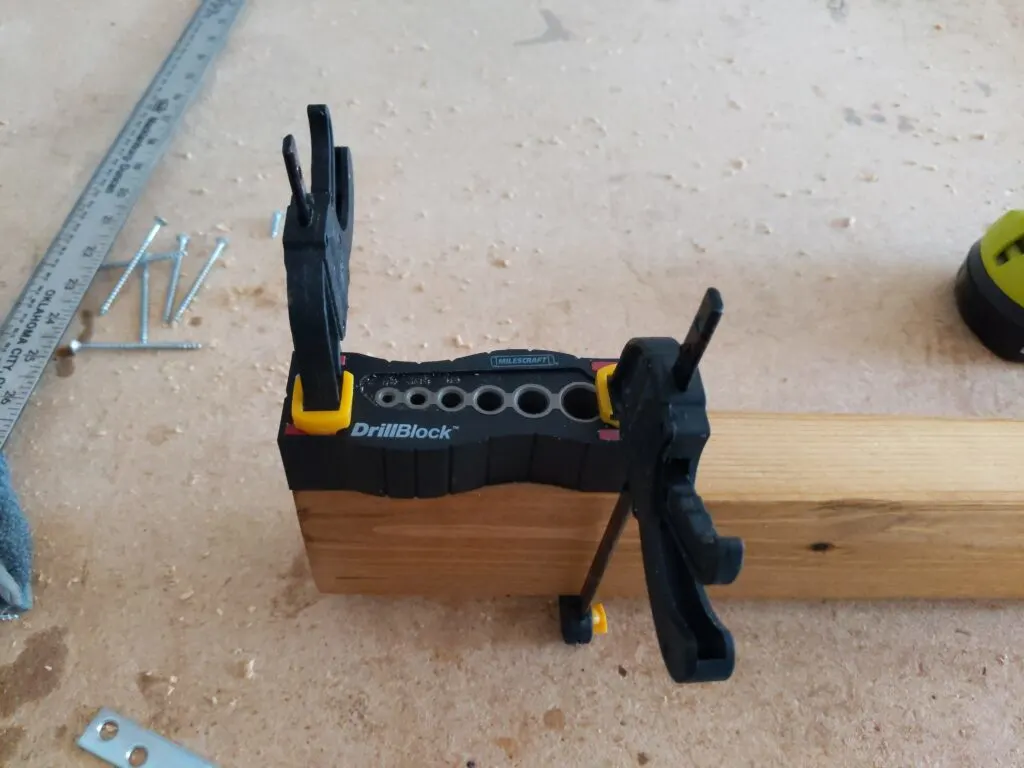
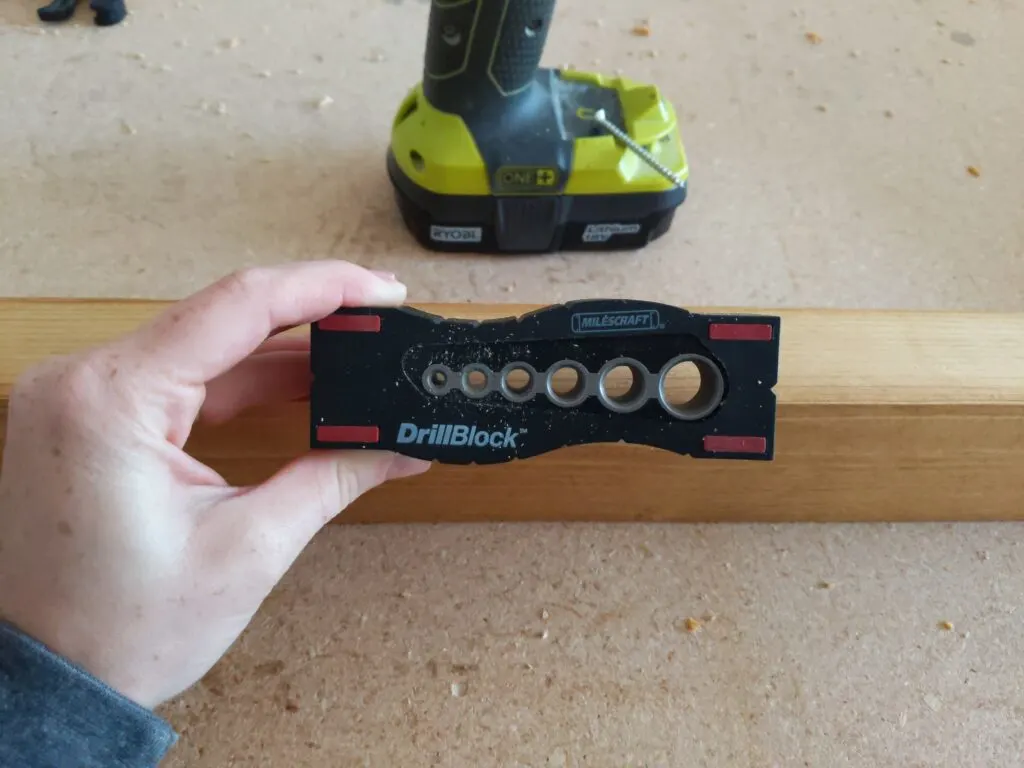
A drill press would be perfect in this situation. But if you don’t own one (I do not), I highly recommend this drill block. It’s only about $7 on Amazon and is the handiest little jig EVER. I actually bought it specifically for this project, and now I’ve been using it all the time!

If you use the drill block, you may have trouble drilling the full 2 1/2″ into the 2×4. If so, start each hole with the drill block clamped in place, then remove the block and drill it the rest of the way. The drill block will start it perfectly straight which will guide the drill bit for the rest of the cut, even without the block in place.
Set your drill bit to 2 1/2″ or use a piece of tape to mark how far to drill into the shelf so you don’t go through the front.

Use a drill bit that matches the size of the machine screws in your mounting bracket. I used #10 machine screws, which have a 3/16″ diameter. I drilled 3/16″ pilot holes so the shelves will slide on and off.
If you want the shelves to sit perfectly flush to the wall, countersink the pilot holes so the nut on the machine screw can sit inside the shelf.
I didn’t countersink the pilot holes, so the shelves sit about 1/8″ out from the wall. You can’t see it unless you press your head against the wall (which I’ve definitely done of course), but it would be a nice finishing touch if you prefer them to be truly flush!
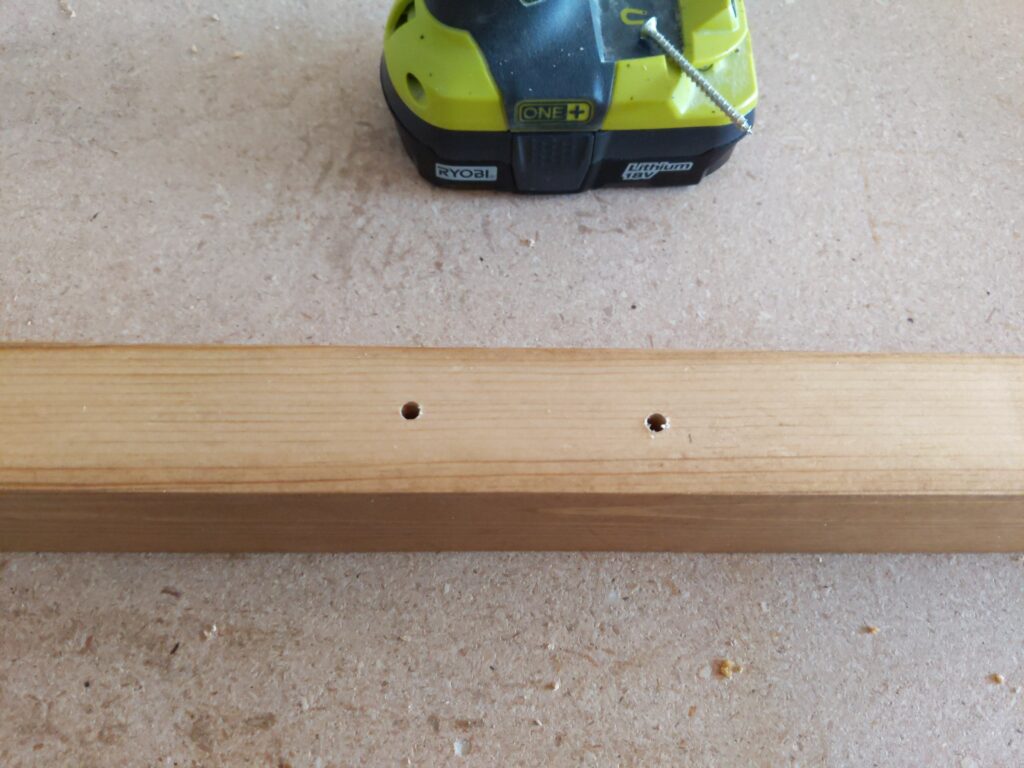

You’ll see three sets of pilot holes in the photo below, but I only used two mounting brackets. Pretend the center set isn’t there – just wanted to give you a better overall shot of the back of the shelf.

Step 4.
Sand and finish your shelves as desired and then install them on the mounting brackets!
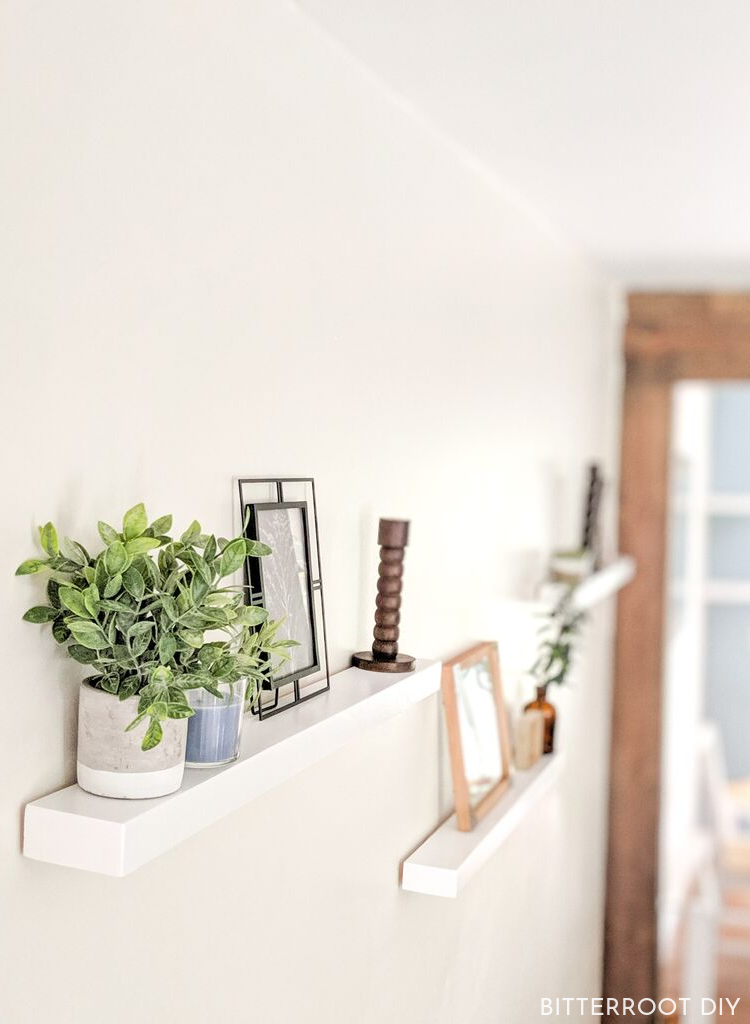

I painted these with Sherwin-Williams “Extra White” to match the rest of the trim in the house.
If you’re looking to build some bigger shelves – maybe 2x8s or something – I know people who use lag bolts through the studs for a stronger mounting bracket. You can also buy pre-made steel floating shelf brackets. The concept is the same – use a rod through the back of the shelf with a plate to attach it to the wall. I chose to use mending plates and machine screws because I couldn’t find pre-fabricated brackets that were small enough for 2x4s, and I don’t have a welding set-up. My goal was to make the shelves as thin as possible. From what I found, the smallest brackets were 3″ and the most common small ones are 6″. If you have access to a welder, you could weld your own brackets. Just depends what you’re going for and what tools you have available!
Please let me know if you have any questions and I’ll get back to you as soon as possible.


Thanks for stopping by!
For more project ideas, you can find me on Pinterest. And to stay up to date with the latest shenanigans, follow me on Instagram.

Thorsten
Sunday 13th of June 2021
Thorsten
DIY Floating Shelves |