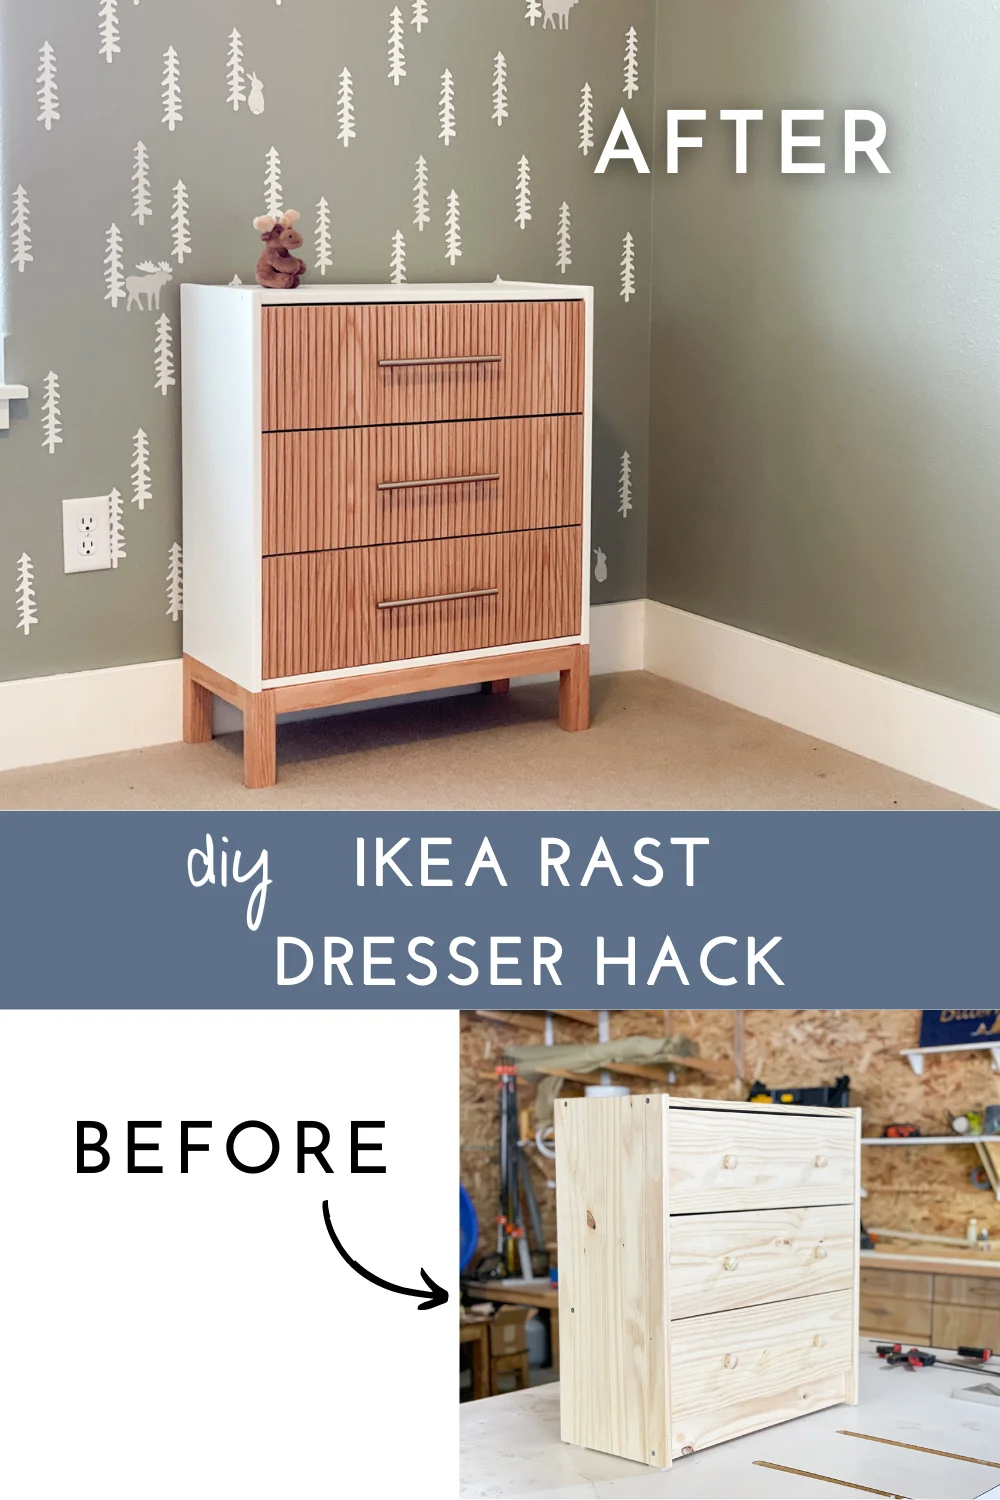
Transform your IKEA Rast dresser with fluted drawer fronts and a fresh coat of paint.
This post contains affiliate links. If you make a purchase from one of the links, I may make a small commission at NO EXTRA COST to you. Thank you for your support! See my full disclosure here.
We picked up a couple IKEA Rast dressers about a year ago and they’ve been on my fix-it-up list ever since. A little fresh paint & fluting and they pair well with the kids’ new fluted DIY toy box without being TOO matchy-matchy.
I put two in the closet side-by-side so each kiddo has their own designated space. They’re budget friendly, solid wood, and compact: great for the kids’ room and pretty much a clean slate for adding your own creative spin!
- Red Oak Pole Wrap
- Champagne Bronze Bar Drawer Pulls
- Shellac Based Primer
- Paint of choice (I had Home Depot match Behr paint with Benjamin Moore “white dove” to match the trim in the kid’s room)
- Countersink Bit
- Miter Saw
- Circular Saw
- Drill
- Tape Measure
- Wood Glue
- 1 1/4″ Screws
- Level
- Speed Square
- Pencil
- Safety Glasses
- Ear Protection
LUMBER:
- 1 | 1×4 @ 6′
- 1 | 2×2 @ 8′
- Red Oak Pole Wrap
CUTS:
- 1 | 1 x 4 cut to fit (dresser box)
- 2 | 2×2 cut to fit (front & back of the new bottom frame)
- 2 | 2×2 cut to fit (sides of the new bottom frame)
- 2 | 2×2 @ 6″ (feet for the new bottom frame)
- 3 | Pole Wrap cut to fit drawer fronts
**Since there are often small discrepancies in IKEA furniture, I did not provide exact measurements. I recommend you measure and cut all new pieces to fit your specific dresser.
You can also check out the video tutorial over on my YouTube channel.
Step 1.
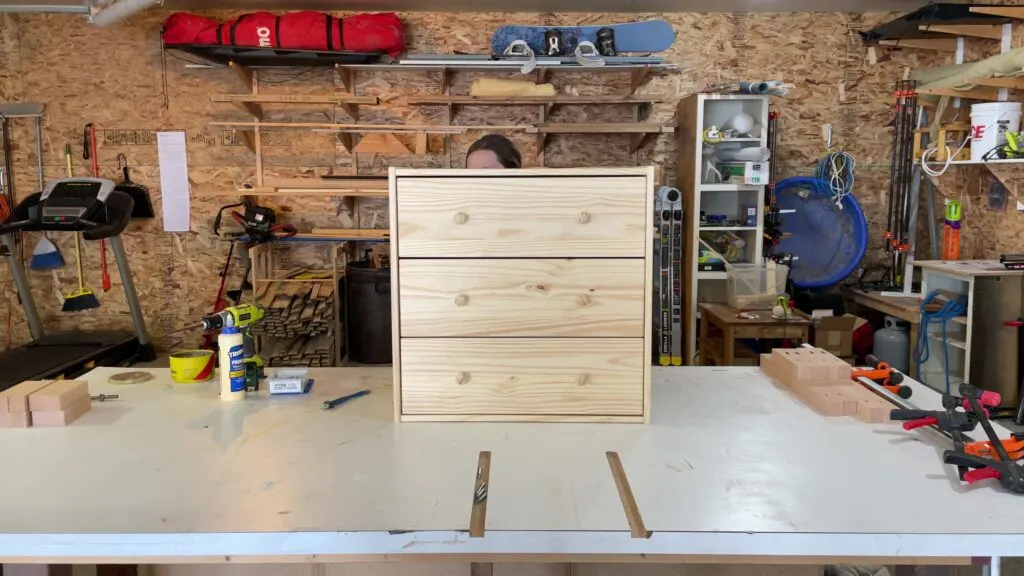
The dressers I used were already fully assembled since the kids have been using them for a while. So here was my starting point:


If you’re starting with a brand-new-just-off-the-delivery-truck IKEA rast dresser, go through MOST of the assembly instructions. Stop once you get to the point that you add the bottom front brace (the board that spans across the bottom in the photo above).
With the drawers in place, turn the dresser on it’s side. Measure 3/4″ + 1/8″ from the bottom of the bottom drawer and use a circular saw to cut the excess off the sides. The 3/4″ accounts for the thickness of the boards you’ll attach in Step 2. The 1/8″ leaves a small gap below the bottom drawer so it has room to slide. I recommend measuring from the bottom of the drawer, rather than the bottom of the dresser, since IKEA furniture can have small discrepancies in dimensions. Just make sure you cut the same amount off each side and the drawer has room to slide.


Step 2.
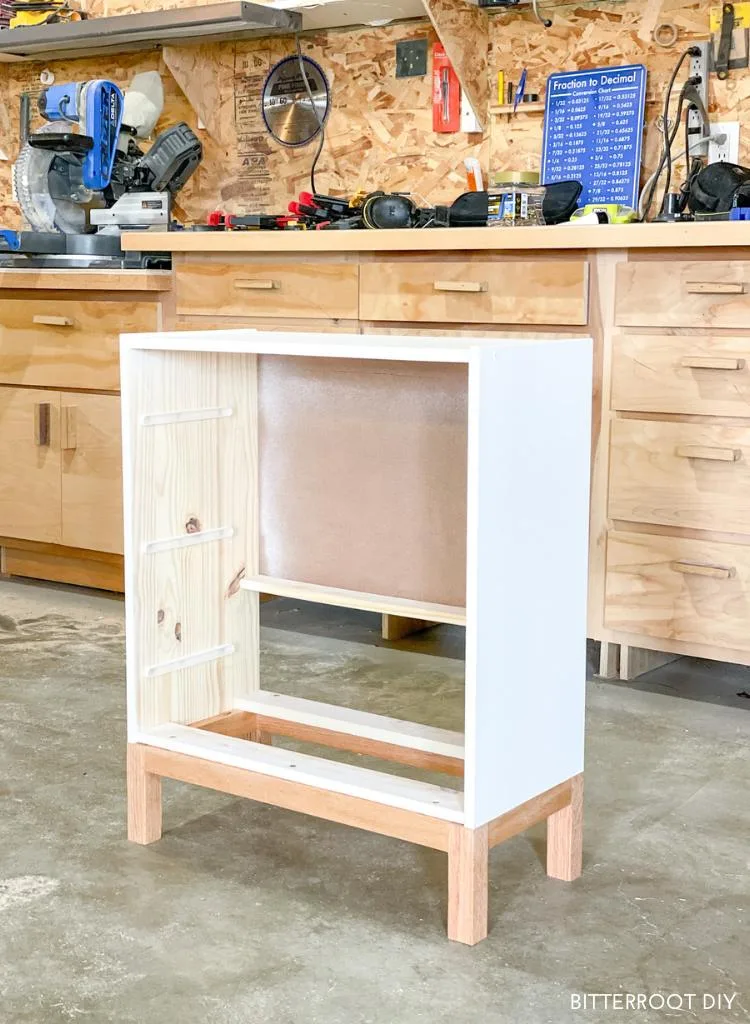
Drill one pocket hole on each end of the 1×4 bottom board and attach it with wood glue and 1 1 /4″ pocket hole screws. It should sit flush with the bottom of the cuts you made in step 1 and flush with the front of the dresser.
Attach an additional 1×4 along the back of the dresser. Again, use wood glue and 1 1/4″ pocket hole screws to secure it to the frame.

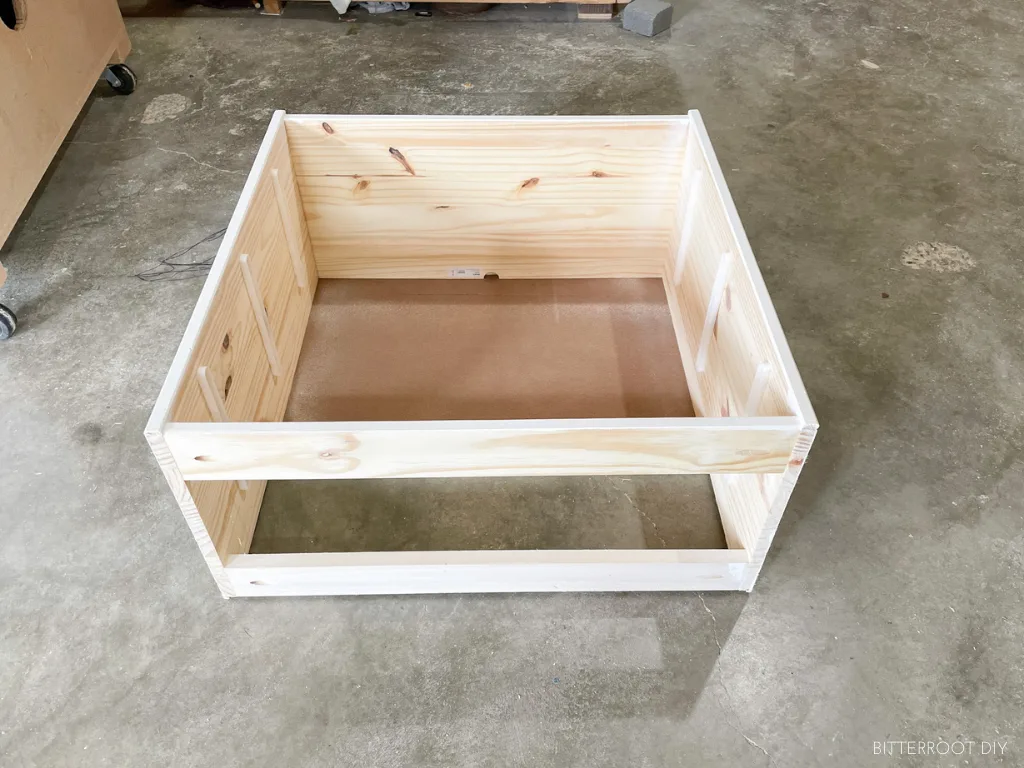
Here’s a view of it with the drawers intact so you can see how the bottom lines up:

Step 3.
Prime and paint the dresser box.
I used a shellac-based primer to seal all the wood knots and sap spots really well and painted it with Benjamin Moore White Dove to match the trim in their room (satin sheen).


Step 4.
Build the new 2×2 bottom frame and feet for each dresser.
Again, IKEA furniture usually has some discrepancies in dimensions, so I recommend building this to fit your specific dresser. The feet are 6″ tall.
Use wood glue and 2 1/2″ pocket hole screws to assemble the 2x2s. You can put the pocket holes on the top OR bottom of the frame – the dresser will cover them.
I placed pocket holes on the bottom of the long 2x2s, but had to put them on the top of the side 2x2s since the drill didn’t fit between the feet, as shown below.


Step 5.
Attach the dresser to the new legs with wood glue and 1 1/4″ screws. Use a countersink bit to nicely countersink each screw (or just make sure the screw heads are flush with the wood so they don’t get in the way of the drawers).


I had to drill the back ones at a bit of an angle since that 1×2 was in the way of the drill, but it still worked just fine.

Step 5.
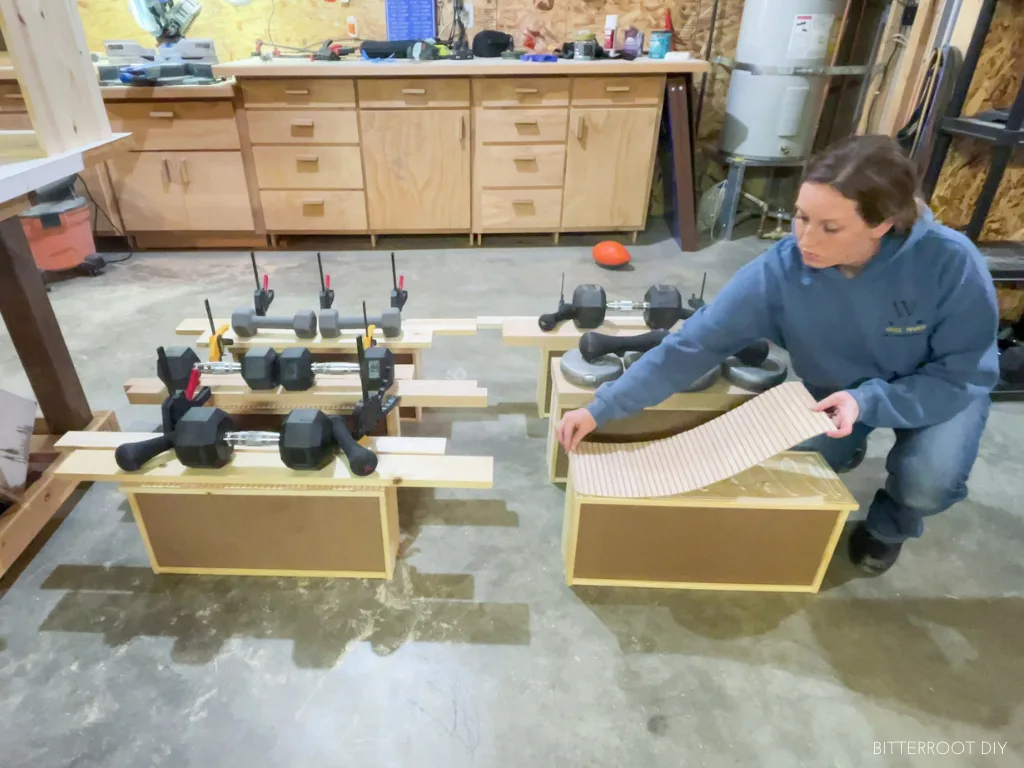
Next, cover the drawer fronts with red oak pole wrap.
Measure the drawer faces and cut the pole wrap to fit. You can use a miter saw to cut against the grain – roll the pole wrap up tightly, measure, and cut. To cut it with the grain, just use a utility knife and cut between the flutes along the paper backing.
Attach it to the drawer fronts with construction adhesive and clamp (or weight) it down until the adhesive dries.
** Make sure the pole wrap doesn’t slide around when you tighten the clamps down – double check that it’s still centered.

I think Home Depot and Lowes are both having a hard time keeping pole wrap in stock. If you can’t find it near you, you can use fluted trim or half rounds. The only downside is that you have to cut each piece and glue them on one at a time. But it will still give you the same texture!
Step 6.
Once the construction adhesive dries, stain or seal the pole wrap. Or, if you prefer, leave it natural.
I sealed both the drawer fronts and new 2×2 base and feet with teak oil to add a bit of protection and warmth to the wood.
Step 7.
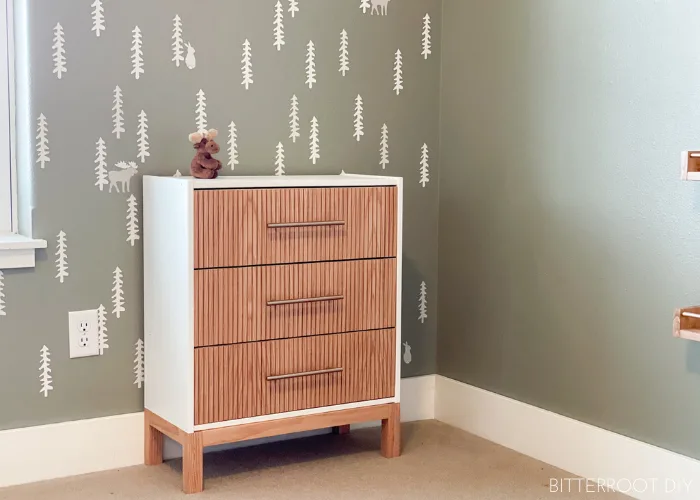
And NOW the final step – new hardware. I found these beautiful champagne bronze bar drawer pulls at Home Depot:


They have a few sizes, but I went with the 6 5/16″. They’re pretty substantial and really complete the whole piece.
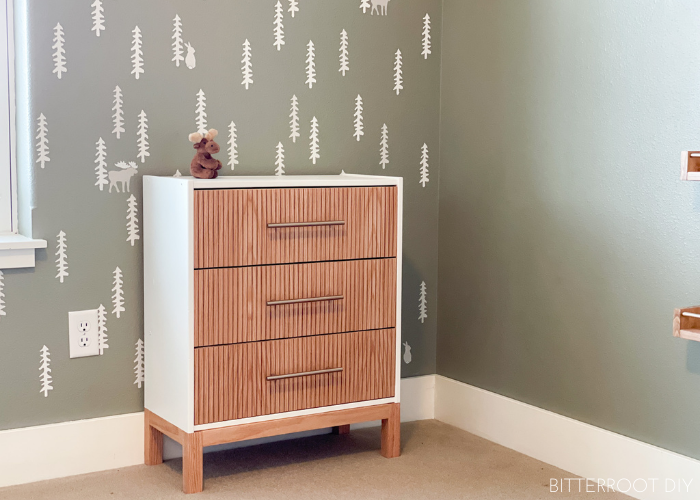
I put the dressers back together and vwalla!

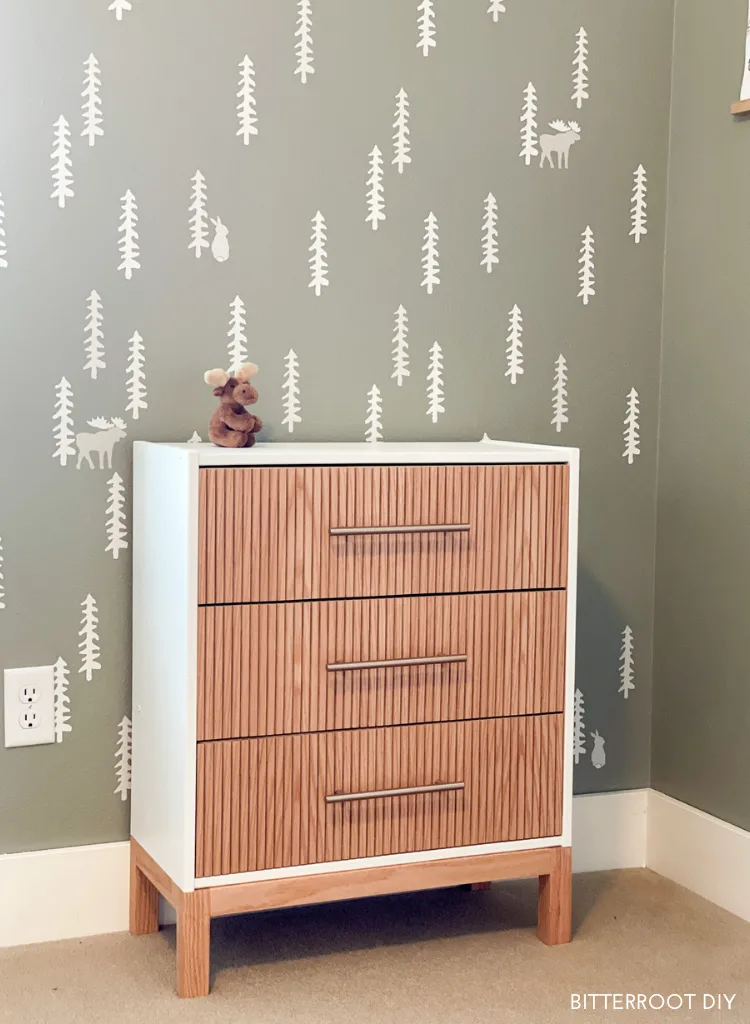
You know those projects where you have an idea and it turns out SO. MUCH. BETTER than you ever even imagined? It’s rare. But this is one of them.
I really can’t believe these started as IKEA rast dressers. It’s got me thinking maybe I should try more of these sorts of makeovers haha! We shall see…
But anyhoo, here they are in the kids’ closet!


I’m so excited about how this whole room is coming together. I’m zeroing in on the finish line and can’t wait to show you all the final reveal! It’s coming SOON. (If you missed it, head over to check out the design board for the room).
I’d love to see your take on this IKEA rast makeover! Tag me over on Instagram @bitterrootdiy or shoot me an email at bitterroot.diy {at} gmail.com if you fix up one of your own!
And please let me know if you have any questions on this IKEA rast dresser makeover. I’ll get back to you as soon as possible.
– Tylynn –