If you’re just joining, welcome to the Bitterroot Scrap Wood Series!
Head over to Day 1 to catch the beginning of the shenanigans, as well as our exciting news.
Long story short – I’m sharing a new scrap wood project every Monday, Wednesday, and Friday in May and this is Day 10!

This post contains affiliate links. If you make a purchase from one of the links, I may make a small commission at NO EXTRA COST to you. This helps keep the tutorials and plans free here at Bitterroot DIY. Thank you for your support! See my full disclosure here.
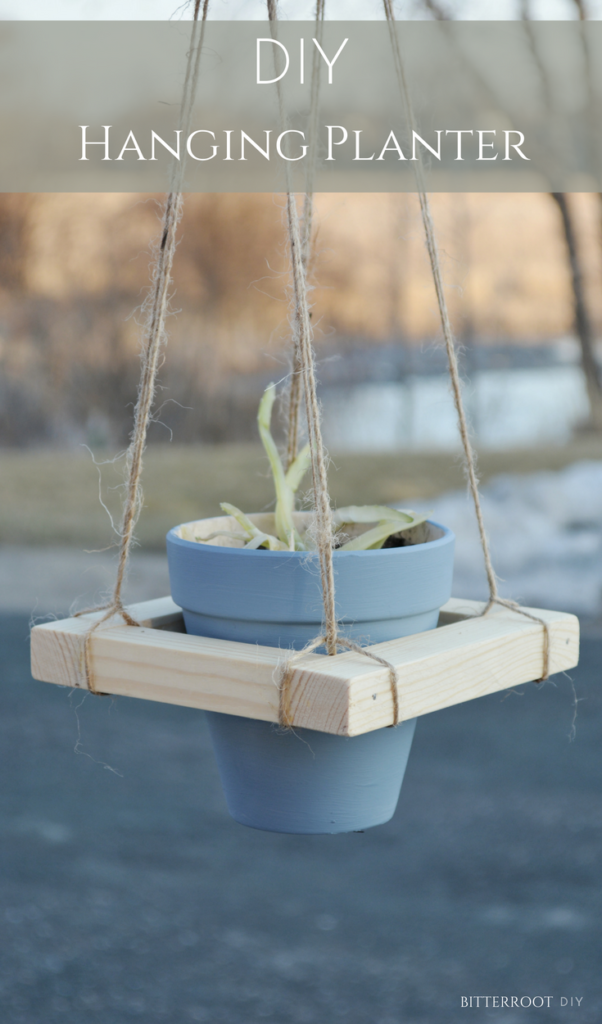
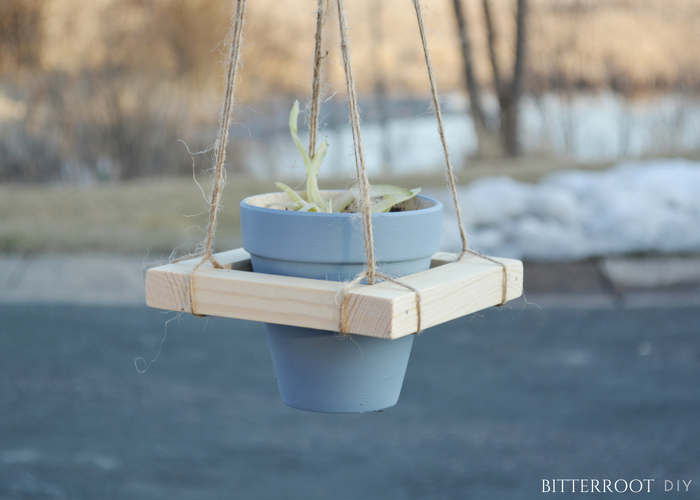
I recently inherited a baby aloe plant. Pot and all.
Now, though I’d love to claim that I’m a plant lady and keep and garden and have tons of beautiful flowers all over my home, I tend to kill pretty much any sort of plant ever. Maybe some day I’ll be able to keep something alive … but so far no good.
I’ve read everywhere that aloe plants are supposed to be great for people like me. They’re the un-killable plant.
I’m here to tell you that that is false.
I have killed three aloe plants.
Maybe its the water.
Maybe the air.
I haven’t solved the problem yet.
Regardless, I decided this newly-inherited aloe plant was probably better off in someone else’s care. So I made a fun DIY hanging planter, plopped the aloe plant in there, and gifted it to my other younger sister-in-law.
I’m happy to report that it’s still alive!
Here’s to being a “remote plant lady”!
Maybe this DIY hanging planter was just what the plant needed.
I hope it works out for you as well 😉
All you need is a small square wood dowel, jute twine, wood glue, and some nails. My wood dowel was scrap from the edge of a 1×10 that I had ripped off. The dimensions are irregular, but somewhere around 1/2″ should work great.
Step 1.
Cut the dowel to size according to the pot you want to set in there.
To measure for the hanging planter, measure the diameter of the pot just below the wider top lip and added one dowel width (for the overlapping end). Measure twice. The top of the pot should sit just above the planter once its all done.
Step 2.
Arrange the dowels in a square (each with one overlapping edge), glue, and clamp in place. Once the glue sets, add finish nails for extra strength. You can add finish nails with a hammer & nails or a finish nailer.
I didn’t stain this piece at all, but I did seal the wood with Acrylic Spray to protect it.
Step 3.
Tie the jute twine around each corner of the hanging planter.
The length of string is entirely up to you. I used about 30″ pieces.
Fold the twine in half and loop under the corner of the planter.

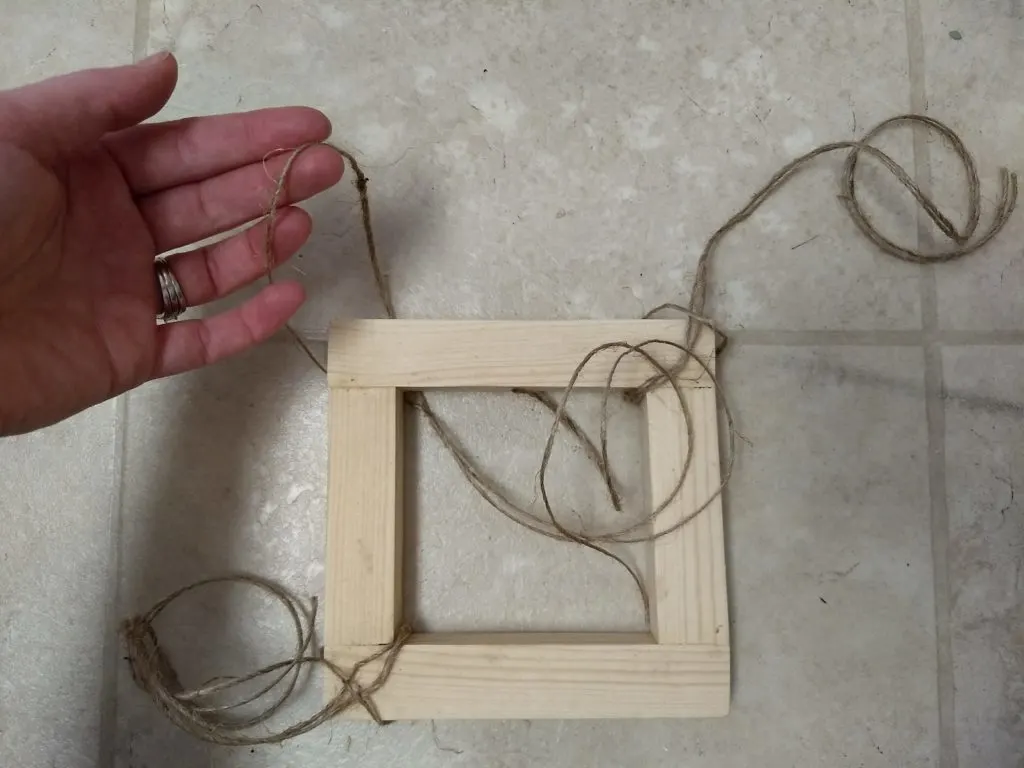
Run the twine ends through the loop.

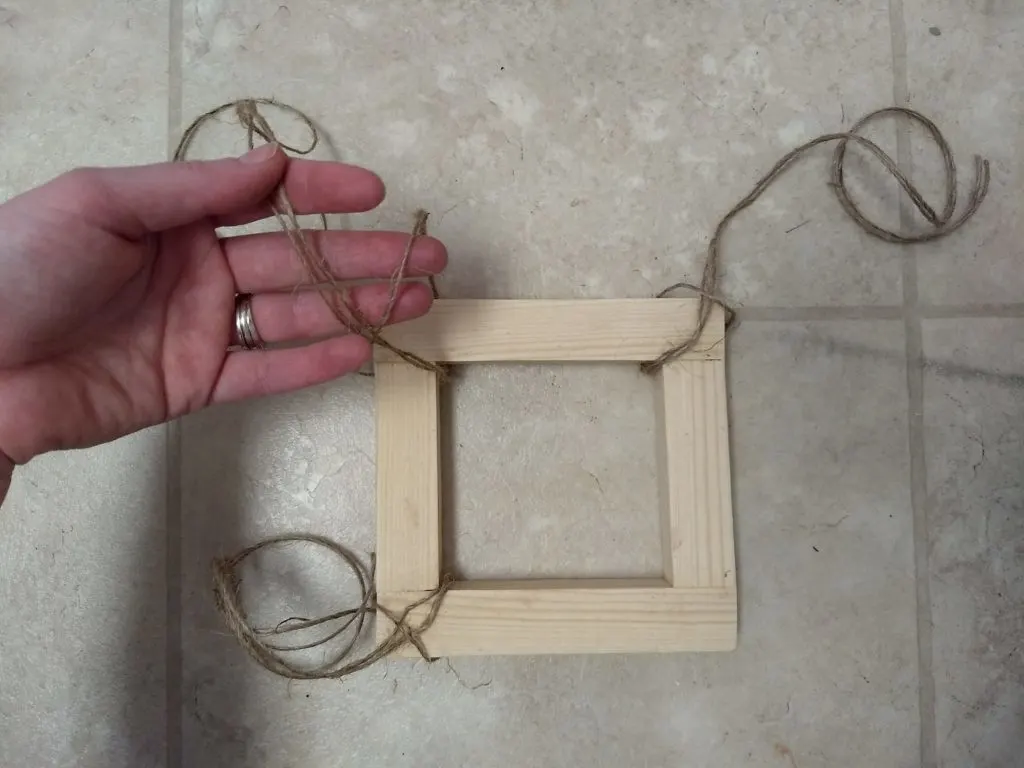
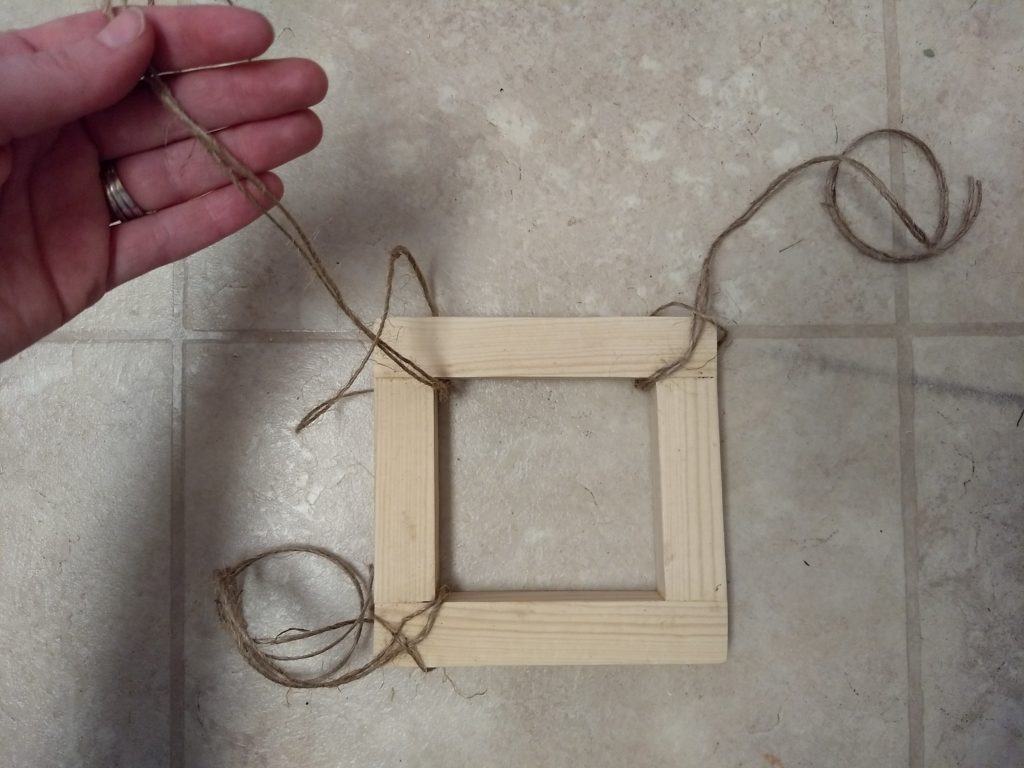
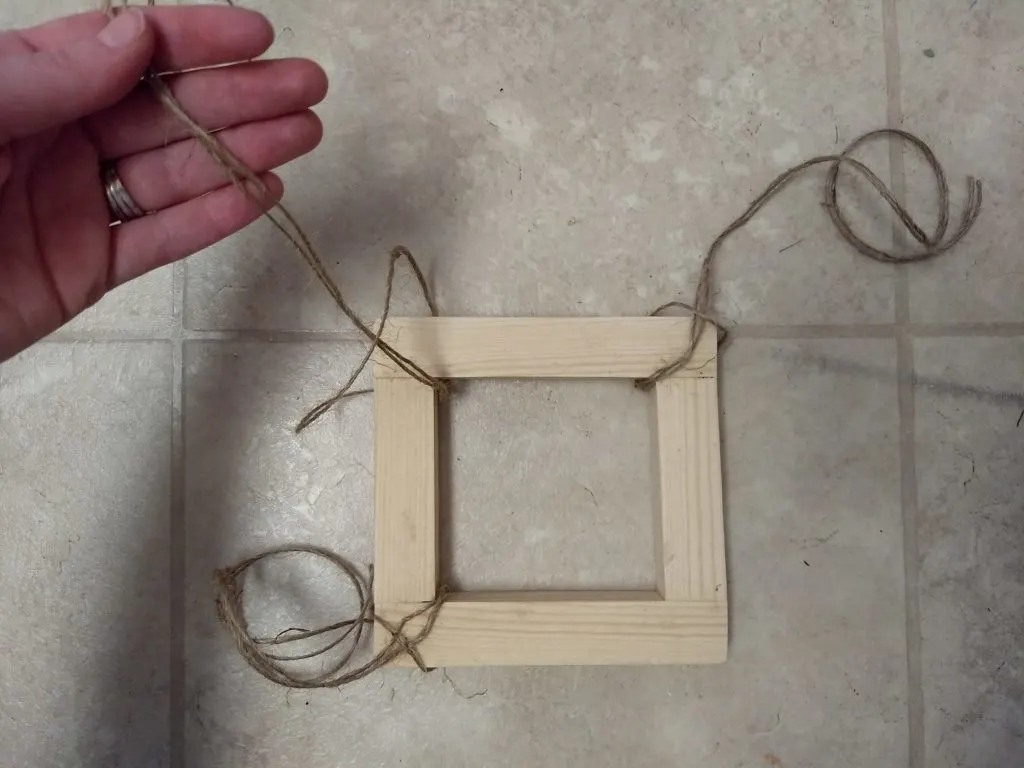
Pull tight over the corner.
Repeat for all four corners.


Once you have twine on all four corners, join them at the top and tie a knot.
Place your potted plant in the center and you’re good to go!
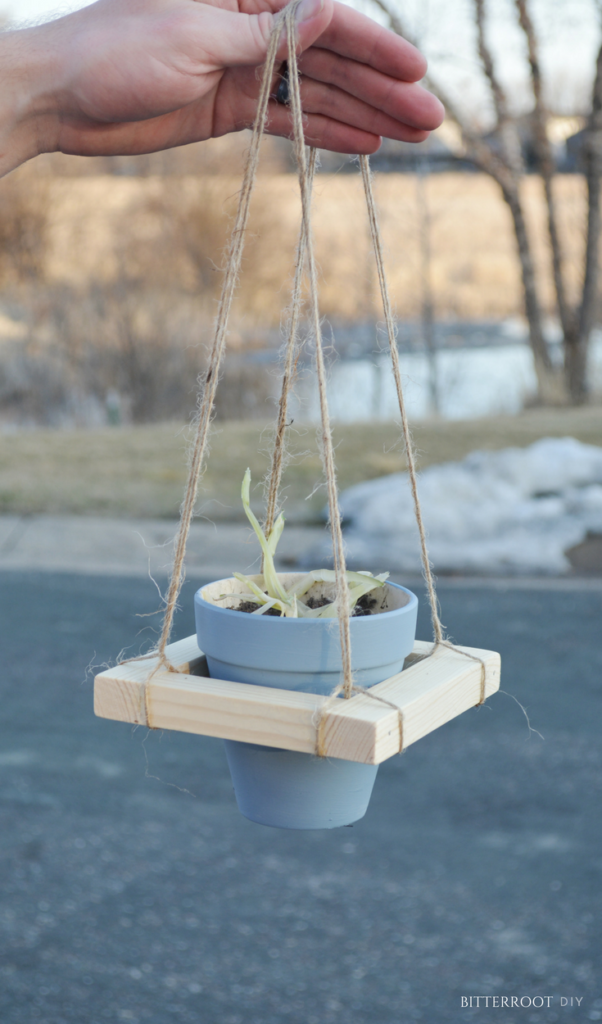

Happy planting!
Let me know if you have any questions and I’ll get back to you as soon as possible!
![]()
![]()
Thanks for stopping by!
For more project ideas, you can find me on Pinterest. And to stay up to date with the latest shenanigans, follow me on Instagram.