
Give your flat panel doors a new look with this DIY interior door makeover.


This post may contain affiliate links. If you make a purchase from one of the links, I may make a small commission at NO EXTRA COST to you. This helps keep the tutorials and plans free here at Bitterroot DIY. Thank you for your support! See my full disclosure here.
Let’s take it back to the boy bedroom makeover today for a simple, affordable way to update your flat panel interior doors! I shared the closet door makeover a few weeks ago, and this is pretty much the same process but on the main door. All you need is a sheet of 1/8″ Eucaboard (or 1/4″ plywood) and some paint!
TOOLS & SUPPLIES:
- Miter Saw
- Circular Saw (or Table Saw)
- Orbital Sander
- Construction Adhesive
- Wood Filler
- Primer
- Paint of your choice
- Paintable Caulk
- Clamps
- Door Knob
- Tape Measure
- Pencil
- Safety Glasses
- Ear Protection
LUMBER:
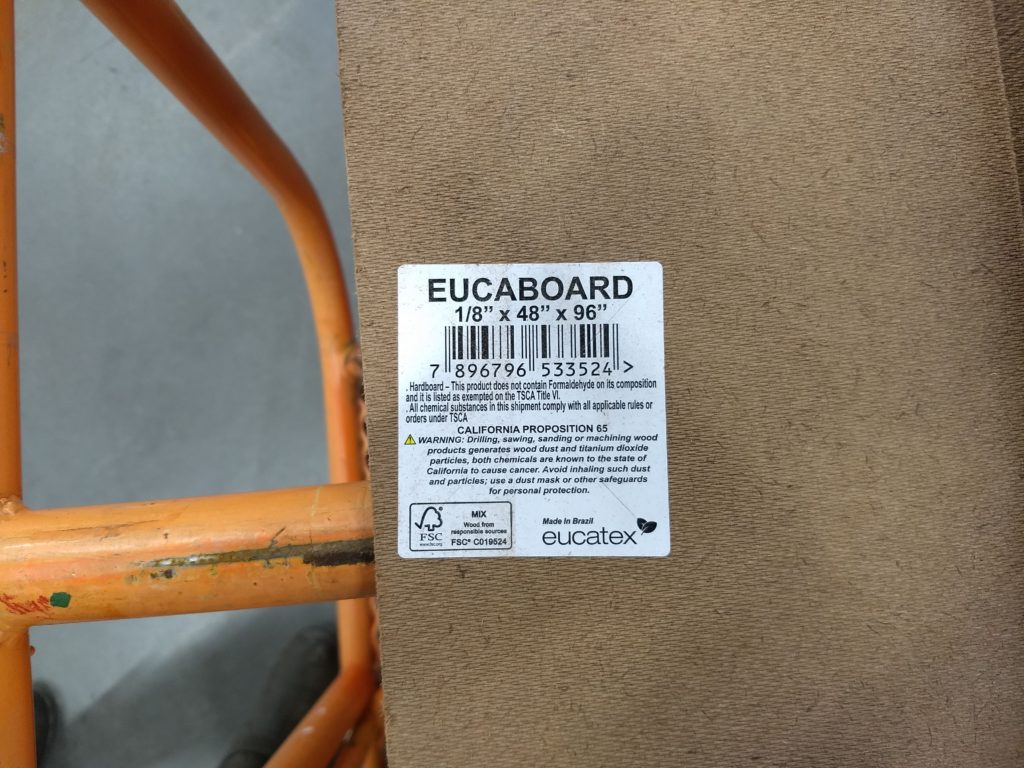
- 1 | 4′ x 8′ Sheet of 1/8″ Eucaboard
Step 1.
There are a million ways to update interior doors, and I’ve seen quite a few tutorials with 1/4″ plywood. Plywood works great, but I decided to go with these sheets of eucaboard that I found at Home Depot. It’s only about $7 for a full sheet and is 1/8″ thick, rather than 1/4″. I didn’t want to add a full 1/2″ to the door thickness (1/4″ on the front & back) since that seemed a little intense for this project. However, feel free to use plywood if you prefer – it’s all the same process and I’ve seen a lot of beautiful door makeovers with plywood!

First, remove the door knob and take the door off its hinges.


Step 2.
Give the door a light sanding. I used 220 grit sandpaper and just scuffed up the old finish a little.


Be careful not to sand too much or you’ll go through the wood grain pattern. The goal is just to scratch up the top coat to give the adhesive and primer something to grip.
Step 3.
Measure your door and cut the eucaboard to fit. I ripped the eucaboard into 5″ strips and then cut them to length for the pattern. Try a few different layouts on your door to see what you like best. I went with this:


The pattern and measurements will be different depending on the size of your door, so it’s best to measure and cut to fit.
Once you have your layout and everything fits, adhere the eucaboard strips to the door with a strong construction adhesive. Clamp them in place and let the adhesive dry completely.
Repeat Steps 2 & 3 for the other side of the door. If you’ve seen the closet door makeover, I only did one side of them. However, for a main interior door, make sure to do both sides since they’re both visible.
If you’d like more information for Steps 2 & 3, check out this quick video of the process. And don’t forget to follow me on Instagram for more DIY tips & tricks!
Step 4.
After the new pattern is secured on both sides of the door, fill any gaps with wood filler. Let it dry according to the manufacturer’s instructions and then sand it down flush with the eucaboard.


Step 5.
Prime both sides of the door. I used Bullseye 1-2-3 primer (my favorite) on both the main door and closet doors.


Let the primer dry completely on both sides.
Caulk all the seams with paintable caulk to smooth the transition between the flat panel door and new eucaboard overlays. Let the caulk dry according to the manufacturer’s instructions.
Step 6.
Paint the door with the color of your choice. I used Sherwin-Williams “Extra White” trim urethane in satin. I’ve used it on all the trim in our house so far and am really happy with the quality. It’s a great soft white, easy to apply, self-leveling, and easy to clean!
Step 7.
Don’t forget to adjust the door frame before reinstalling the door!
Since you added 1/8″ thickness to both sides of the door, you have to move the door stop out 1/8″.
Mark the existing location of the door stop, and then remove the door stop from the frame:


I just used a small taping knife and pry bar to work my way behind the door stop and pulled it off (just like removing old trim). Repeat for both sides and the top of the frame.


After you remove the stop, move all three sections (sides and top) back 1/8″ (or 1/4″ if you use 1/4″ plywood) and reattach to the frame with 2″ finish nails. I used my favorite brad nailer for this, but you can also do it by hand with a hammer and nails!
If you painted the door a new color, repaint the door frame the same. Scuff the frame up with a high grit sandpaper, prime it, and then paint (same process as the door).
Step 8.
Once everything dries, reinstall the door and hardware!
I used the same knob on the door as before and it worked just fine with the new thickness.


It’s difficult to see the new pattern in the above photo since it was kinda dark in the room but here’s a better shot:
I also re-did the trim around the door since this was a full renovation, but that’s definitely not necessary since you won’t move the frame at all.
If you’re interested in any more of this room reno, here are the links so far (more on the way):
Please let me know if you have any questions and I’ll get back to you as soon as possible!


Thanks for stopping by!
For more project ideas, you can find me on Pinterest. And to stay up to date with the latest shenanigans, follow me on Instagram.


Shailesh
Monday 18th of January 2021
Love ur website! Keep posting :)
Quick question - what color is the wall - SW Agreeable Grey?
tylynn_sattler
Monday 25th of January 2021
Thanks!
It's Benjamin Moore Pale Oak - very similar to Agreeable Grey (which I did in our bathroom) but just a little lighter.
Amanda
Wednesday 18th of November 2020
Hi!! Love it!! I have a question, what if my door stop does not remove that easily... my door stop is connected to the frame and won’t pop off like yours did :(
tylynn_sattler
Monday 7th of December 2020
This isn't super helpful ... but I'm not sure. The stops on my doors were just nailed into the frame so I could pry them off. If your stop is attached to the frame, you may have to shave it down so the new door fits.