
Step-by-step instructions to build DIY shaker drawer fronts for your next drawer project.


This post contains affiliate links. If you make a purchase from one of the links, I may make a small commission at NO EXTRA COST to you. This helps keep the tutorials and plans free here at Bitterroot DIY. Thank you for your support! See my full disclosure here.
The first step of the DIY vanity makeover was to build new shaker drawer fronts and cabinet doors. I’ve built shaker cabinet doors one time before (for this bookshelf), but this was my first time with shaker drawer fronts. They’re similar to the cabinet doors, but I modified them a little so there’s a solid place to attach hardware. If you build them just like the cabinet doors, you end up with a gap between the drawer face and front of the drawer (see photos below to clarify), which could cause bowing in the drawer front. I came up with two options to avoid the gap – an extra piece of plywood or cutting a rabbet.
Enjoy the plans!
Tools & Supplies:
- Router
- Router Table
- 1/4″ Straight Router Bit (that’s what I used) or 1/4″ Groove Bit
- Miter Saw
- Drill
- Kreg Pocket Hole Jig
- 1 1/4″ Screws
- Tape Measure
- Pencil
- Wood Glue
- Orbital Sander
Lumber:
- 1 | 1 x 3 @ 8′
- 1 | 2′ x 4′ Sheet of 1/4″ Plywood OR
- 1 | 2′ x 4′ Sheet of 1/2″ Plywood
** The lumber and cut list will change depending on how many drawers and what size you’re building. I used 1/4″ plywood for the center panels and 1x3s for the rails and stiles for Method #1. I used 1/2″ plywood for the center panels and 1x2s for the rails and stiles for Method #2. The lumber sizes are interchangeable depending on your project. Simply adjust the measurements as necessary.
Shaker Drawer Front Method #1 – Extra Piece of Plywood

Step 1.
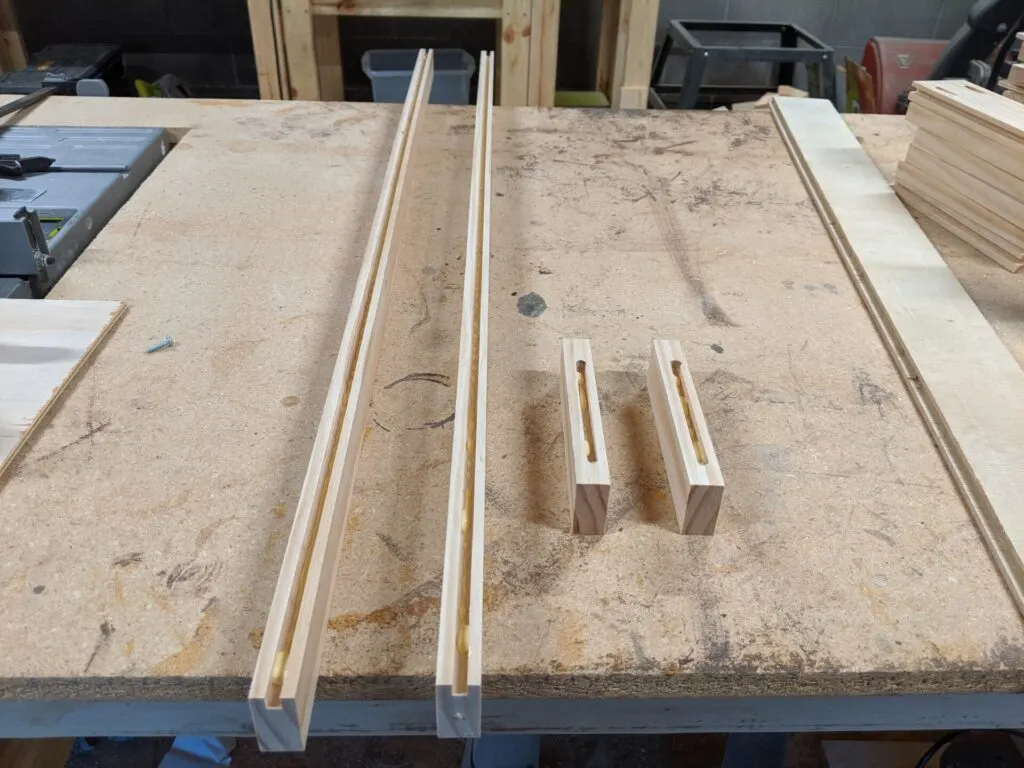
Use your router to cut a 1/4″ wide groove along the center of the rails and stiles. I did two passes through the router for each board to cut the groove 1/4″ deep. It’s best to cut a little at a time with a router, so I cut the first pass at 1/8″ deep and the second at the full 1/4″.

Cut the groove along the full length of the rails but only through part of the stiles (a stopped dado). You’ll have to adjust how far to cut the stopped dado depending on the width of your rail boards. Just cut them far enough that the center panel will fit.
Step 2.
Cut a piece of 1/4″ plywood for the center panel. Don’t forget to account for the distance that the panel will sit into each groove. I usually work it out so each side of the center panel will sit 3/16″ into the grooves. That leaves a little room (1/16″ + 1/16″ = 1/8″ total) for the panel to move as the wood expands and contracts. It doesn’t have to be EXACT – just make sure there’s a little float room for the panel to move.


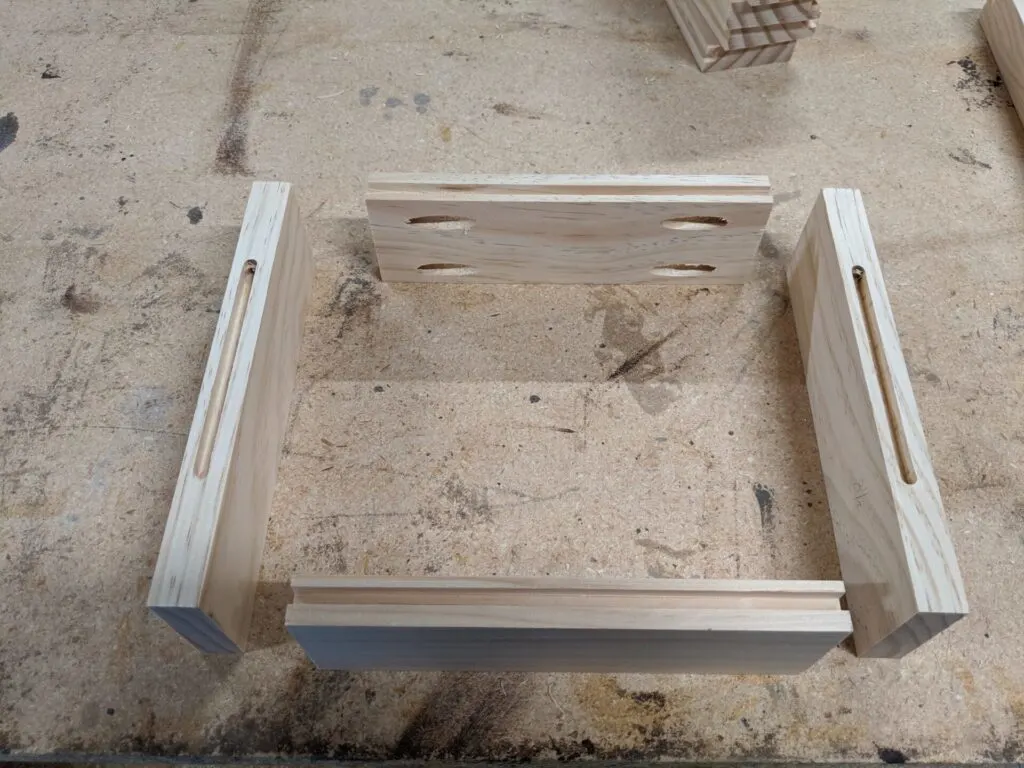
Drill pocket holes on both ends of the rails. I use two on each end.
Step 3.
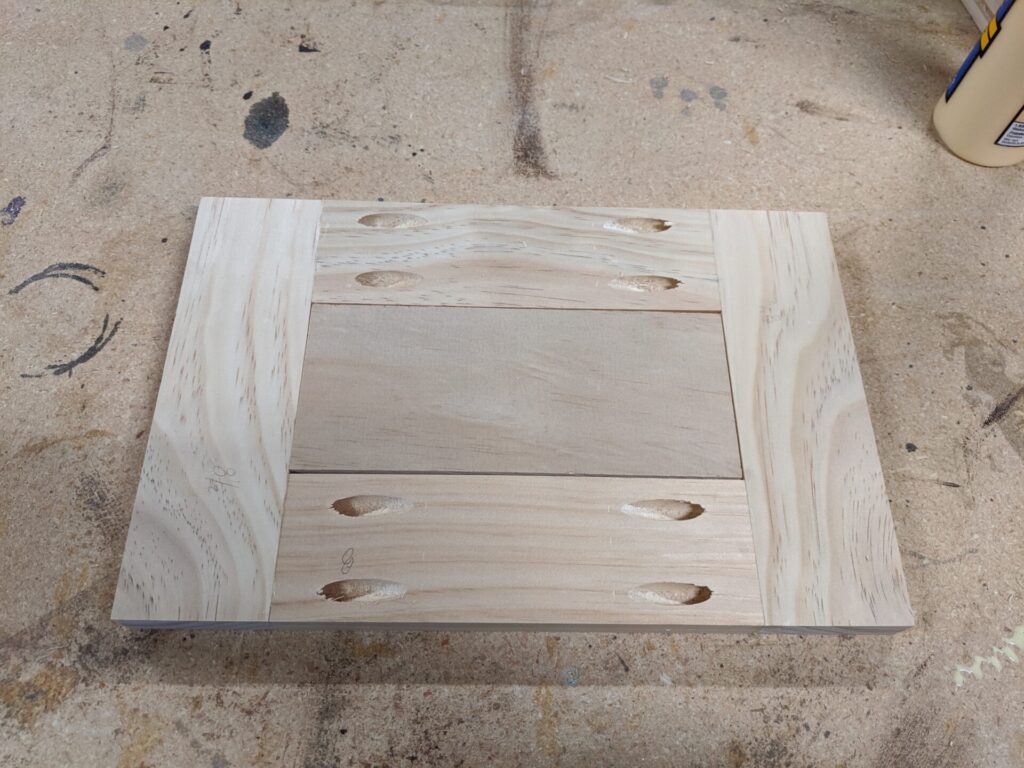
Apply wood glue to the ends of the rails and in the grooves, put the panel in place in the grooves, clamp and attach the rails to the stiles with 1 1/4″ pocket hole screws.


This is where that little gap comes in. See in the above photo how the center panel sits in the middle of the rails and stiles? If you leave it like that, there will be a small gap between the inset center panel and the front of the drawer. It works just fine on shaker cabinet doors since they stand alone, but drawer faces have to attach to the front of the drawer. The simple solution?
Cut another piece of 1/4″ plywood to fit in the inset portion of the center panel.


Attach the second piece of plywood to the center panel with wood glue.
And there you have it – the whole back of the drawer is flush.
SHAKER DRAWER FRONT METHOD #2 – Cut a rabbet
This is a completely different sized drawer front, but still the same shaker style. It’s the top faux drawer for the vanity makeover, but you can use this method on any size drawer front. The only difference is that you’ll use 1/2″ plywood rather than 1/4″ for the center panel.


Step 1.
Same as in Method #1, cut a 1/4″ groove centered along the full length of the rails and a stopped dado on the stiles. Cut them in two passes: 1/8″ deep first, then 1/4″ deep.

Drill pocket holes on both ends of the rails just like in Method #1. I only used one pocket hole on each end since these were 1x2s, but use two if you have wider boards.
Step 2.
Use the router and a 1/4″ straight bit to cut a rabbet all the way around your 1/2″ piece of plywood.


If the grooves are perfectly center in the rails and stiles, you should have a 1/4″ section of wood to each side of the groove. Cut the rabbet 1/4″ deep so the back of the plywood lines up flush with the back of the rails and stiles. Again, cut the rabbet in two passes: 1/8″ deep first, then the full 1/4″ deep. I cut the rabbet just shy of 1/4″ into the plywood so it sits a little less than 1/4″ inside the grooves. That leaves a little room for the wood to expand and contract with temperature and humidity changes (same idea as cutting the center panel a little small in Step 2 of Method #1).
Step 3.
Once everything is cut and ready, apply wood glue in the grooves and pop the rails onto the center panel. See how there’s a small gap between the center panel and edge of both grooves? That allows the wood to expand and contract as necessary.


Step 4.
Apply wood glue to the ends of the rails and the stile grooves and attach the stiles with 1/4″ pocket hole screws.


Repeat for both sides and you’re good to go!
Both Method #1 and #2 worked really well. It just depends what you want to try (or what scrap wood you have lying around) but the result is the same! If you aren’t quite as comfortable on a router, Method #1 is a little simpler.
You could also do full tongue and groove joints if you want to go the more traditional route. I like the pocket holes since they’re quick and easy. I simply filled the holes with wood plugs and sanded them down and you can barely see them! Wood filler also works well.
Please let me know if you have any questions and I’ll get back to you as soon as possible.
And don’t forget to check out how the whole vanity makeover turned out, complete with new shaker drawer fronts and cabinet doors!


Thanks for stopping by!
For more project ideas, you can find me on Pinterest. And to stay up to date with the latest shenanigans, follow me on Instagram.


Christine
Monday 15th of June 2020
I have a question about wood glue. In my experience, thinner plywood or wood sheets cup when water-based wood glue is used. I press them because of that and I am mostly successful.
I'm beginning a project to make door and drawer fronts using wine crates as the center panel. Some will need to be planed to fit smoothly, which is where my cupping concern is.
What glue would you recommend, where the moisture from the glue isn't absorbable by the wood? If there is such a thing. I'm kinda at a loss here and hesitate to start.
Thanks for your suggestions.
tylynn_sattler
Monday 15th of June 2020
Thanks for the questions Christine. I'm not an expert on wood glue and moisture levels so I would recommend asking someone with more experience. However, I use Titebond on everything and have never had a problem.