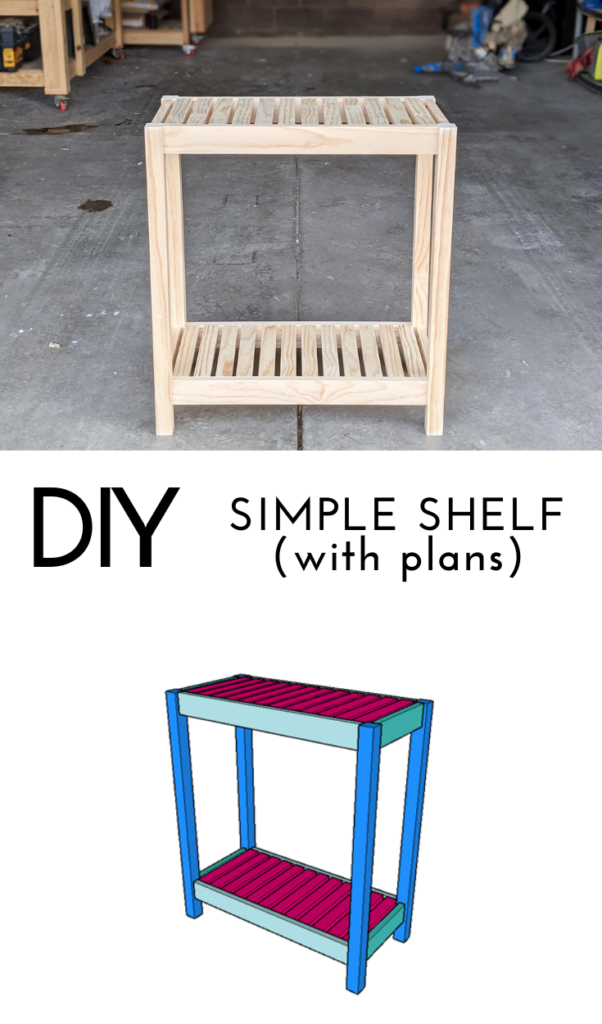
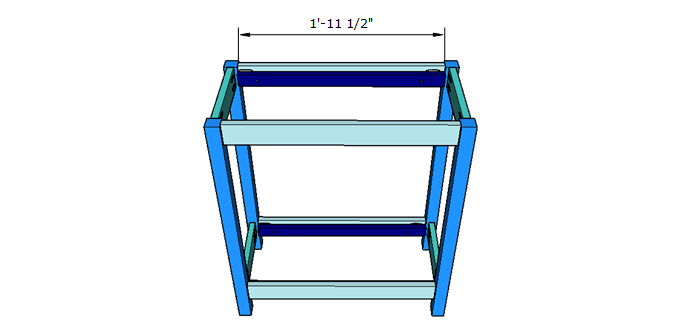
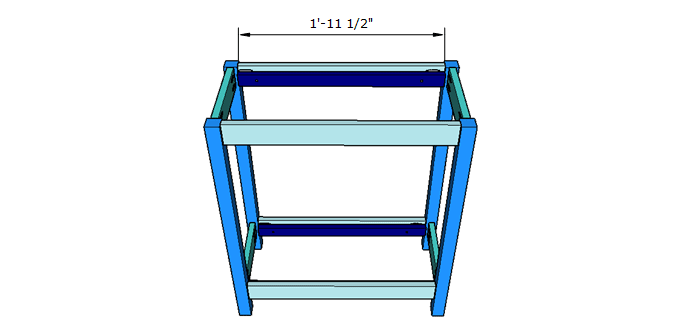
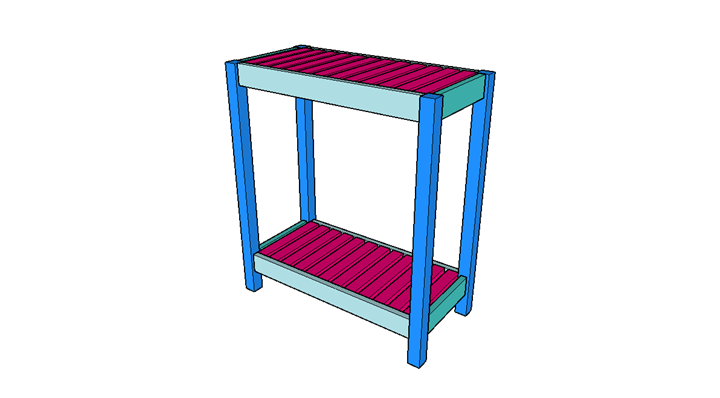
Plans to build a DIY two tier shelf with slats.

This post may contain affiliate links. If you make a purchase from one of the links, I may make a small commission at NO EXTRA COST to you. This helps keep the tutorials and plans free here at Bitterroot DIY. Thank you for your support! See my full disclosure here.
- Kreg Pocket Hole Jig
- 1 ¼” Screws
- Miter Saw
- Brad Nailer
- 1 1/4″ Brad Nails
- Drill
- Tape Measure
- Wood Glue
- Clamps
- Level
- Speed Square
- Pencil
- Safety Glasses
- Ear Protection
The lumber and cut lists for this DIY console table are available for purchase. Your purchase also includes a downloadable PDF of the plans. If you prefer, the plans are available for free in the post below – you simply have to calculate the lumber and cut lists yourself.

Step 1.
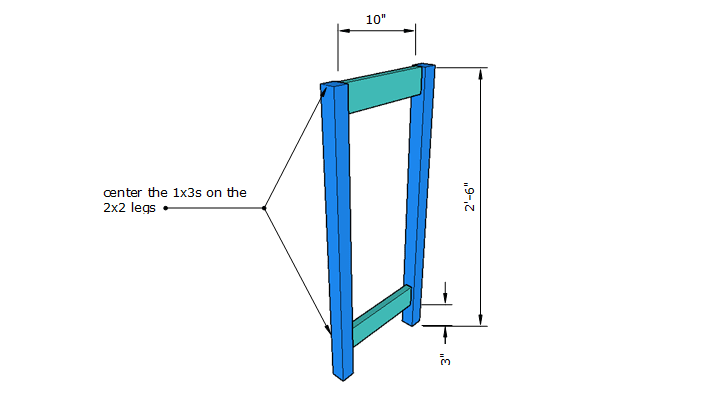
Assemble the outside frames. Center the 1x3s on the legs and use wood glue and 1 1/4″ pocket hole screws to attach them to the legs.

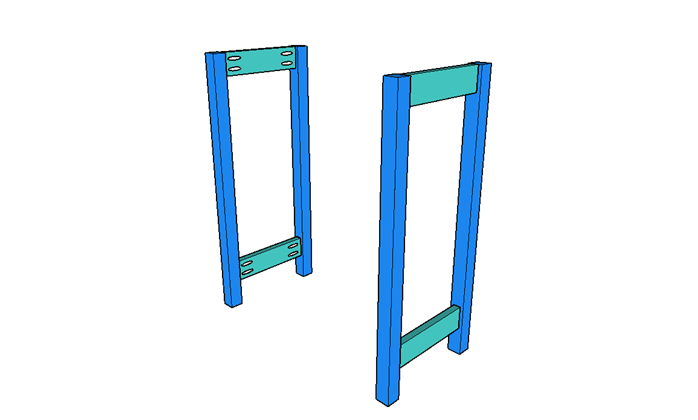
Build two frames:

Step 2.
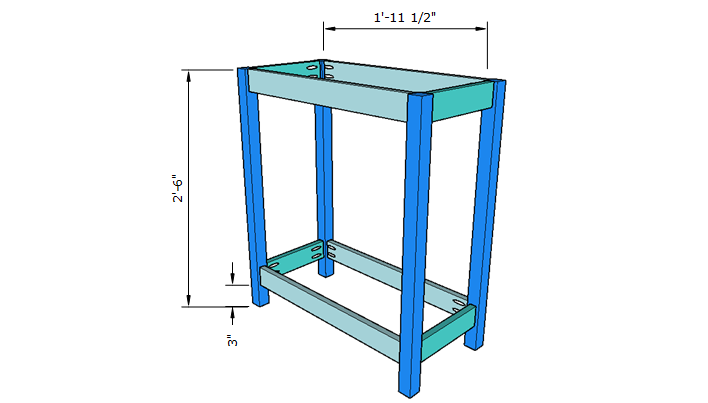
Join the frames together with the front and back 1x3s. Start with the front frame, then do the back frame. Again, center the 1x3s on the 2×2 legs and use wood glue and 1 1/4″ pocket hole screws to attach them.

If you cut the 1×2 shelf slats ahead of time, you may want to use them to make sure you get the spacing of the front and back of the frame correct. Alternatively, you can wait to cut the 1x2s to fit.
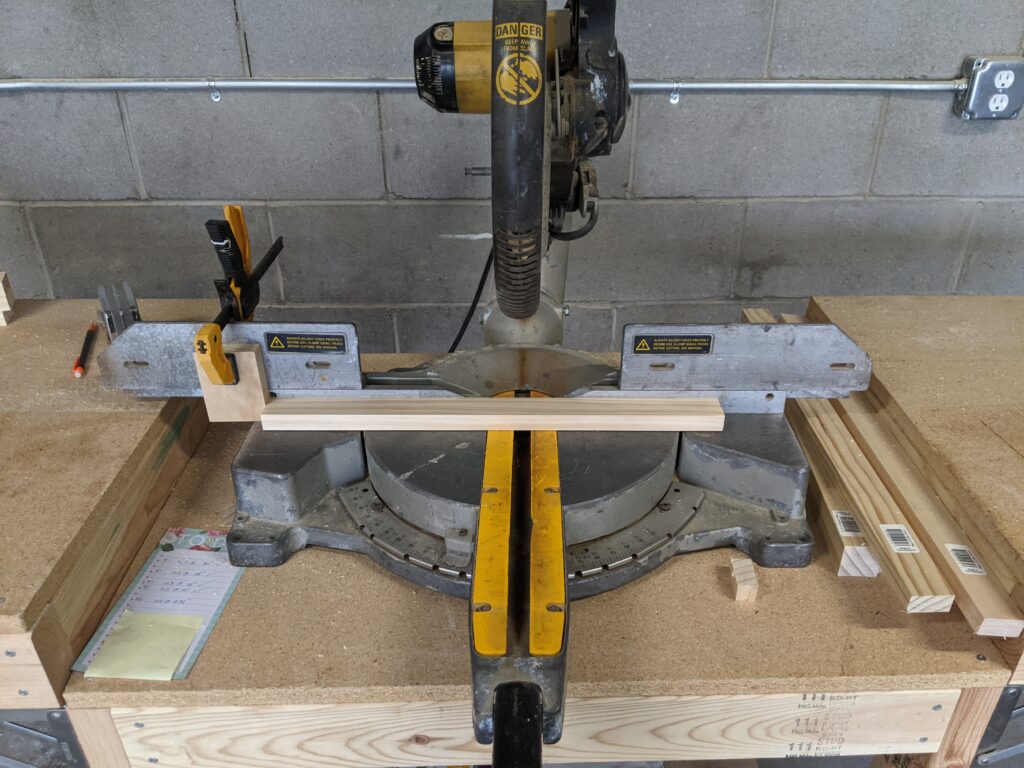
**TIP: Since there are 24 1×2 slats, you may want to use a stop block to cut them quickly. If you don’t have a miter saw stand with a stop block, you can just clamp a board to your saw like I did here:

Step 3.
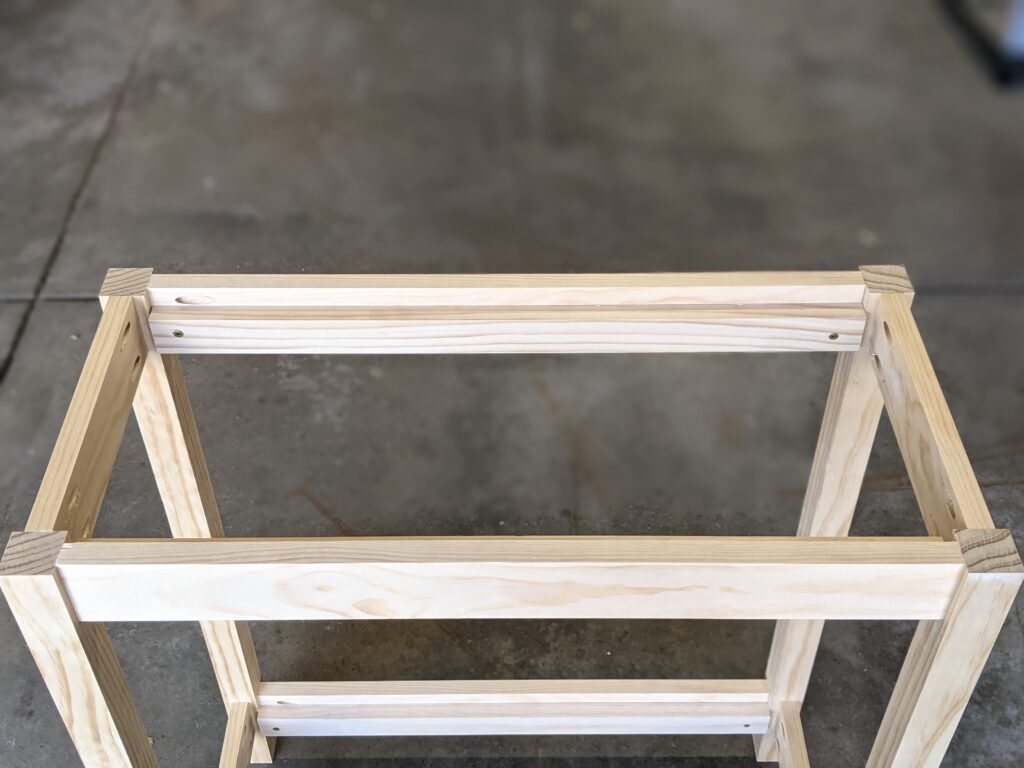
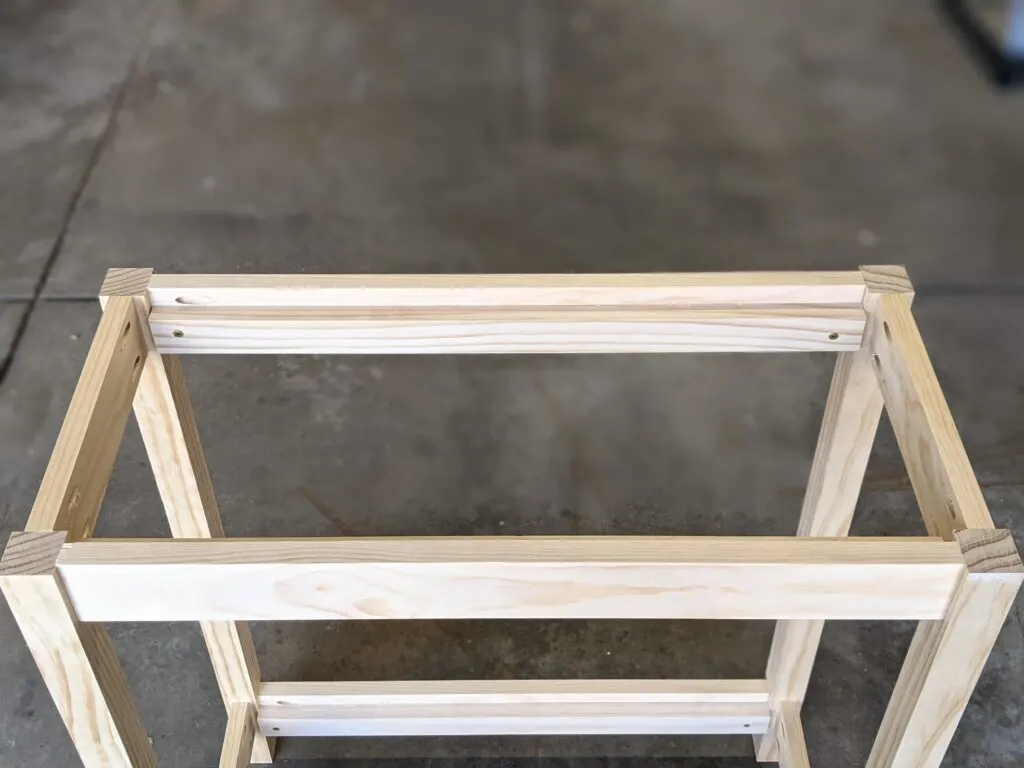
Attach the shelf rails to the inside of the front and back 1x3s on both the top and bottom. Position the rails 3/4″ from the top of each 1×3 so the shelf slats sit flush with the tops of the 1x3s once they’re in place.
I used one of the 1×2 slats to make sure I had the 3/4″ gap correct before attaching the rail:
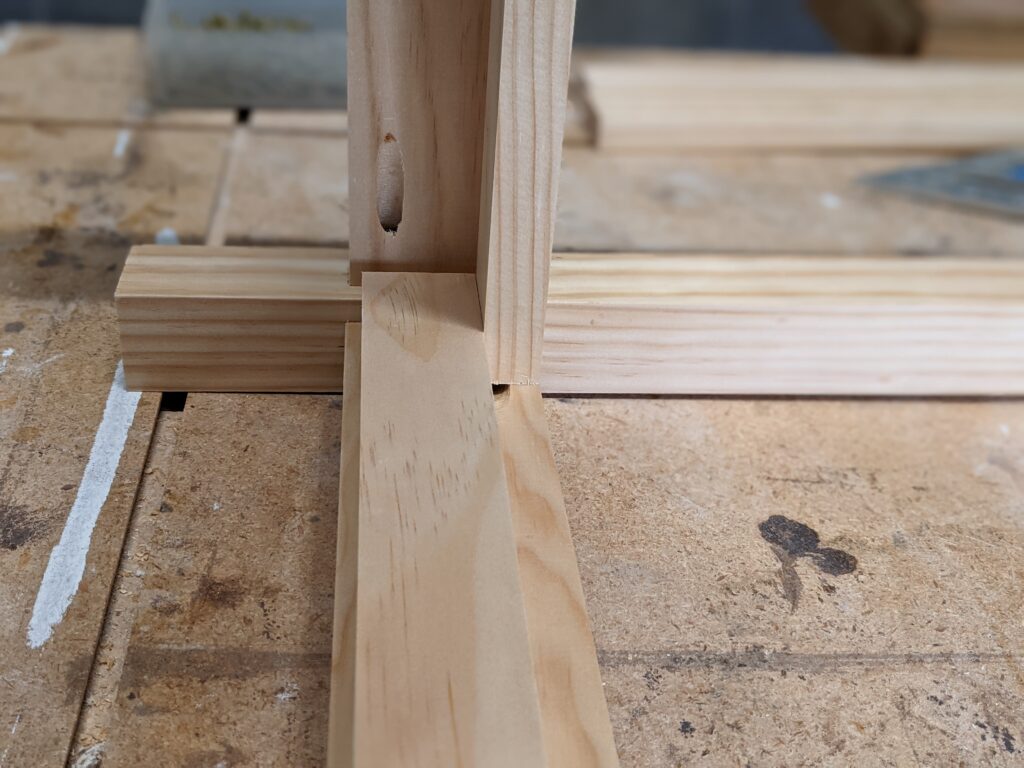
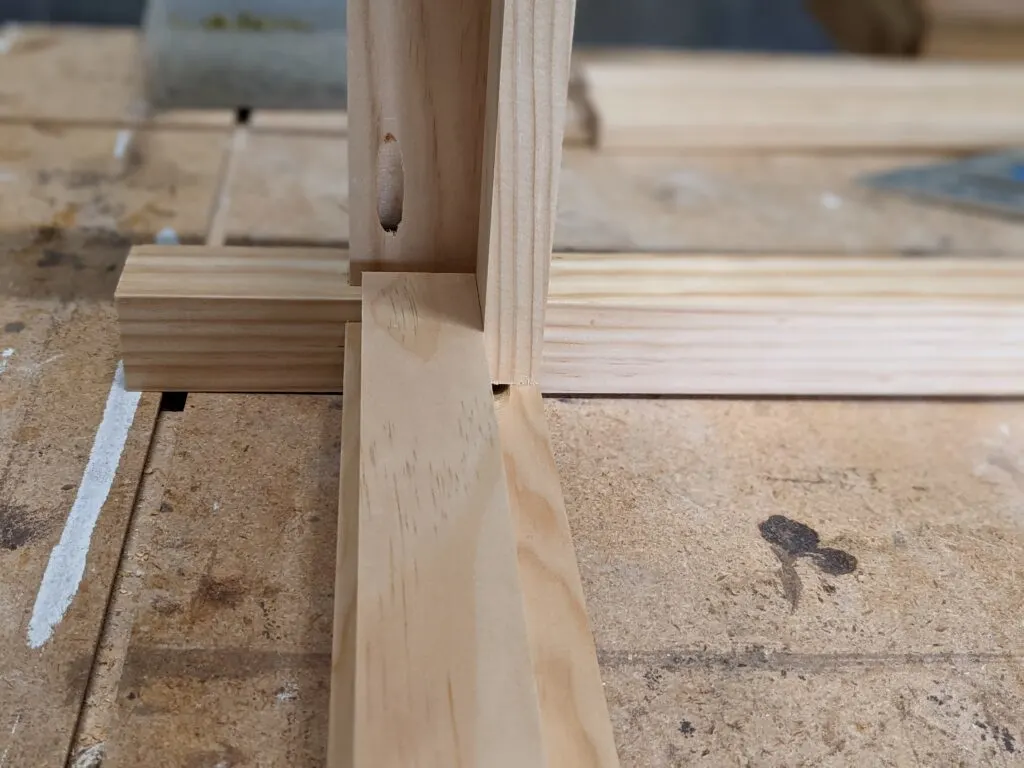
Use 1 1/4″ screws to attach rails and countersink the screws to hide them.
I just used two screws per rail – one on each side. You could also get away with wood glue and brad nails if you prefer.
Here’s a view from the top to show all four rails:
Step 4.
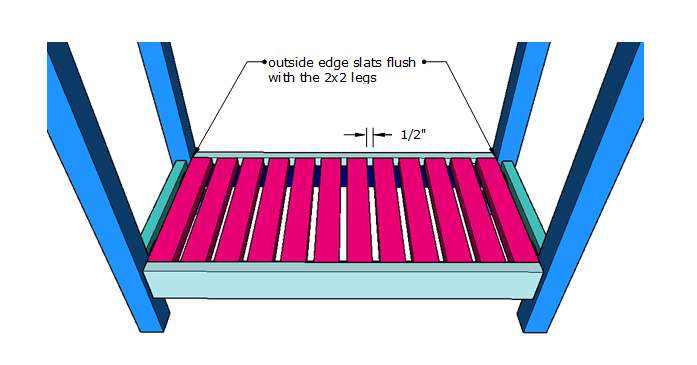
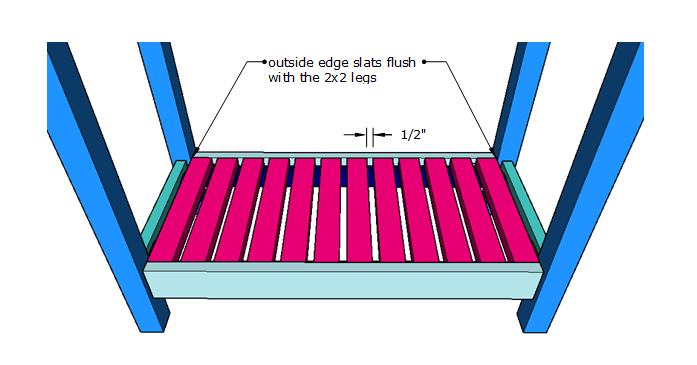
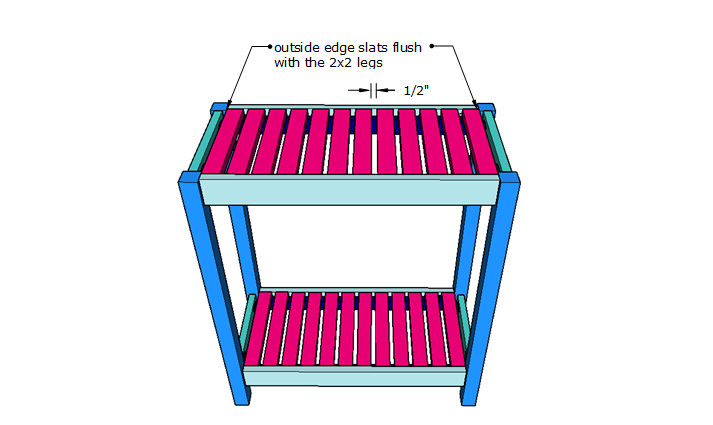
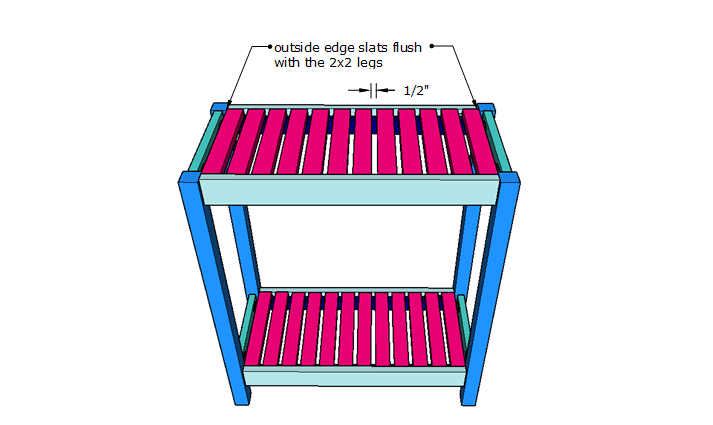
Attach the 1×2 slats to the bottom shelf with 1 1/4″ brad nails. Place the outside edge slats flush with the legs, then space the middle ones 1/2″ apart. Use two brad nails on each end of each board.
Step 5.
Attach the top shelf slats with 1/14″ brad nails, same as you did on the bottom. Position the outside edge slats flush with the legs and then space the middle ones 1/2″ apart. Use two brad nails on each end of each board.
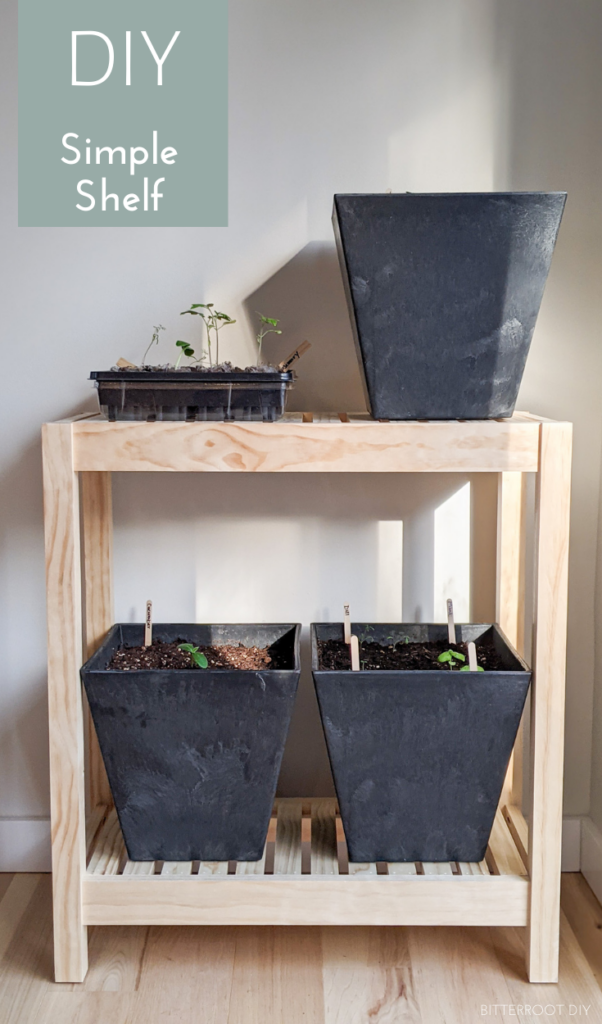
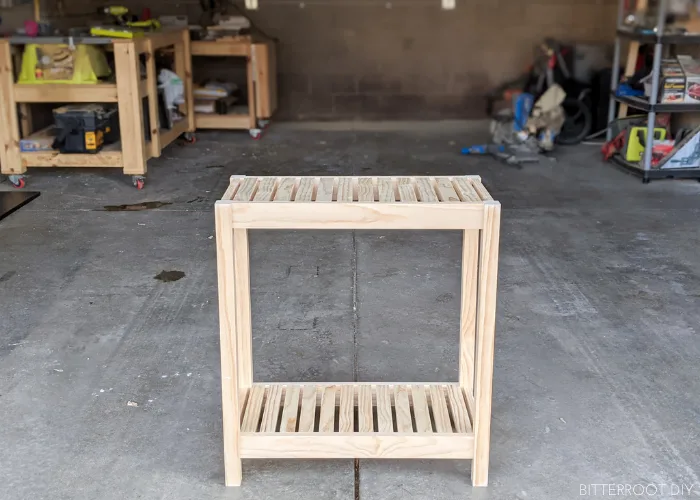
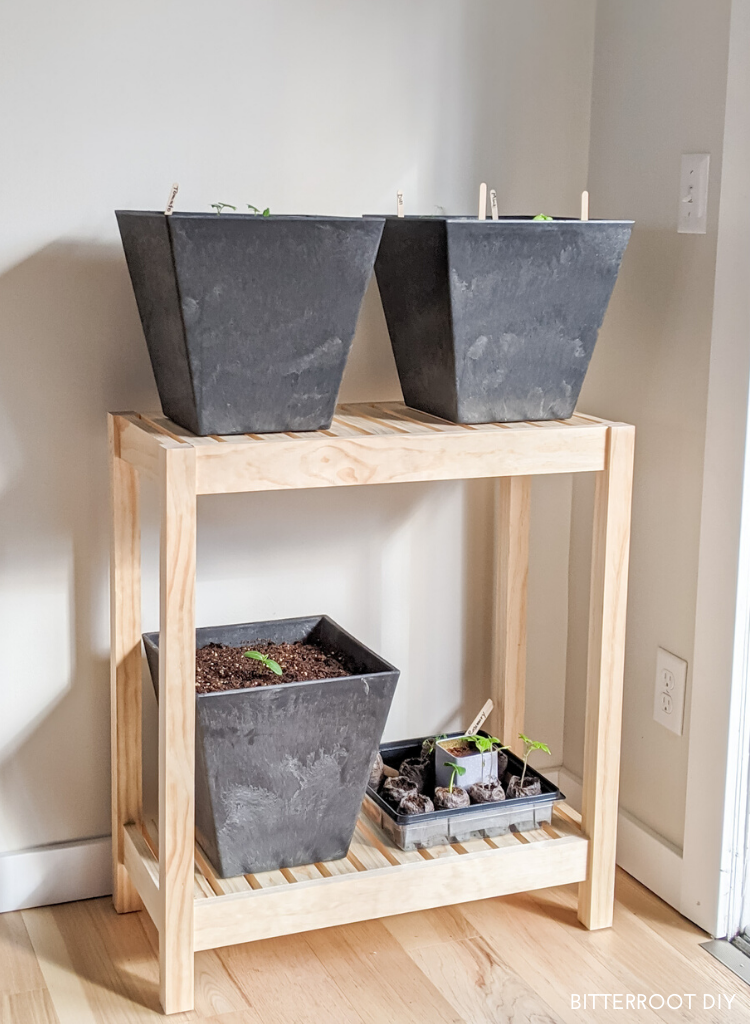
Sand and finish and that’s that – brand new shelf!

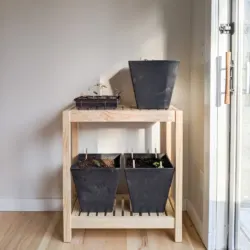
I left mine unfinished in the natural pine color for now. It’s just a shelf for my little container garden, so no need to get too fancy!

I’d love to see your take on this DIY console table, so tag me over on Instagram @bitterrootdiy or shoot me an email at bitterroot.diy {at} gmail.com if you build it.
And, as always, please let me know if you have any questions and I’ll get back to you as soon as possible.
| Tylynn |
Don’t forget to pin for later!