
A full tutorial for a DIY bathroom vanity makeover to update your bathroom.
This post contains affiliate links. If you make a purchase from one of the links, I may make a small commission at NO EXTRA COST to you. This helps keep the tutorials and plans free here at Bitterroot DIY. Thank you for your support! See my full disclosure here.
This post is sponsored by Sherwin-Williams. All thoughts and opinions are my own, and I only recommend products that I truly love and use all the time.
Did you see how the bathroom renovation turned out?! We are beside-ourselves-excited about it and still can’t quite believe that it’s our new bathroom (and that we can finally shower and get ready in the same place again … #youdontknowwhatyouhavetilitsgone).
I can’t decide if my favorite part of the project was adding the new closet or this DIY vanity makeover – it’s a close call. But, either way, the vanity is definitely a statement piece in the new room!
Here’s what it used to look like:


I know what you’re thinking …
It was a statement piece in the old bathroom as well … and not the positive kind.
I agree.
Thank goodness for lumber and paint!
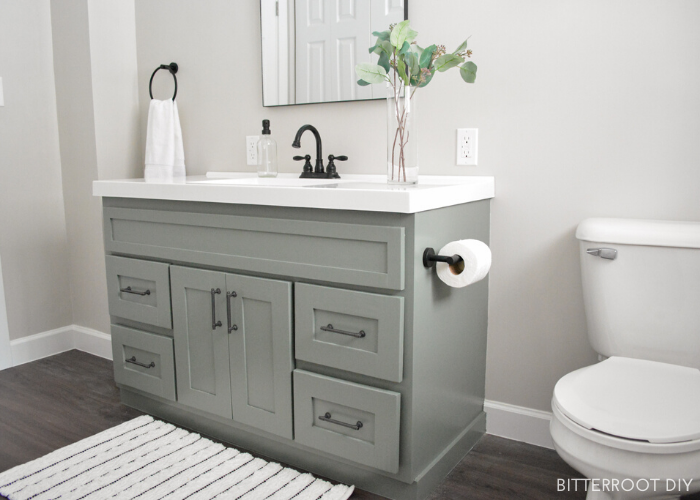
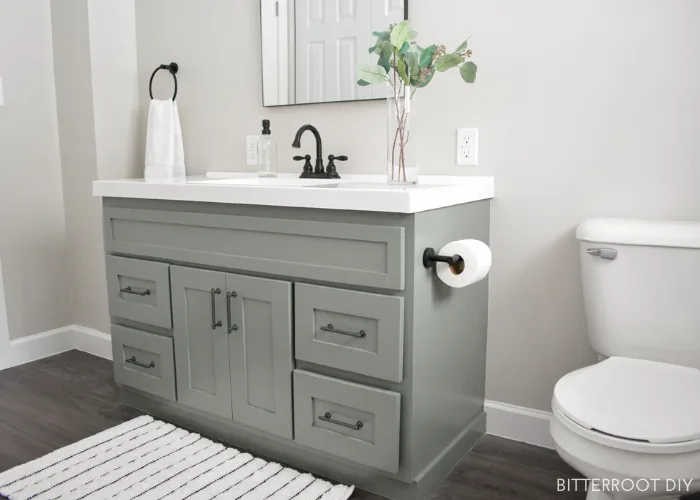
Here’s what it looks like now:
What the whaaa!?
I know.
SOURCES
- Glacier Bay Countertop
- Glacier Bay Mandouri Faucet
- Drain assembly from Amazon for sink with NO overflow
- Soft Iron Hardware
- Color: SW Retreat 6207
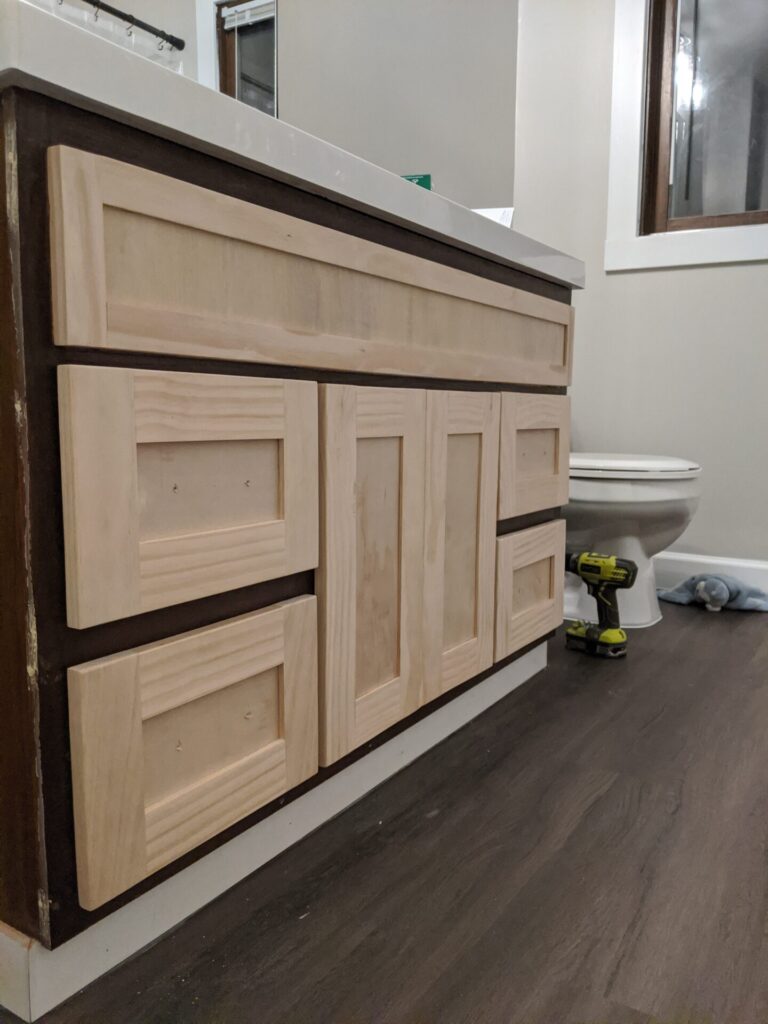
Step 1 – New Cabinet Doors and Drawer Fronts
The first step in the makeover was to build new shaker style cabinet doors and drawer fronts.
You can always skip the new cabinet doors and drawer fronts if you simply want to paint. It’s amazing what paint and new hardware can do just on their own! Head down to Step 2 below if you don’t plan to build new pieces.


Follow the links for the tutorials to build your own, and simply adjust the measurements to fit your vanity. I built all the new pieces to the exact same dimensions of the old cabinet doors and drawer fronts so everything would fit perfectly.
Depending on the type of drawers you have, you may have to add a new front piece to the drawer boxes before attaching new faces. I saved the full tutorial for this to my Instagram reels, but basically there was no front on the drawer boxes on our vanity. They just attached the drawer face straight to the sides of the drawer. I used a hammer to knock the old drawer face off and then cut a new piece to fit.
I attached the new front with wood glue and 1 1/4″ brad nails through the side:


Here’s a view from the front:
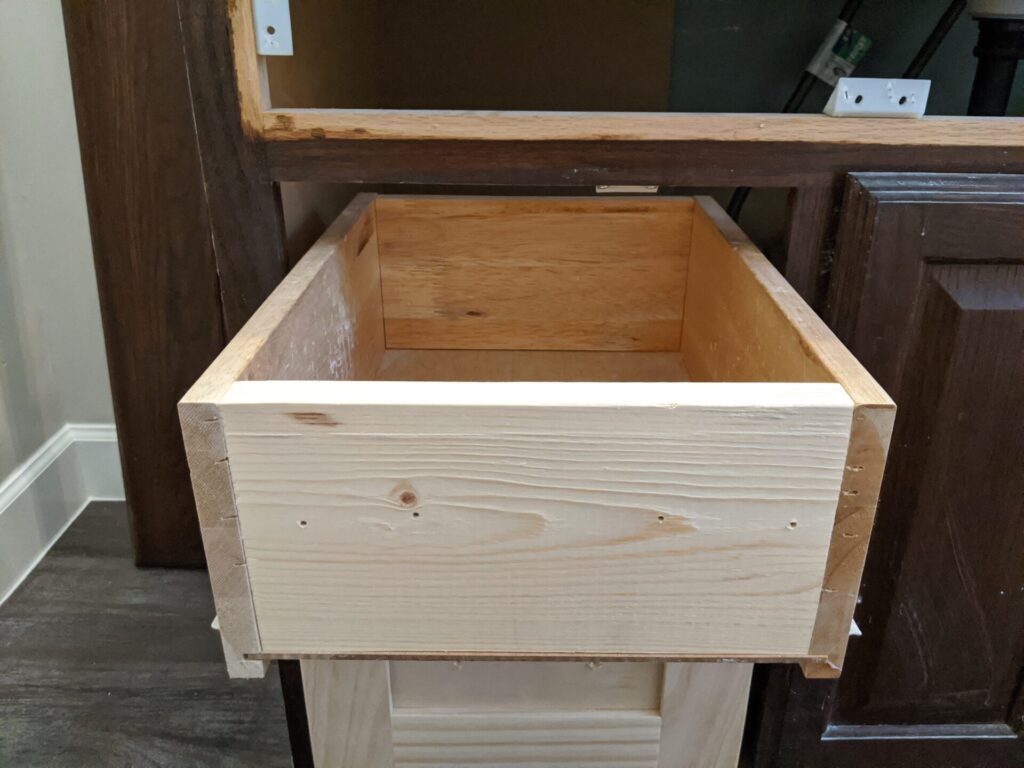
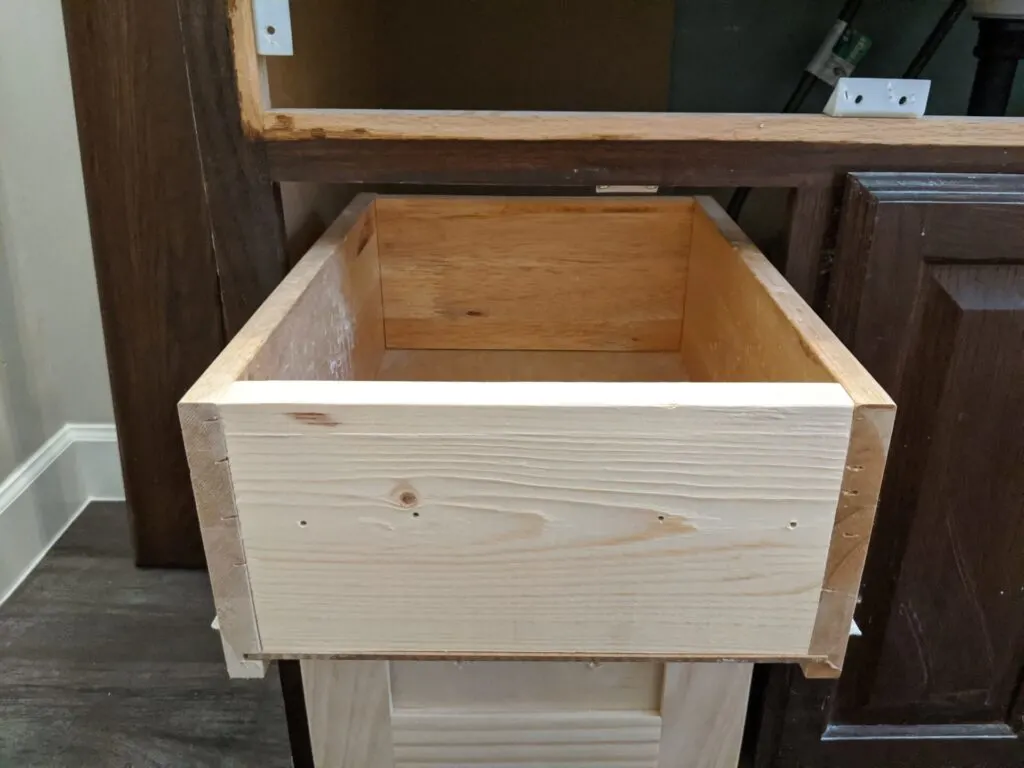
Because the old drawer face was attached directly to the sides, the bottom of the drawer ran all the way to the front. I just put the new piece on top of it and drove a few brad nails through the drawer bottom into the new front piece.

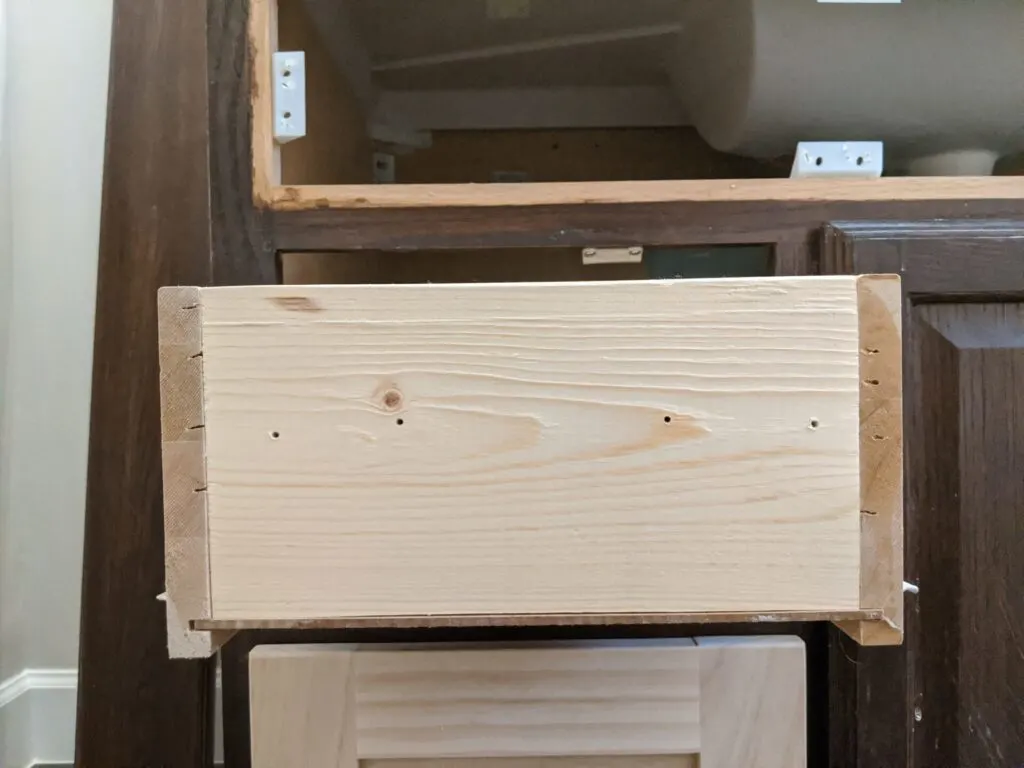
I did the same thing for all four drawers and then installed the new faces.
The top “drawer” is a faux drawer face. All I did was pry the old one off with a small pry bar and then attach the new faux front with wood glue and brad nails. Be careful not to damage the cabinet when you pry the old faux drawer off. I like to use a taping knife and work it in behind the pry bar to protect the old surface (similar to removing old baseboards).
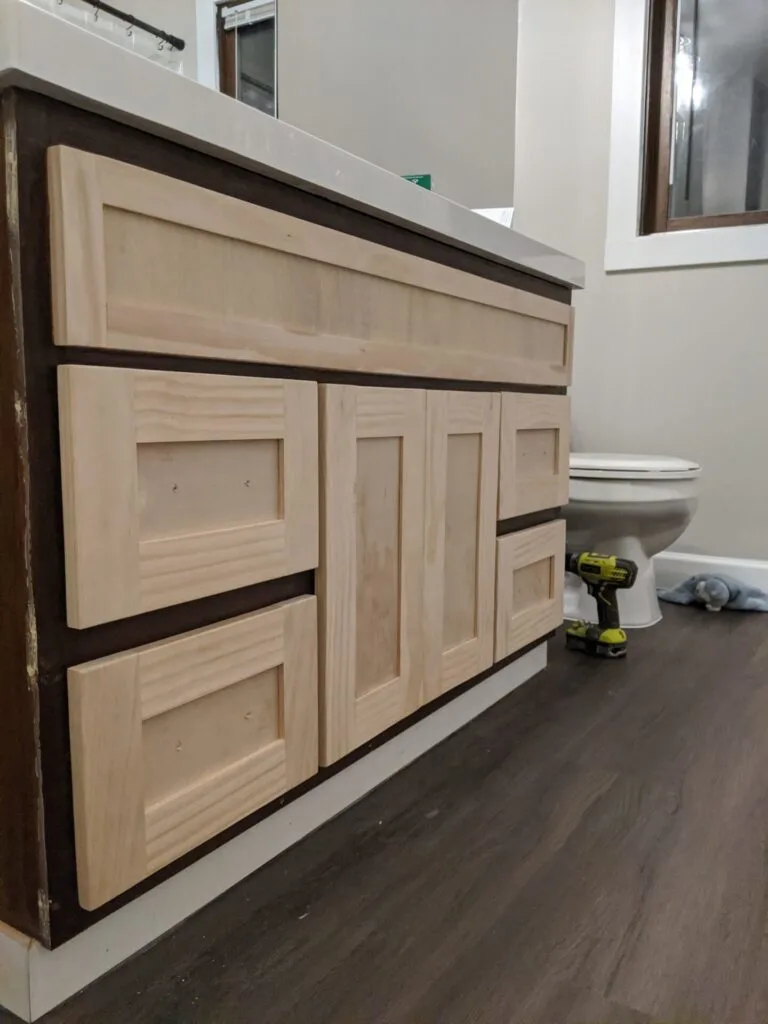
I actually used the old cabinet door hardware to install the new doors. The old cabinets had concealed hinges, so I picked up this handy dandy tool from Kreg. I removed the hinges from the old doors, drilled new concealed hinge holes, and installed the hinges on the new doors. The tool was super easy to use and all four hinges were spot-on on the first try!


Once all the new pieces were installed, I finished things off with a small piece of 1×3 trim around the bottom kick plate and got ready to paint.
Step 2 – Clean
The key to repainting old cabinets is good preparation. If you prep everything well, the paint will hold perfectly.
The first step is cleaning. A lot of people recommend TSP or soap & water. I used 409 for the vanity but soap & water when I did the kitchen cabinets – both seemed to work well. The goal is to remove any dust, grime, or gooey stickiness. If you build doors and drawer fronts, there’s no need to clean the new pieces since they’re raw wood.
Step 3 – Prime
Next, scuff up the old cabinet finish with a high grit sandpaper (I usually use 220 for this sort of thing). Some primers say there’s no sanding necessary, but I recommend sanding no matter what. It gives the primer a good, rough surface to grip. Take care not to sand too much. All you want to do is scuff the old finish, not go through the veneer surface. Again, don’t worry about the new doors and drawer fronts if they’re new – just give them a good sanding when you build them, before they’re attached.
Now you’re ready for primer.
I used my favorite Bulls Eye 123 primer from Rustoleum (available at Home Depot and most other home improvement stores). I’ve had really good luck with this primer and use it on almost all my projects:


Prime the entire cabinet – new and old pieces – to seal out old stains and the raw wood. The primer gives you an even surface, all the same color, so everything will accept the paint the same way. I used a brush and roller for this cabinet, but you can use a sprayer if you have one. With a brush and roller – simply brush all the corners and edges first and then roll the rest.
Let the primer dry according to the instructions and then you’re ready to paint.
Step 4 – Paint
I used my favorite cabinet paint: Sherwin-Williams Urethane Trim Enamel. I used the same trim enamel on our kitchen cabinets (as well as all the trim in our house) and am so impressed not only by how easy it is to apply, but also how well it holds up. I’m pretty sure I wipe the kitchen cabinets down approximately 457 times a day. The paint looks just the same as the day I applied it (almost 3 years ago) and everything comes off really easily. Additionally, it’s self-leveling when you apply it (perfect when working with a brush and roller) and has GREAT coverage. I’m super excited to have the same paint on the bathroom vanity, which I’m sure will also see it’s fair share of use and cleaning.


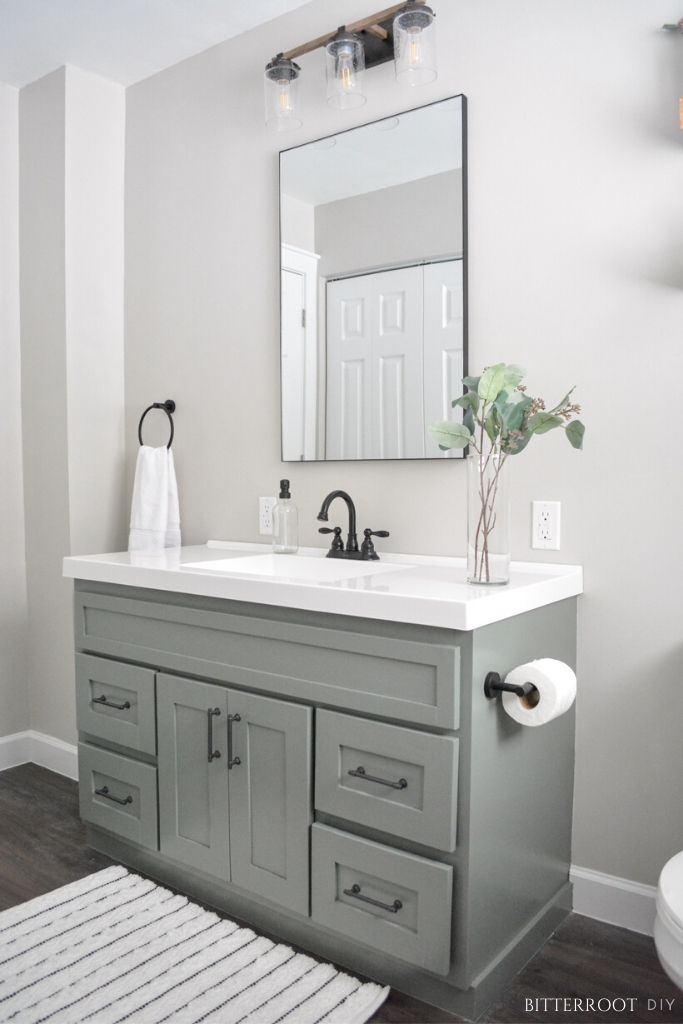
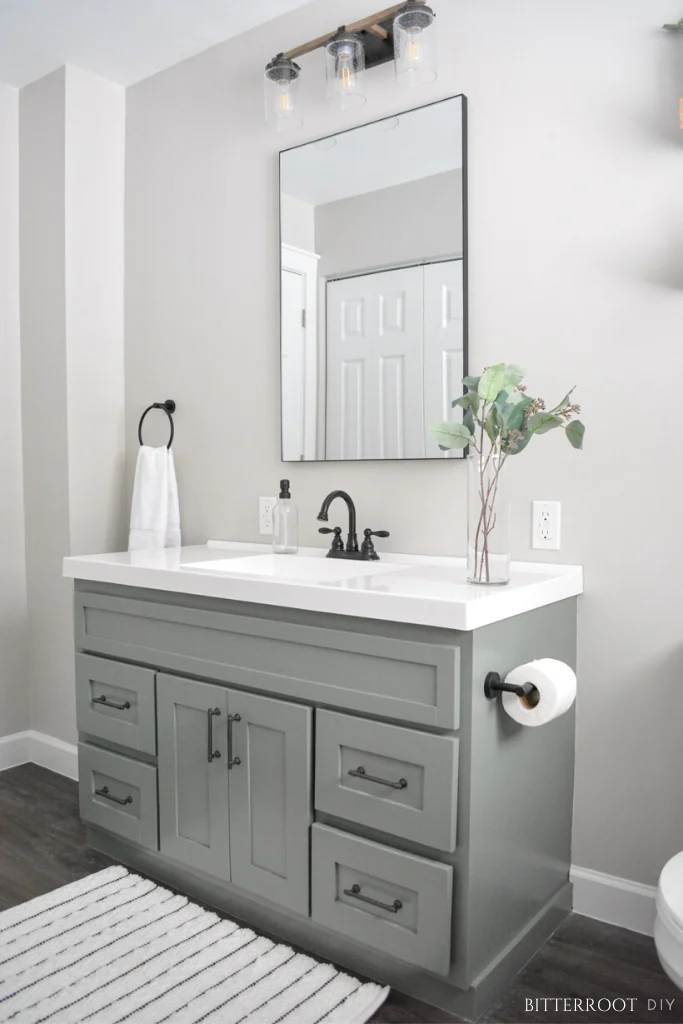
The color is SW Retreat 6207 and, quite possibly, my new favorite color. It’s such a calm, cozy green and really brings the whole bathroom together! Plus, it looks amazing against the new hardware!
To finish things off, I installed a new counter-top and faucet, both from Home Depot. The new faucet came with a drain assembly, but it did not work with a sink that has no overflow. The sink that’s built into the new counter-top does not have an overflow, so I grabbed a different drain assembly from Amazon and installed that instead. Worked like a charm.
And there you have it – a DIY bathroom vanity makeover!
You can always take or leave any portion of the makeover – simply paint and change out hardware if you’re looking for a quick fix. Or do the whole shebang to really make it look brand new. Totally up to you!
To find sources for anything in the bathroom, head over to the final reveal post. I added links at the bottom of the post for as many items as I could find.
Please let me know if you have any questions and I’ll get back to you as soon as possible.
Follow along on Instagram to see these projects come to life in real time!
| Tylynn |


Megan
Sunday 24th of January 2021
What color did you paint the vanity?
tylynn_sattler
Monday 25th of January 2021
Sherwin Williams Retreat 6207
Alex Sutton
Thursday 14th of January 2021
This is such an awesome article! Thank you for sharing your experience! I'm getting ready to refinish my bathroom vanity as well, so this is so helpful! I'll definitely take a look at the Bull's Eye primer you mentioned.
tylynn_sattler
Monday 25th of January 2021
Of course! Good luck with the update :)
Maribel
Wednesday 6th of January 2021
Can this be done to vanities not made of real wood (particle board/wood veneer) and, if so, do you still suggest sanding first?
tylynn_sattler
Thursday 7th of January 2021
Yes, this vanity was just a wood veneer. Don't sand it much - all you want to do is scuff the surface a little. If you sand too much, you'll go through the veneer.
Nicole93
Friday 4th of December 2020
Love it!!! Do you have the measures of the lumber? The thickness.
tylynn_sattler
Monday 7th of December 2020
Thanks!
I used 1x3 lumber.
Veronica
Friday 20th of November 2020
I think the new face cabinet is terrific. I am not that talented . I love the make over. Colors and shapes are awesome .
tylynn_sattler
Monday 7th of December 2020
Thank you!