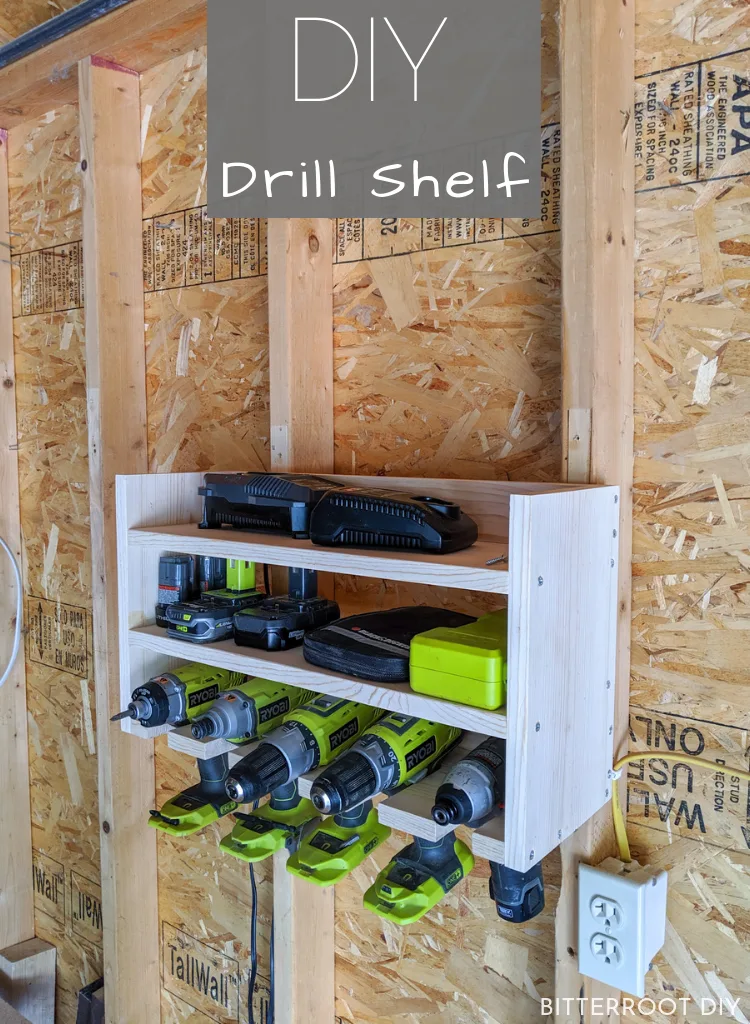
Build a drill storage shelf to organize drills, chargers, batteries, and bits.

This post may contain affiliate links. If you make a purchase from one of the links, I may make a small commission at NO EXTRA COST to you. This helps keep the tutorials and plans free here at Bitterroot DIY. Thank you for your support! See my full disclosure here.
This summer has definitely been the summer of shop projects. Over the past few weeks, I’ve added two workbenches in my shop (see them here and here), a pegboard sheet for tools, and built a simple workbench for Joseph’s shop. The workbench added a lot of space, but he still needed something to organize drills and accessories. So last week I put this drill station together. By hanging the drills backwards, the shelf doesn’t have to be as deep and doesn’t stick as far out from the wall.
Enjoy the plans!
Tools & Supplies
- Miter Saw
- Drill
- Jigsaw
- 1 1/2″ Hole Saw or Spade Bit
- Tape Measure
- Clamps
- Level
- Speed Square
- Pencil
- Safety Glasses
- Ear Protection
- 1 ¼” Screws
Lumber
- 1 | 1 x 8 @ 8′
- 1 | 1 x 3 @ 8′ (or just enough for two 20″ pieces)
Cuts
- 2 | 1 x 8 @ 12 1/4″ (sides)
- 3 | 1 x 8 @ 20″ (shelves)
- 2 | 1 x 3 @ 20″ (back supports)
Step 1.
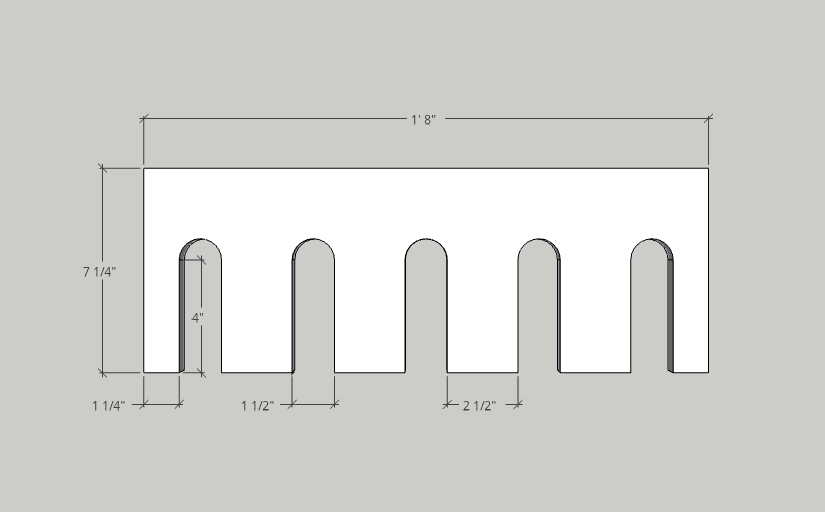
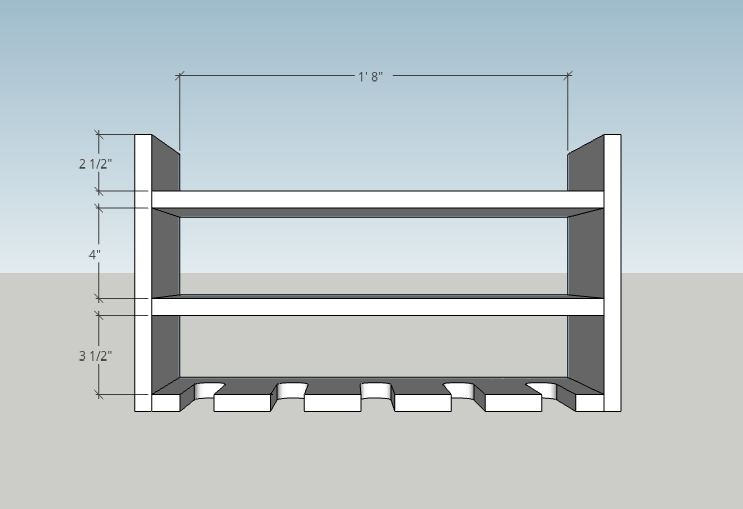
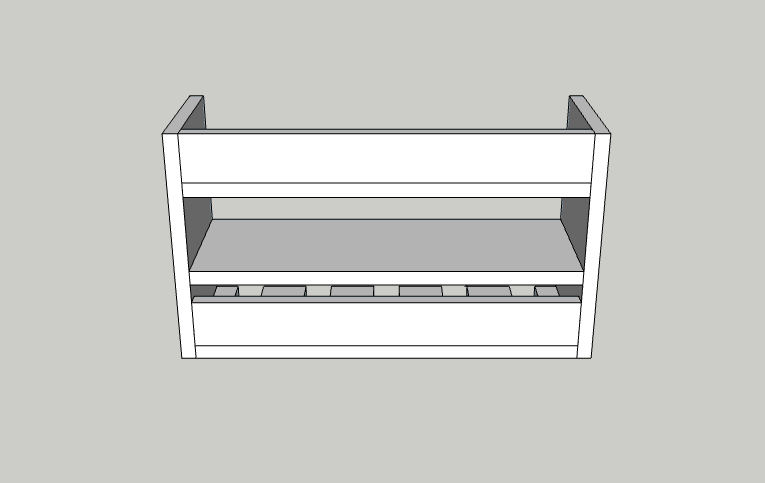
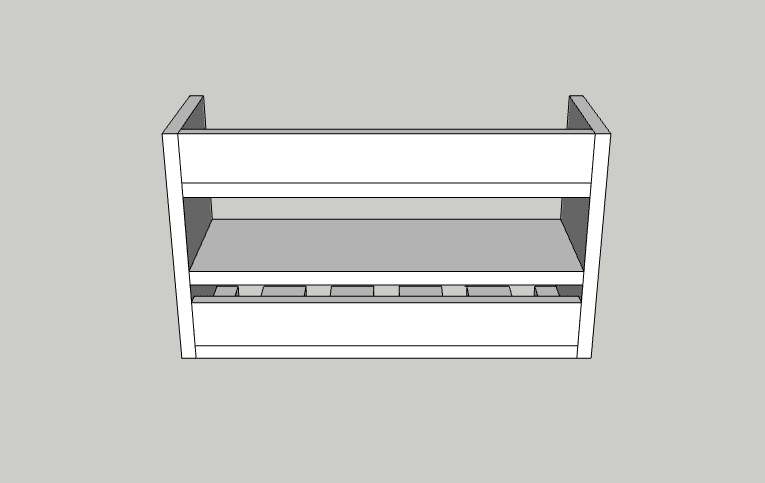
Once you’ve cut all boards to length, cut the drill hanger sections out of the bottom shelf according to the diagram below.
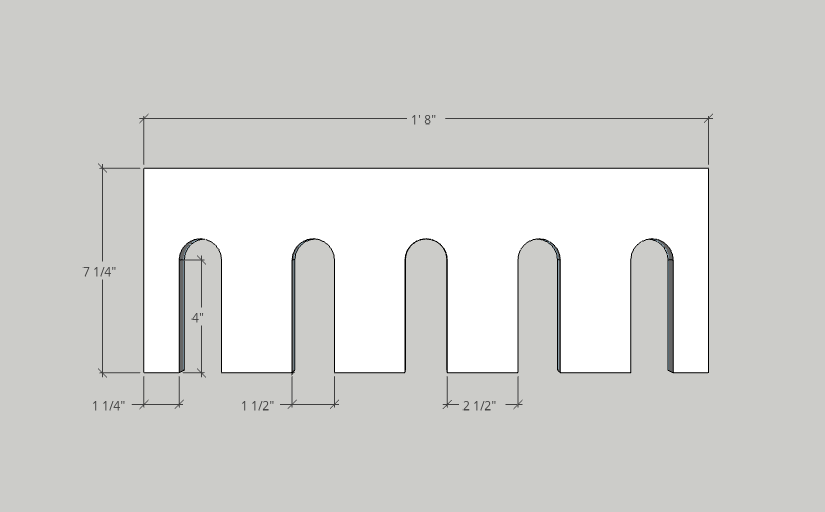
Draw a horizontal line at 4″ across the board to mark the center of the semi-circles and a vertical line to mark each opening.
Use a 1 1/2″ hole saw (or spade bit) to drill out the semi-circles. Center the hole saw on the center of the circle – where the 4″ horizontal line intersects the middle of the drill openings.

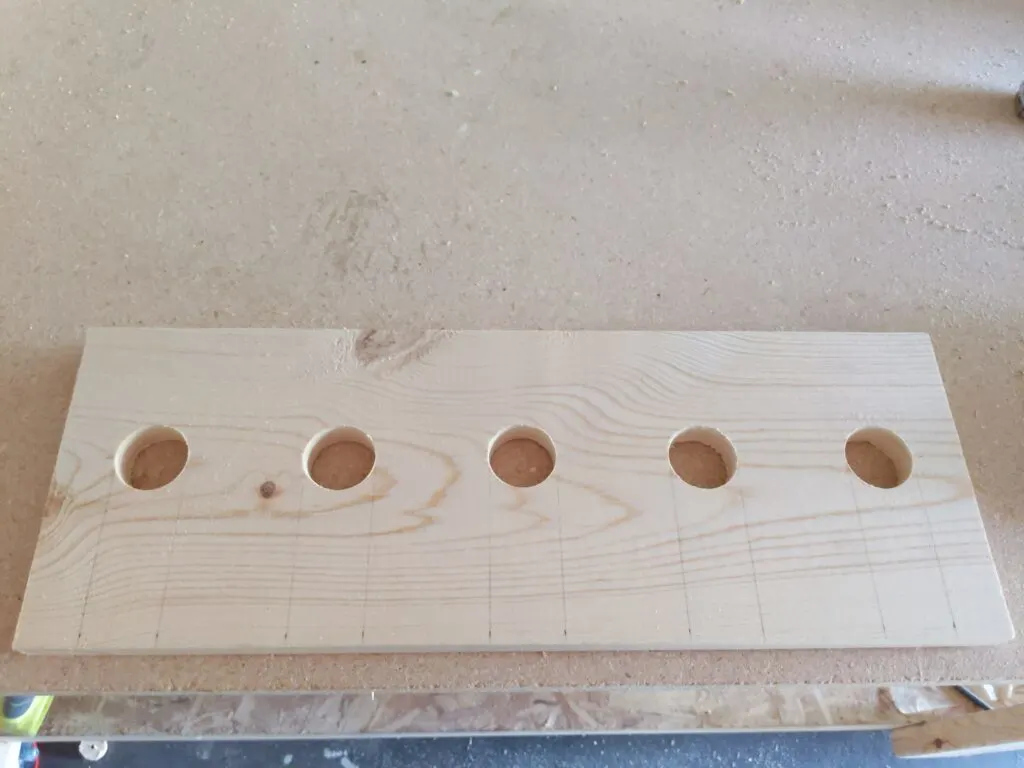
Then, cut the straight section of each opening out with a jigsaw.
If you don’t own a hole saw or spade bit, you can cut the openings out with just a jigsaw. The semi-circles might be a little tight for the jigsaw, however, so I’d recommend cutting rectangles. It will still hold the drills just the same!
Step 2.
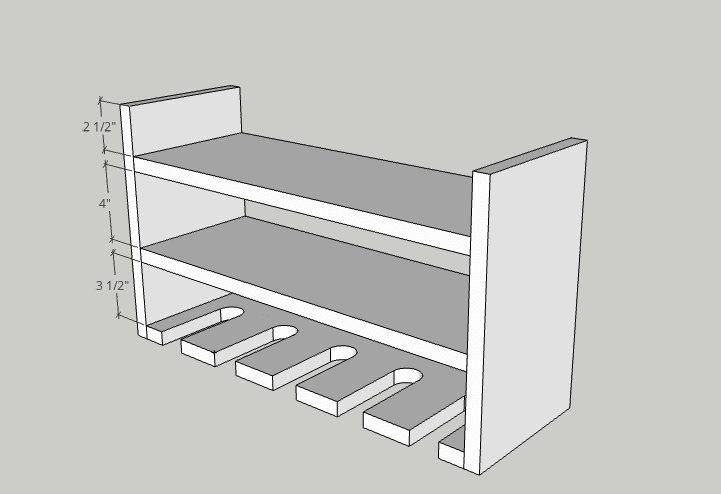
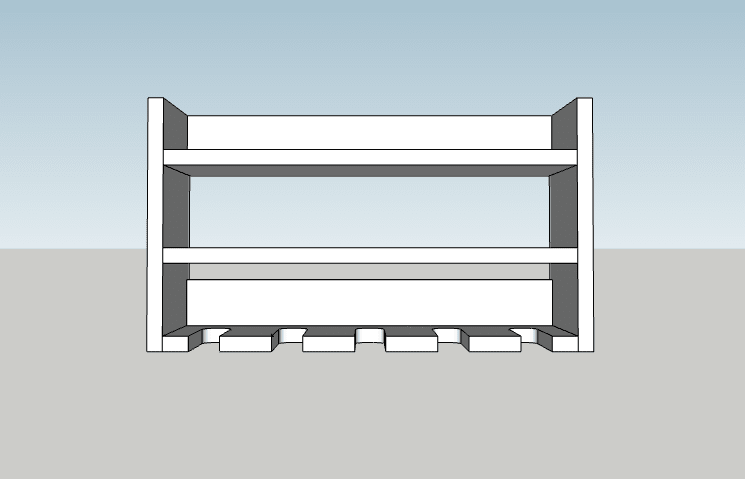
Attach the three shelves with wood glue and 1 1/4″ screws.
I drove screws directly through the sides into the shelves. You can use pocket holes along the bottom of the shelves if you prefer.

Step 3.
Attach the 1×3 supports along the back of the shelf with wood glue and 1 1/4″ screws. Again, feel free to use pocket holes if you prefer.
The purpose of the 1x3s is to give you a way to attach the shelf to the wall.

Step 4.
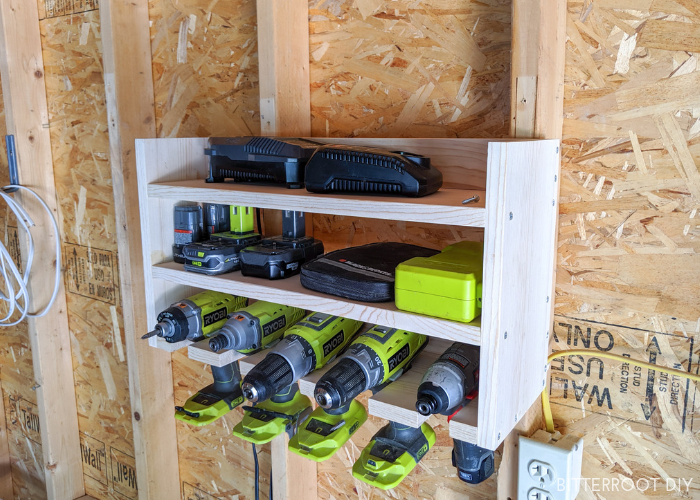
After I assembled the shelf, I drilled a 1″ hole through the left side of the top 1×3 to run cords for the chargers (behind the chargers in the photo below).

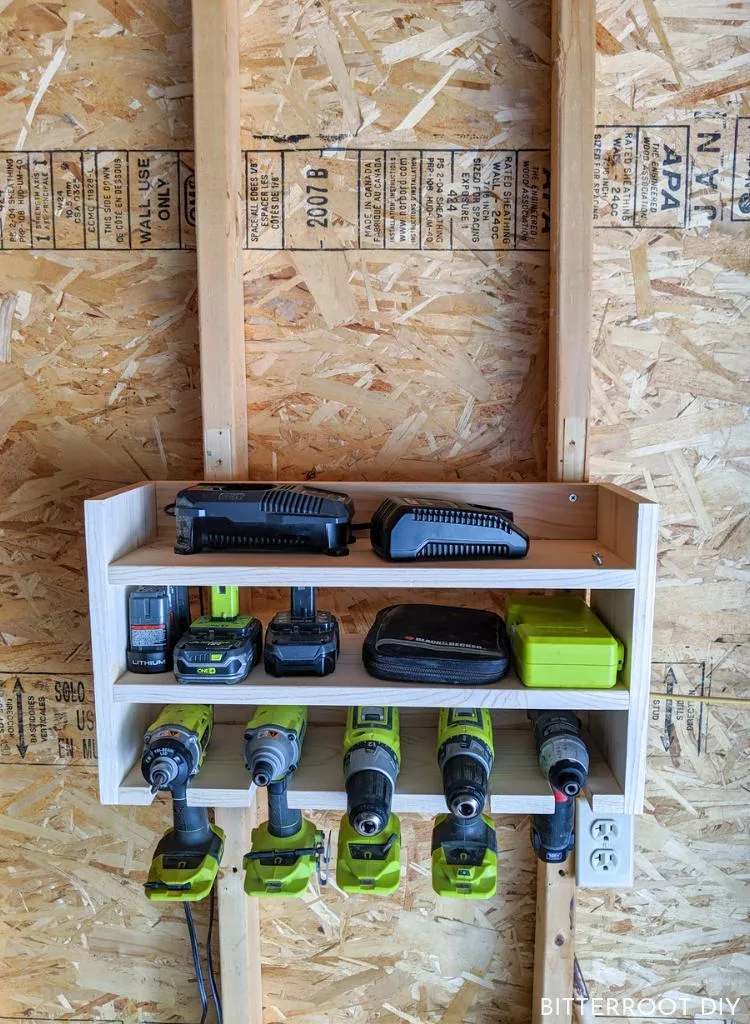
Last, but not least, I drove two 2″ screws through each 1×3 into the studs to mount the shelf to the wall.
Please let me know if you have any questions and I’ll get back to you as soon as possible!


Thanks for stopping by!
For more project ideas, you can find me on Pinterest. And to stay up to date with the latest shenanigans, follow me on Instagram.