
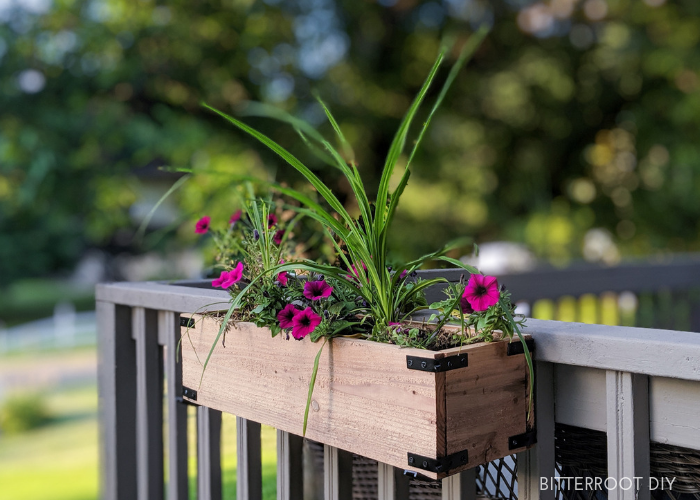
Build your own cedar planter boxes with these free plans – perfect for window boxes or to decorate the porch or patio.

This post may contain affiliate links. If you make a purchase from one of the links, I may make a small commission at NO EXTRA COST to you. This helps keep the tutorials and plans free here at Bitterroot DIY. Thank you for your support! See my full disclosure here.
I’ve been working on a little front porch makeover the last couple weeks and just finished up four of these planter boxes to go around the railing. There were a few issues at first with the cedar warping, but I got it all figured out and they’re holding up well now!
These planter boxes are super easy to build and very customizable.
Check out how they went together in this quick video! And I’d love to have you follow along while you’re there.
Enjoy the plans!
Tools & Supplies
- Flower Box Brackets
- Black Stainless Corner Braces
- Miter Saw
- Kreg Pocket Hole Jig
- Drill
- Brad Nailer
- Tape Measure
- Clamps
- Exterior Wood Glue
- 1 1/4″ Screws (exterior grade)
- 1 1/2″ Finish Nails
- Speed Square
- Pencil
- Safety Glasses
- Ear Protection
** The lumber and cut list are for ONE planter box. Adjust as necessary for multiple planter boxes.
Lumber:
- 1 | Cedar 1 x 6 @ 8′ (or use 1×6 cedar fence boards to save money – they usually come in 6′ lengths)
Cuts:
- 2 | Cedar 1 x 6 @ 23″ (sides)
- 1 | Cedar 1 x 6 @ 21 1/2″ (bottom)
- 2 | Cedar 1 x 6 @ 5 1/2″ (ends)
Step 1.
Attach the bottom of the planter box to one of the sides with wood glue and 1 1/4″ pocket hole screws.
Position the side so that there is 3/4″ left on each side for the ends. I put the ends in place (without attaching them) to help position the bottom board correctly.


Drill the pocket holes on the bottom of the bottom board to best hide them.
Step 2.
Attach the bottom of the planter box to the other side the same way – wood glue and 1 1/4″ pocket hole screws with 3/4″ gap on both sides.


Step 3.
Position both ends of the box flush with the bottom and sides. Clamp in place and attach with wood glue and 1 1/2″ finish nails.


Step 4.
Drill drainage holes in the bottom of the planter box.


I drilled 1/8″ holes and just staggered them along both sides and the middle of the planter – nothing super scientific, just enough for water to drain.
Step 5.
This is where the warping came into play. Since I attached the sides with just wood glue and finish nails, they started to pull apart and warp when I watered the soil.


To solve the problem, I clamped the boards back into place and added 2″ brackets on all the corners.
I bought regular stainless steel corner braces and painted them black with Rustoleum’s Universal Black Gloss spray paint. You can also just buy these black stainless corner braces and skip the painting.


You can still see a little warping in the boards, but it’s just residual. If you use brackets when you first build the planter, it shouldn’t be a problem. The brackets are MUCH stronger than wood glue and finish nails and will hold everything in place despite moisture.
Since adding the brackets, I haven’t had any warping issues.
And, if you don’t like the exposed brackets, simply place them on the inside of all the corners – same strength, different style.
Another option is to staple landscaping fabric on the inside of the planter to help hold the soil and keep the water from soaking directly into the cedar. I think I’ll add a liner next spring before I plant new flowers in the boxes.
Step 6.
Once the planter boxes are assembled, attach them to the porch railing (or under the windows for window boxes).


I used flower box brackets to attach them to our deck. They were simple to attach and are very sturdy. Adjust as necessary depending on where you want to put them!
Please let me know if you have any questions and I’ll get back to you as soon as possible!


Thanks for stopping by!
For more project ideas, you can find me on Pinterest. And to stay up to date with the latest shenanigans, follow me on Instagram.

