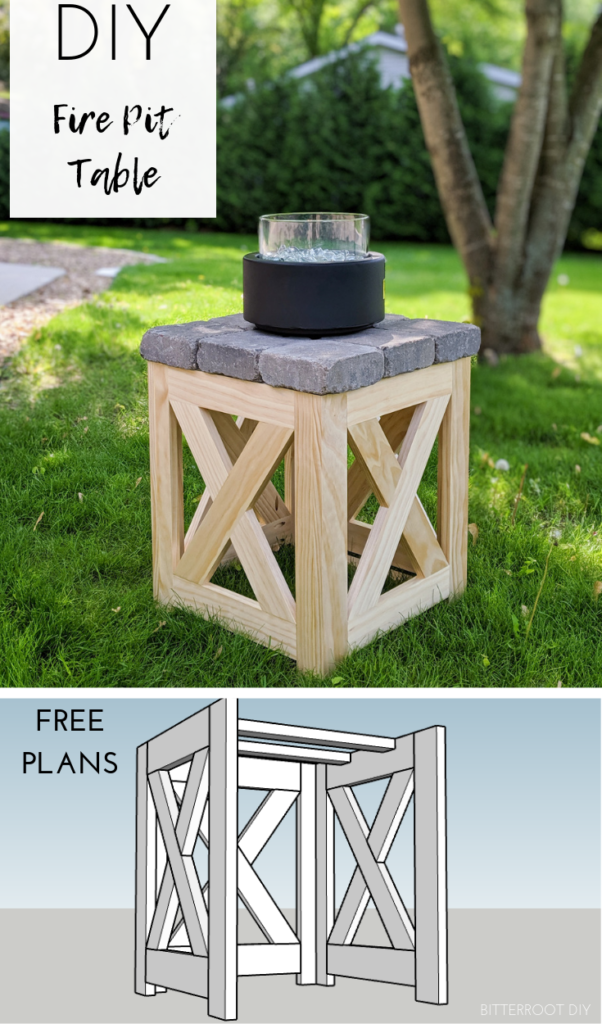
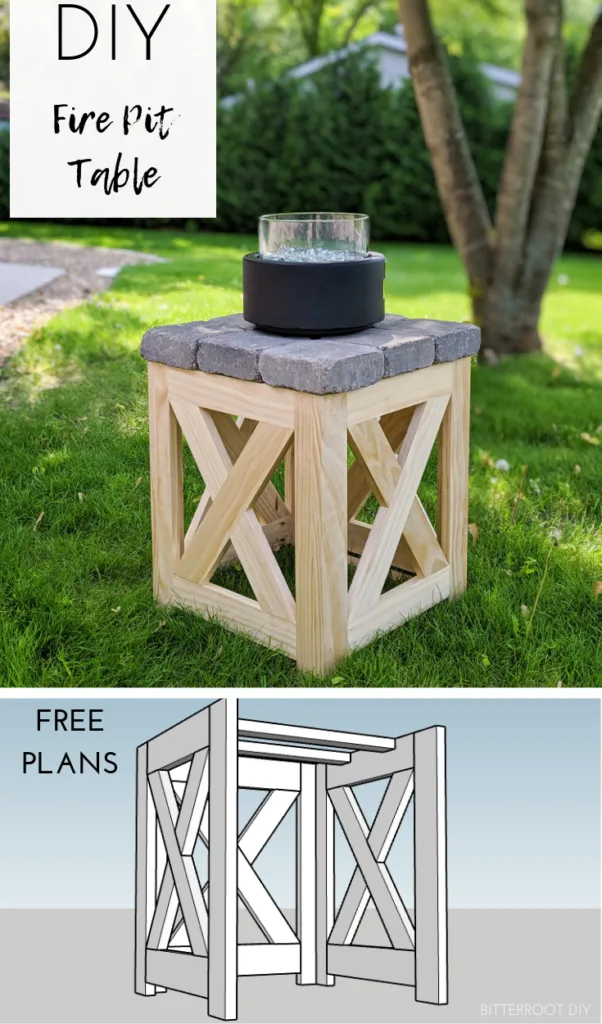
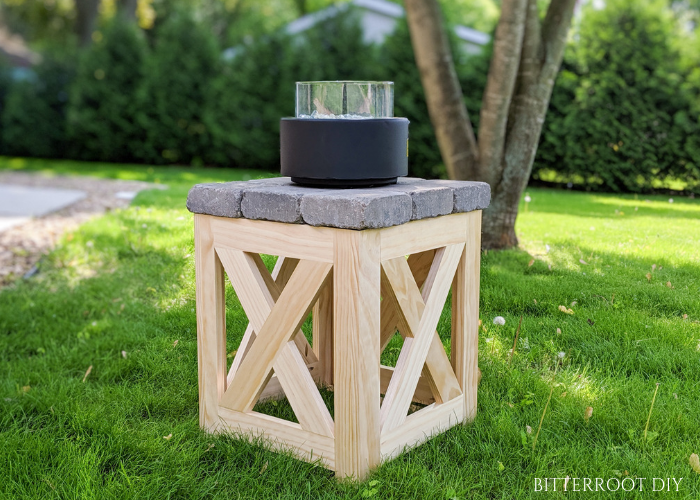
Build a simple gas fire pit table for your porch or patio.

This post may contain affiliate links. If you make a purchase from one of the links, I may make a small commission at NO EXTRA COST to you. This helps keep the tutorials and plans free here at Bitterroot DIY. Thank you for your support! See my full disclosure here.
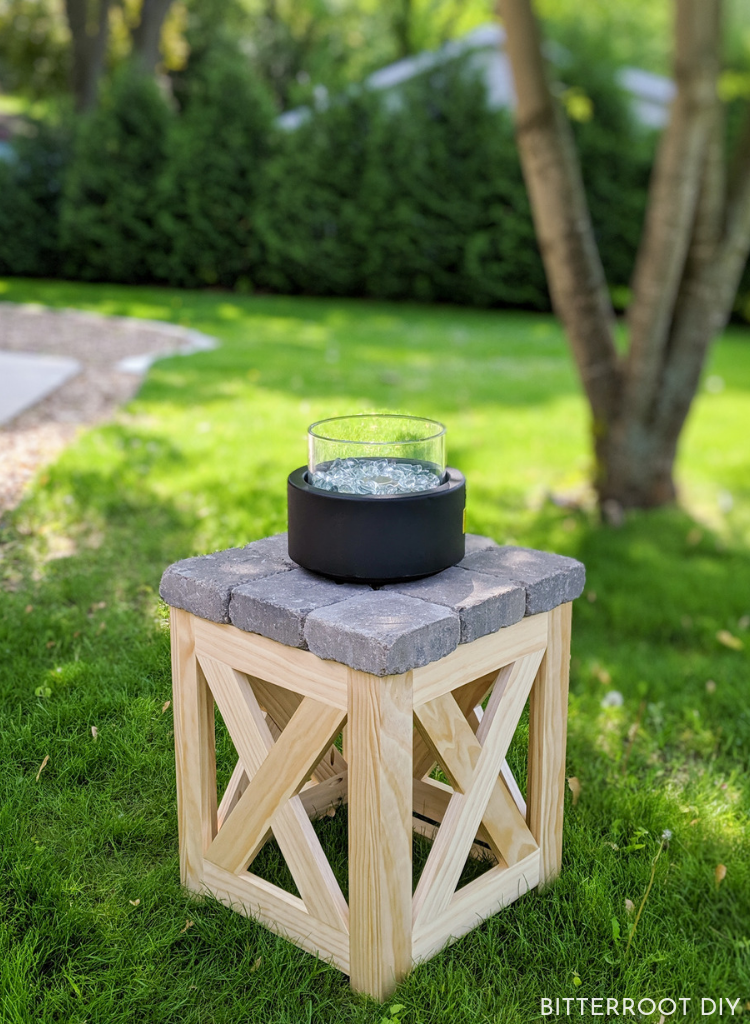
The front porch is one of our favorite places to hang out and enjoy a morning coffee or evening drink, but it hasn’t gotten much attention recently and is looking a little run-down. This spring our goal is to update the space. We grabbed a new set of patio furniture a couple weeks ago, and last week I finished up this DIY gas fire pit table! There are a lot of great gas fire pits out there for purchase, but our porch is pretty small. I designed and built this table to fit around a 20lb propane tank but still be as small as possible. Being able to make exactly what we need is one of my favorite parts of building our own furniture – yay for DIY!
Make sure to use exterior grade wood glue, screws, and finish if you plan to put this table outside.
Enjoy the plans!
TOOLS & SUPPLIES:
- Tabletop Fire Pit
- Exterior Construction Adhesive
- Hinges (available at home improvement or hardware store)
- Barrel Bolt Lock (available at home improvement or hardware store)
- Propane Tank Cover
- Miter Saw
- Drill
- Kreg Pocket Hole Jig
- Tape Measure
- Clamps
- Exterior Wood Glue
- Exterior Spar Urethane (I think it’s cheaper at Home Depot than Amazon, but that’s what it looks like)
- 1 ¼” Screws – Exterior Grade
- Level
- Speed Square
- Pencil
- Safety Glasses
- Ear Protection
Lumber:
- 4 | 1 x 3 @ 8′
- 2 | 1 x 2 @ 8′
Cuts:
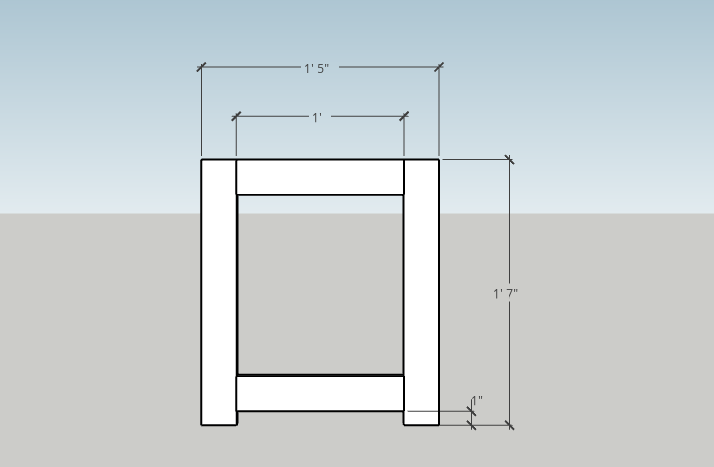
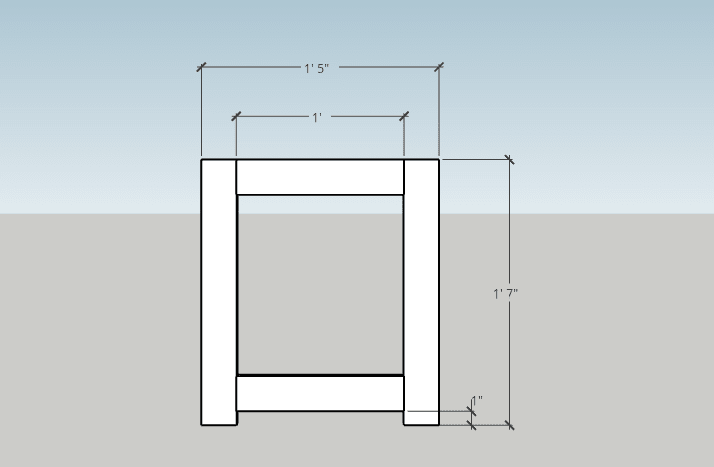
- 4 | 1 x 3 @ 19″ (wide frame sides)
- 6 | 1 x 3 @ 12″ (wide and narrow frames top & bottom)
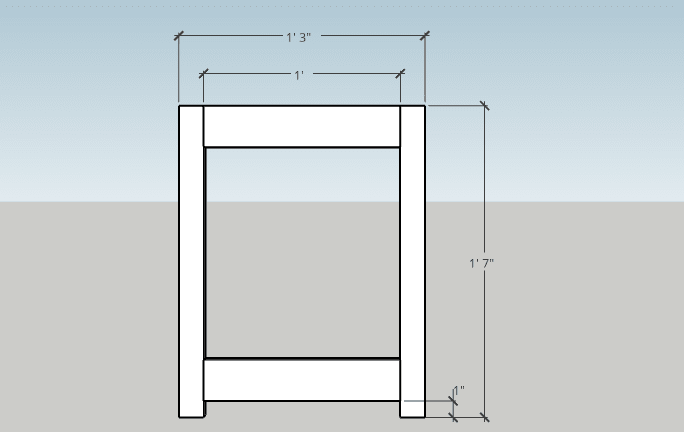
- 2 | 1 x 2 @ 19″ (narrow frame sides)
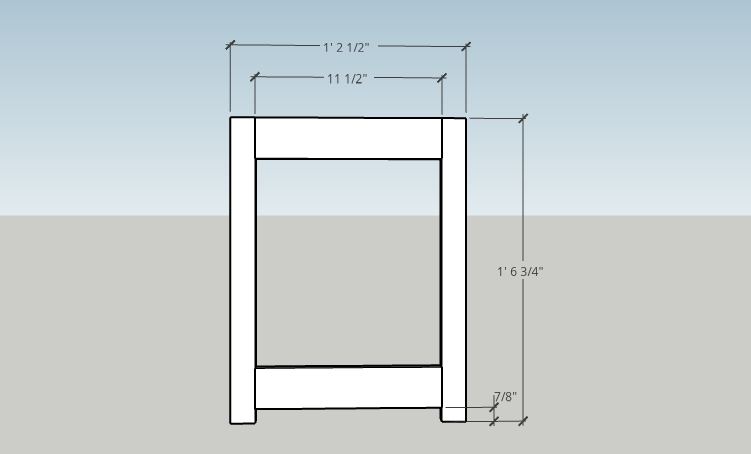
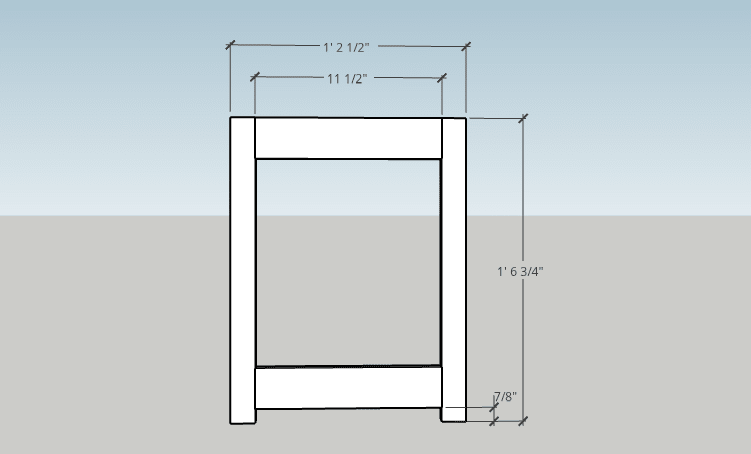
- 2 | 1 x 2 @ 18 3/4″ (door frame sides)
- 2 | 1 x 3 @ 11 1/2″ (door frame top & bottom)
- 4 | 1 x 2 @ 15″ (supports)
- Mark and cut the Xs to fit (explained below)
Step 1.
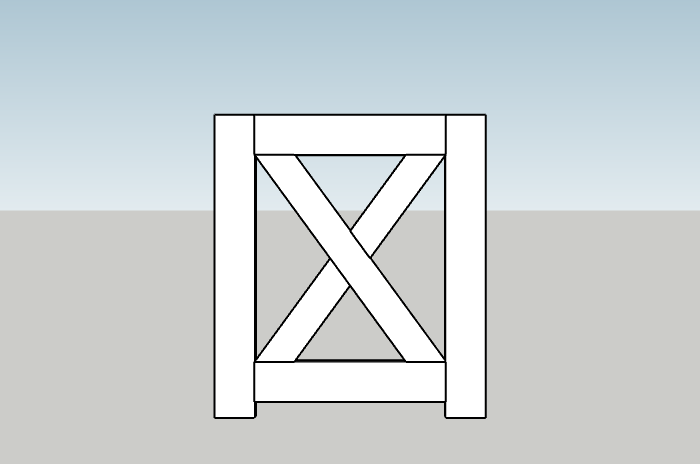
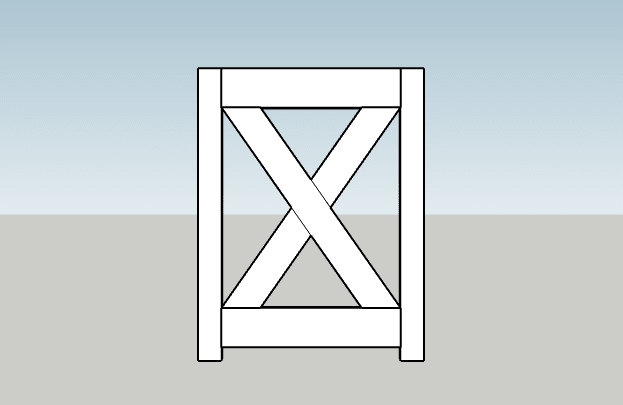
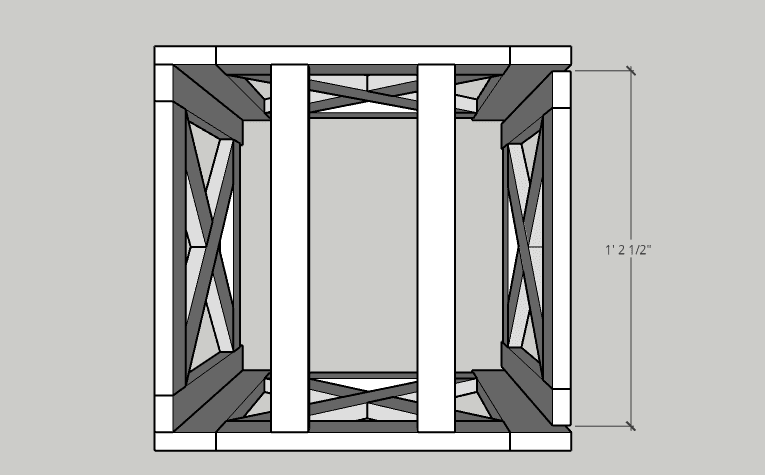
Build the two wide frames with 1x3s as shown. Attach with 1 1/4″ pocket holes and exterior grade wood glue. Place pocket holes along the back of the top & bottom boards to best hide them.
Step 2.
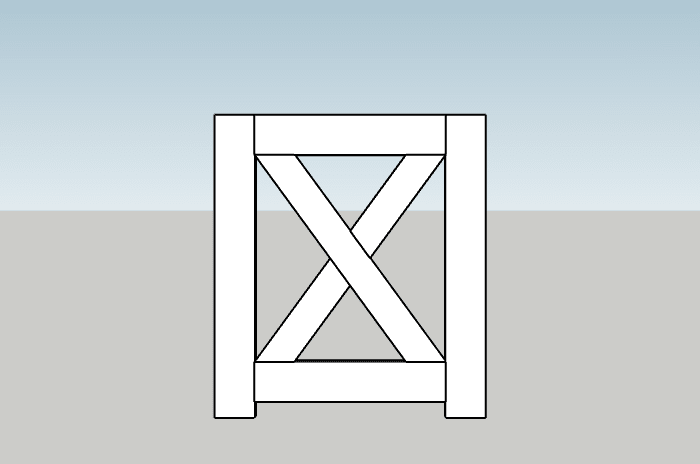
Build the narrow frame with 1x2s (vertical) and 1x3s (horizontal) as shown. Use wood glue and 1 1/4″ pocket hole screws along the back of the 1x3s to best hide them.

Step 3.
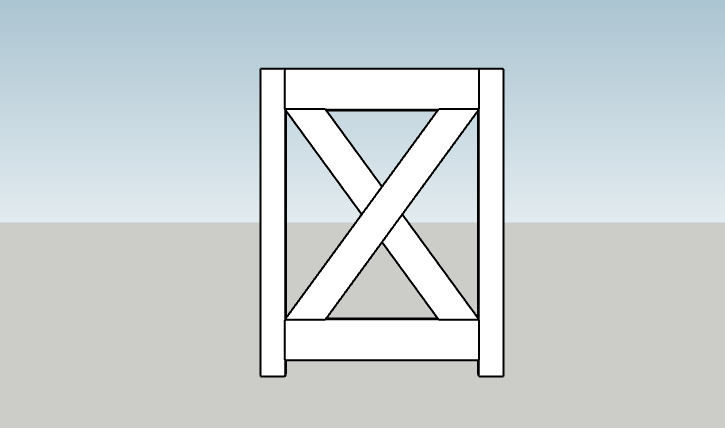
Repeat the same process for the door frame. I built the door 1/2″ narrower to leave room for the hinges (simple butt hinges). Hinge clearance varies, so adjust as necessary for your hinges.
Step 4.
Once you’ve assembled the frames, add the Xs to each. You can calculate the angles, measure, and make the cuts if you want. However, I’ve found that its easiest just to trace and cut – perfect fit every time.
Start with the full length X. Place a 1×3 underneath the frame and line it up so it intersects the top and bottom corners as shown in the diagram below. Draw a line to mark the intersection of the X with the top and bottom frame. You should end up with a 1×3 with two diagonal lines marking the top & bottom intersections. Line your saw miter up with the marked lines and make the cuts.
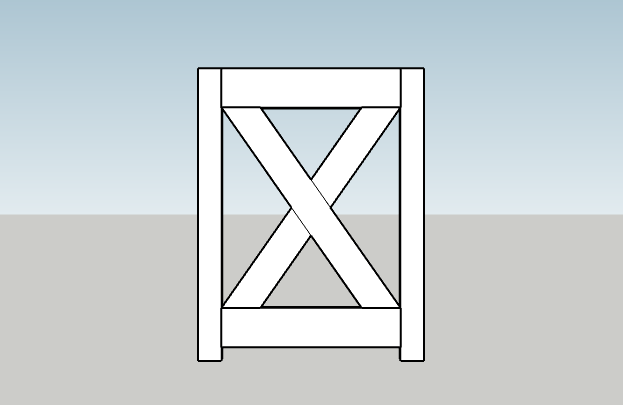
Put the full length X into place in the frame. Place a 1×3 underneath the frame and line it up with top and bottom corners in the opposite direction. Use scrap 1x lumber as necessary to balance the frame for accurate measurements. Mark the intersection with the top frame, full length X (in the middle), and bottom frame. You should end up with a 1×3 with four diagonal lines marking each intersection. Line your saw miter up with each line and make the cuts.
Place pocket holes along the back of the 1x3s to best hide them. Attach the full length X to the frame with wood glue and 1 1/4″ pocket hole screws. Attach the short Xs to the frame and the full length X (in the center) with wood glue and 1 1/4″ pocket hole screws.
Repeat for all three sides and the door frame.
If that explanation made things more confusing, I posted an IGTV video of the process on my Instagram page. Don’t forget to follow along over there for more tips & tricks just like this!

Step 5.
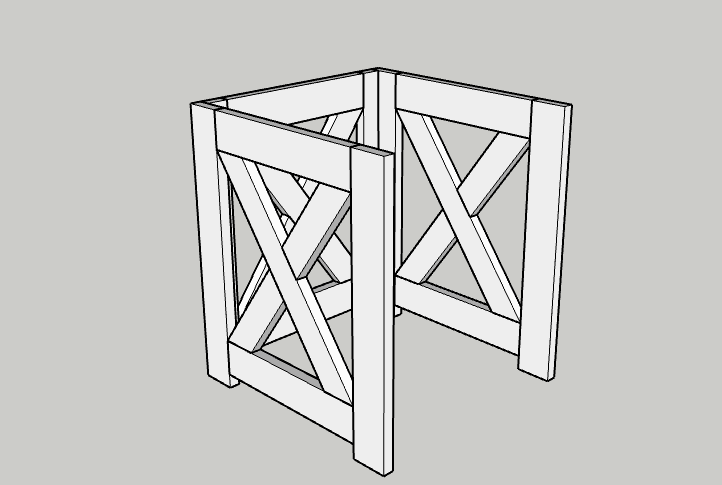
Join the three sides together with 1 1/4″ pocket hole screws and wood glue.


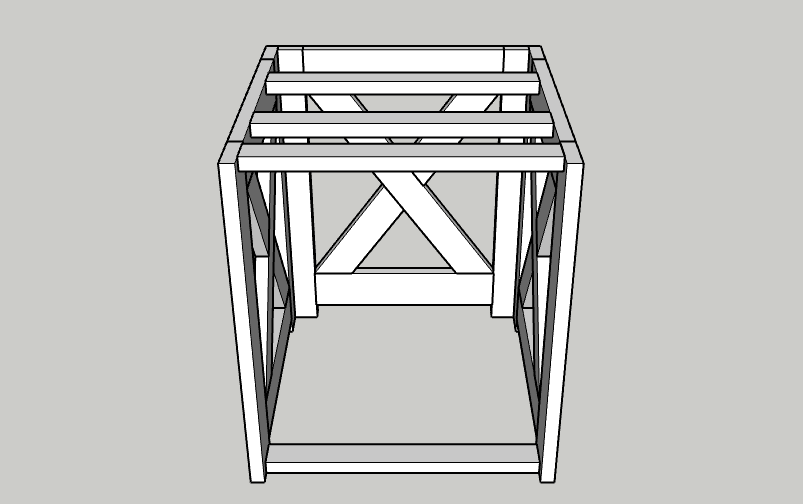
Step 6.
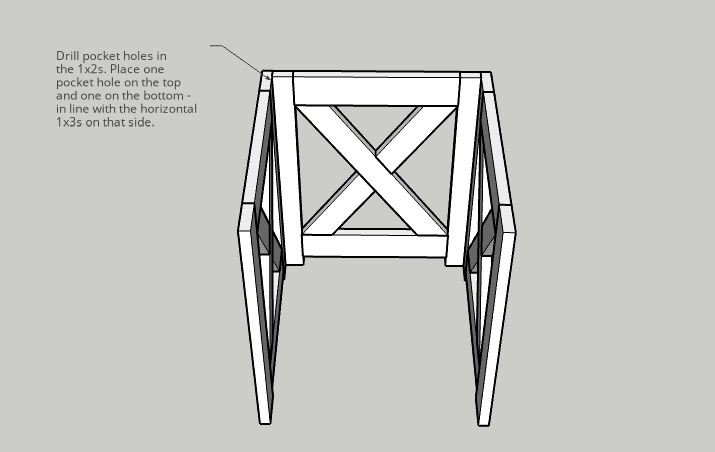
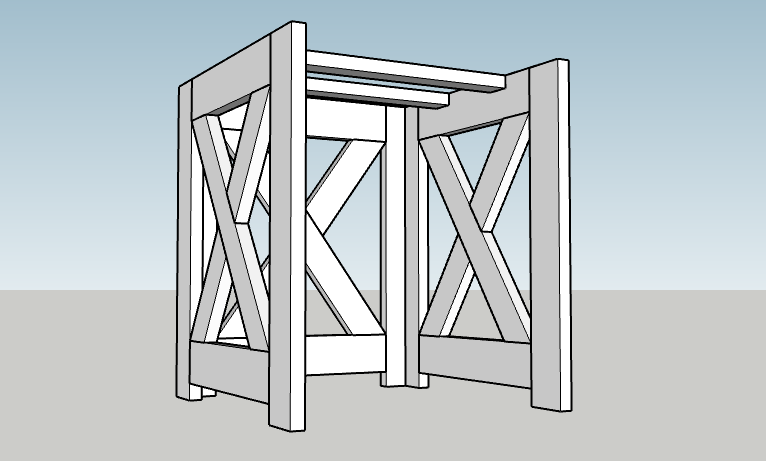
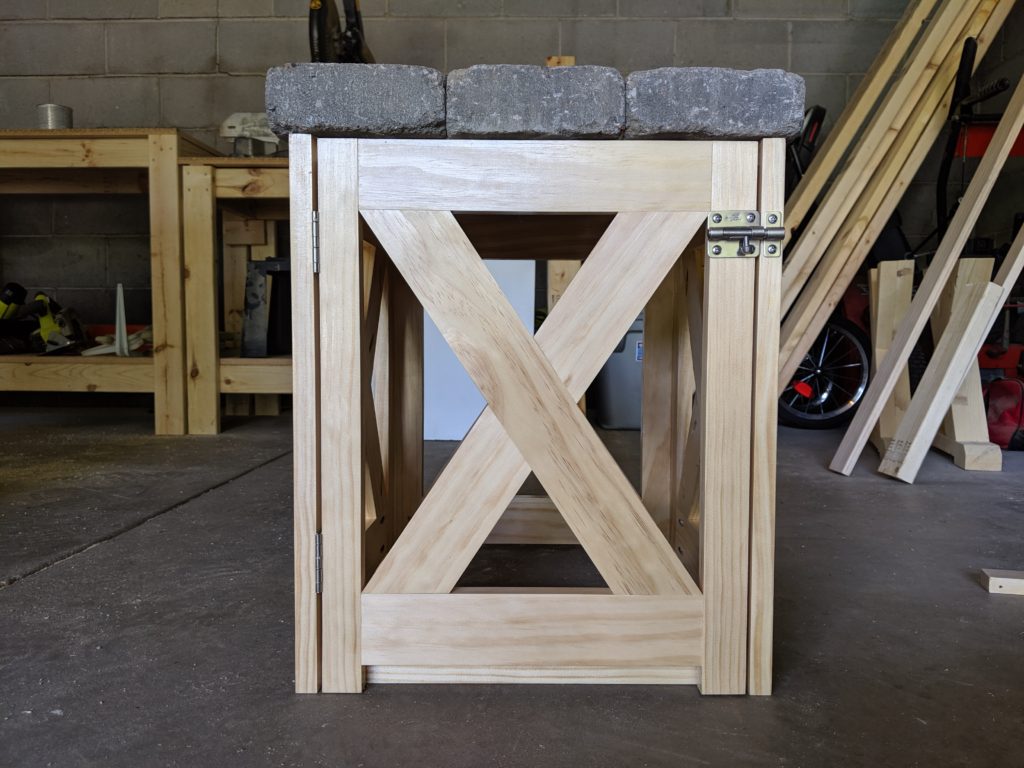
Position the top 1×2 supports as shown and attach with 1 1/4″ pocket hole screws and wood glue. Make sure they’re flush with the top of the frames to support the tabletop. I generally put the pocket holes on the tabletop side of the supports since they get covered. On this table, it’s not as big of a deal so you can drill them on the top or bottom side – you won’t see them either way once it’s done.


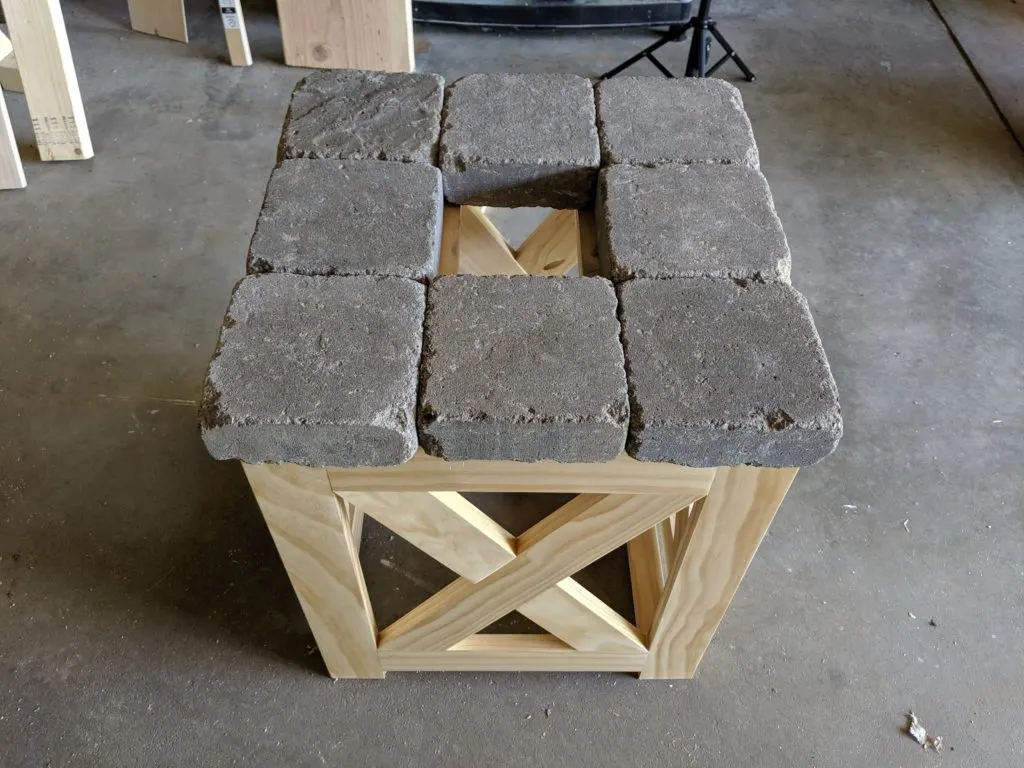
I spaced the supports to hold 6″ landscaping blocks for the tabletop. Adjust as necessary if you use different sized blocks.

Step 7.
Attach the door frame with two hinges and a barrel bolt lock.

The door is 1/4″ shorter than the other three frames. I left about 1/8″ clearance at the top and 1/8″ at the bottom so it will swing freely.

You could also build the door with shorter 1×2 sides rather than full length sides so you don’t have to worry about it catching on the ground. I built it with full length sides so it blends in with the rest of the table. Totally up to you!
Step 8.
Line the far right 1×2 support up with the back of the door and attach to the frame with 1 1 /4″ pocket hole screws and wood glue. This 1×2 supports the edge of the tabletop blocks so you can open and close the door without the blocks wobbling.
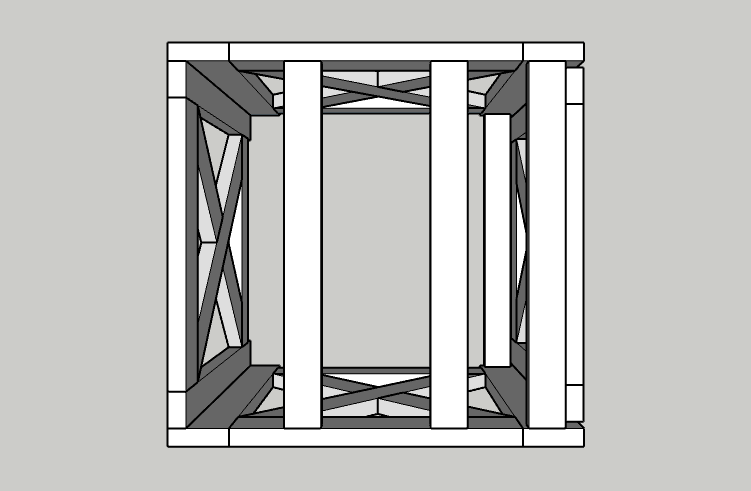

Position a 1×2 flush with the back of the door along the bottom of the table frame as well. Attach to the frame with 1 1/4″ pocket hole screws and wood glue. This 1×2 just keeps things square since the door doesn’t support the frame at all.

Sand and finish the table frame as desired. I left it the natural pine color and simply sealed it with Varathane Exterior Spar Urethane in Gloss (available at Home Depot).
Step 9.
Once the finish is dry, lay the landscaping blocks out on the tabletop to make sure everything fits correctly. If you use 6″ square blocks, there is a 1/2″ overhang on all sides of the tabletop. Leave the center open for the fire pit propane connection.

Attach the landscaping blocks to the frame with exterior construction adhesive.


Let the adhesive dry according to the manufacturer’s instructions.
Step 10.
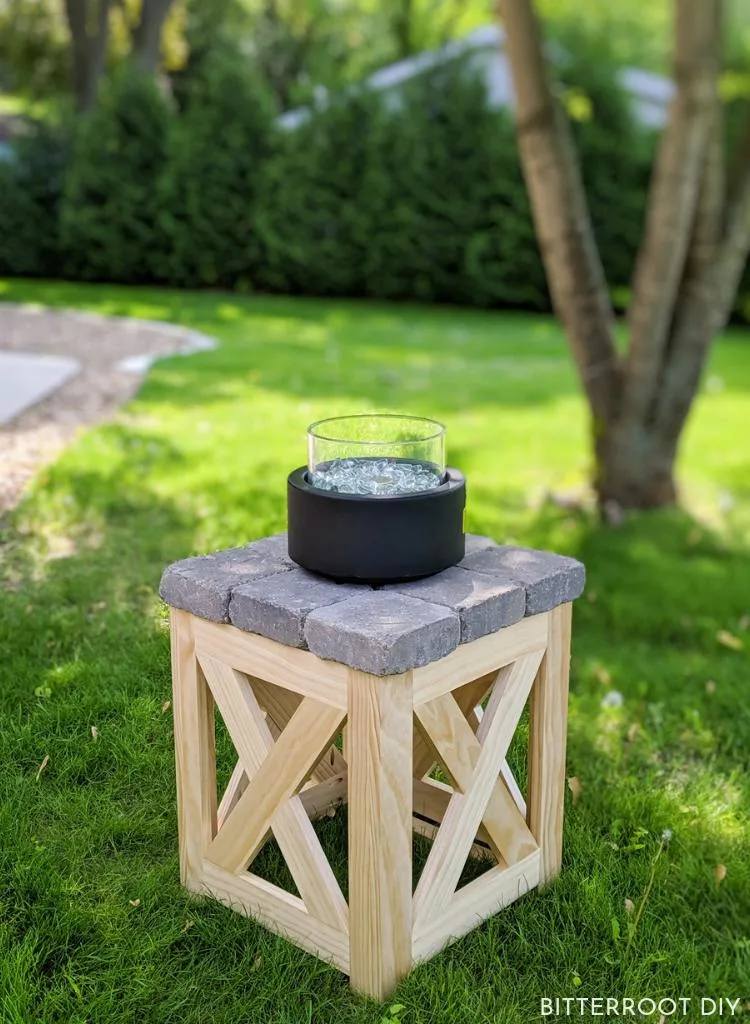
Put the fire pit in place and light ‘er up!
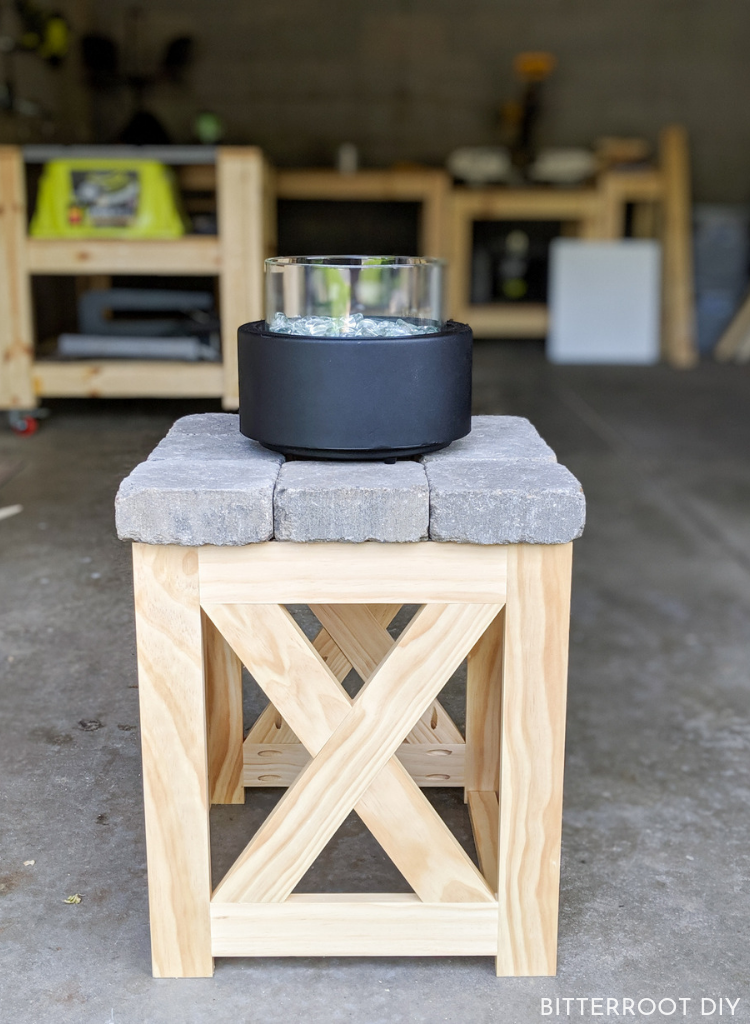

I didn’t have the propane hooked up for the photos, but you get the idea!
I found this tabletop fire pit at Walmart and we’re happy with it so far. There are a few on Amazon as well. Click on any of the photos below for more details. Just remember to adjust dimensions to fit the one you use:


Most of the tabletop fire pits are set up for 1lb propane tanks. If you want to use a 20lb tank, you can buy a converter hose and run it from the fire pit to the tank (that’s what I did).
Please let me know if you have any questions and I’ll get back to you as soon as possible!


Thanks for stopping by!
For more project ideas, you can find me on Pinterest. And to stay up to date with the latest shenanigans, follow me on Instagram.