Hey all, thanks for stopping by Bitterroot DIY!
For more project ideas, you can find me on Pinterest. And to stay up to date with the latest shenanigans, follow me on Instagram.
I recently got a jigsaw and have been itching to try it out. It’s been sitting in the garage the last couple weeks while I tried to come up with a project for it, so I’m so excited I finally got to pull it out for my latest creation!
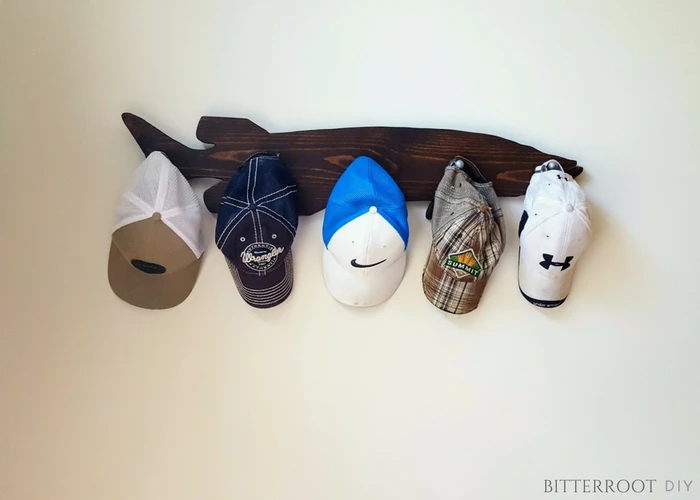
Lately, Joseph (the Mr) has been looking for some sort of rack to organize his baseball caps, and I have such a large pile of scrap wood in the garage that I figured I could try to use some of it up.
I asked Joseph if he wanted any cool shape for the hat rack (so I could use the jigsaw), expecting him to request a diamond or maybe some cool wavy shapes or something like that … nope.
He wanted a fish.
Not just any fish.
A muskie.
Ummm … challenge accepted?
So, if you have a jigsaw and a spare board lying around, this project is for you!
Tools & Supplies:
- Jigsaw
- Orbital Sander
- 1 x 6 Board
- Picture Hanging Hooks
- Drawer Knobs
- Varathane Stain in “Dark Walnut”
- Minwax Polycrylic “Clear Satin”
Step 1.
Resize and print your image to the desired size. I found an image online and then resized and printed it over multiple pages using Paint.
Step 2.
Cut out your image and tape it together.
Step 3.
Tape the image to your board and trace it. If you have someone who can hold the image on the board, that would work fine. I just taped it down in multiple places so it wouldn’t move as I traced around the edge.
It’s difficult to see in this picture, but if you look closely you’ll be able to see the faint outline of the fish after I traced it:
 Step 4.
Cut out your shape with a jigsaw.
Step 5.
Pre-drill holes for your drawer knobs. The drill bit size depends on your knobs. Make sure the drill bit is about the same size as the bolts with the drawer knobs so you can easily insert them into place.
I spaced the knobs 7.5” apart in order to leave enough room for the hats to hang.
Step 6.
Sand and finish as desired.
I finished with Varathane’s “Dark Walnut” (one of my favs) and two coats of Minwax “Clear Satin” Polycrylic.
Step 7.
Attach your drawer knobs or hooks.
Step 8.
I decided to add a little decoration to the drawer knobs I had by wrapping them with twine. I placed a bead of hot glue at the bottom of the knob, wrapped the twine around 4 times, and glued into place at the top.
Easy peasy 🙂
Step 9.
To finish things up, add hooks to the back for hanging and then find a good spot to display your hats!
Let me know if you have any questions and I’ll get back to you as soon as possible!
And, if you’re interested in this project, I’d love if you’d pin it for later!


22 Easy DIY Hat Rack Ideas for Any Home | SawsHub
Thursday 13th of June 2019
[…] Find the instructions here: tylynnm.com […]