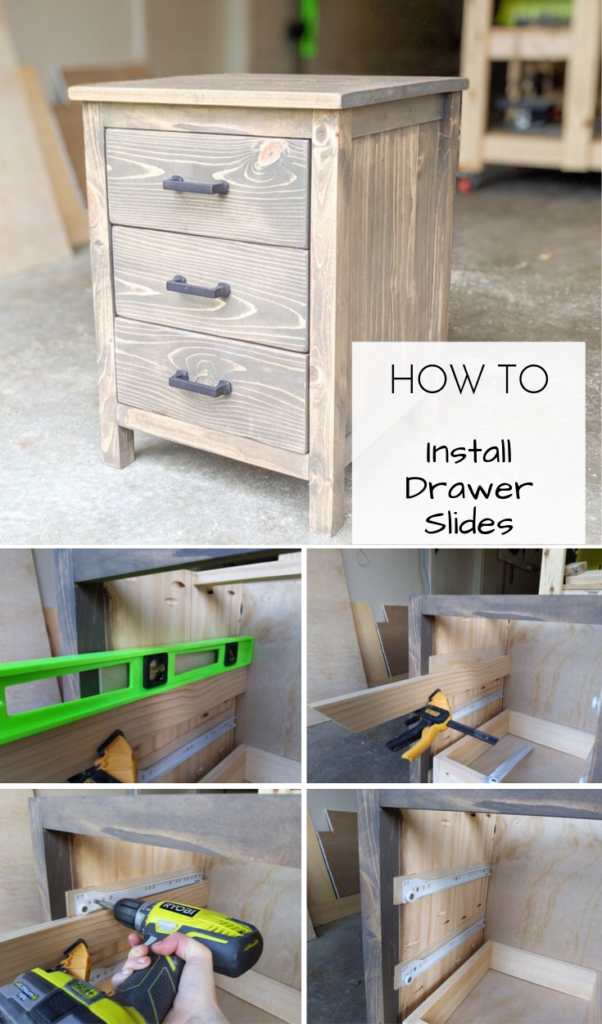
Install drawer slides quickly and easily. This tutorial focuses on how to install bottom mount drawer slides.

This post may contain affiliate links. If you make a purchase from one of the links, I may make a small commission at NO EXTRA COST to you. This helps keep the tutorials and plans free here at Bitterroot DIY. Thank you for your support! See my full disclosure here.
Tools & Materials
- Drill
- Bottom Mount Drawer Slides
- Tape Measure
- Clamps
- Level
- Pencil
- Safety Glasses
It’s all about drawers over here lately and you can’t have drawers withouuut … bum bum bum … you guessed it – DRAWER SLIDES! The most common types of drawer slides are bottom-mount or side-mount. For side- mounted slides, I typically use these full extension ball bearing ones from Liberty Hardware. However, depending on the application, I also use these bottom-mount slides from Amazon quite a bit.
Installation for both types of slides is similar, but this tutorial focuses on how to install bottom-mount slides.
Step 1.
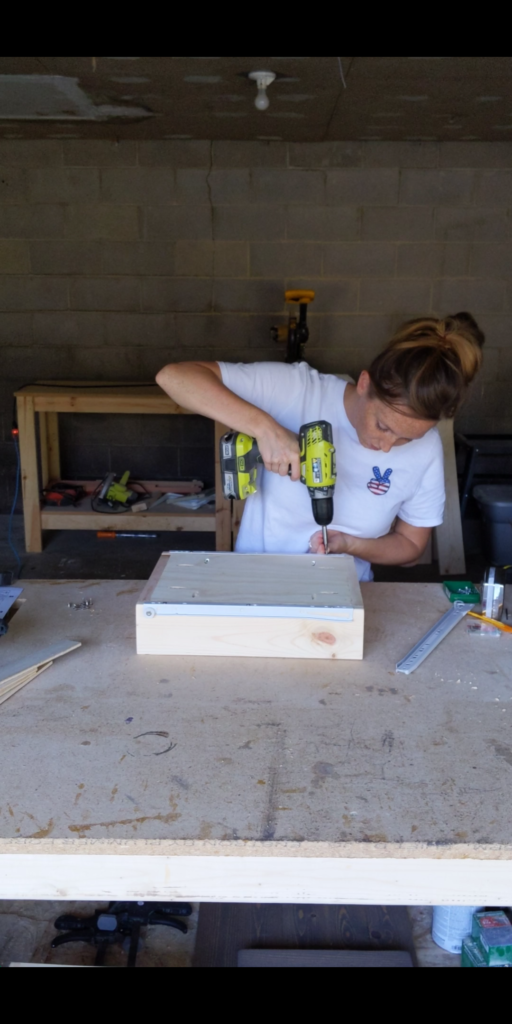
Install the drawer-side slides on the bottom of the drawer.

Step 2.
Measure to where you want the bottom of the drawer to sit and clamp a support board in place.

Make sure the support is level from the front to the back.

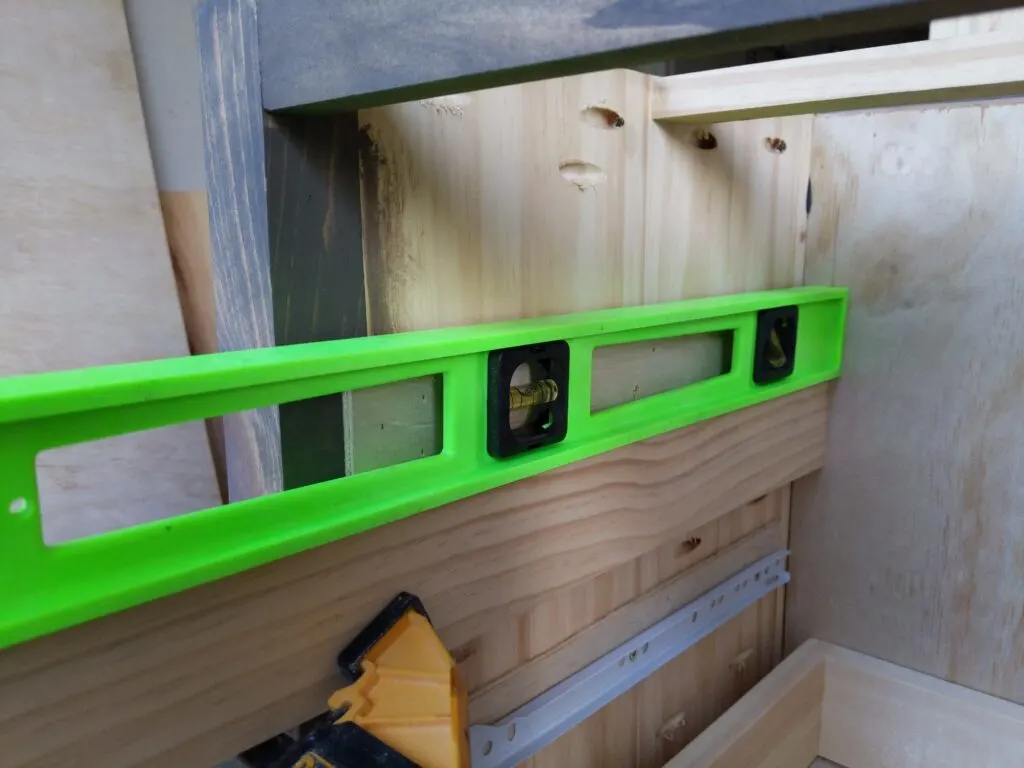
On this particular project, I had to block the drawer slides out 1/4″ on each side. If necessary, add blocks to the slide location. Otherwise, skip to the next step.

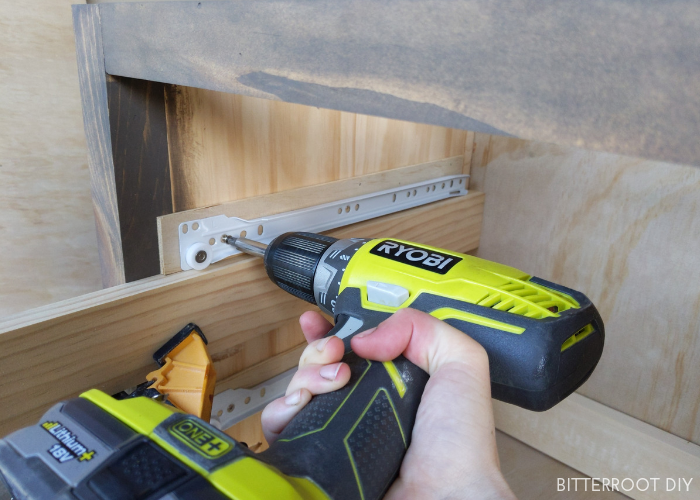
Step 3.
The location of the slide inside the frame depends on where you mounted the slide to the bottom of the drawer.
Finding the correct location is critical with inset drawers since they have to stop in line with the face frame. It’s not as important with drawers that stop on the surface of the frame since the drawer front will stop it, but you still want it pretty close.
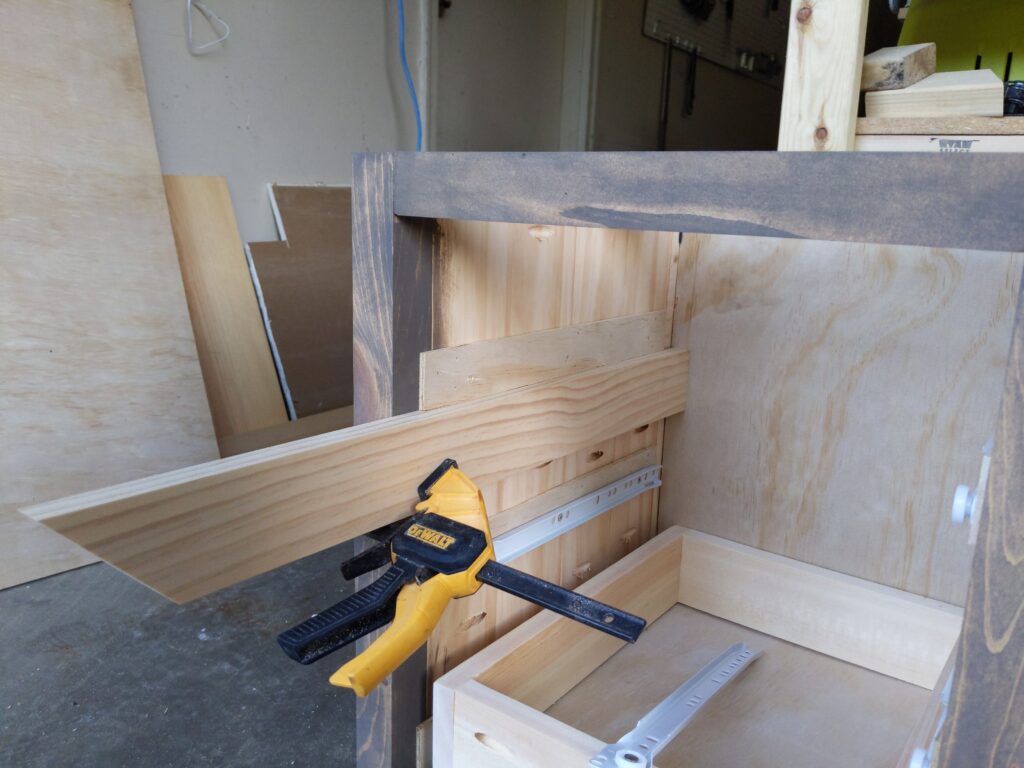
Inset Drawers: Attach the slide on the drawer at the very front of the drawer box, butted up against the back of the drawer face. For inset drawers with a 3/4″ face, position the slide 3/4″ back from the front of the frame.
The Project in the Photos: You may notice that the slides are set back further than 3/4″ in these photos. The drawers are 15″ long so I used 14″ slides. To get max use out of the drawer, I positioned the slides 1/2″ back from the front of the drawer box. In order for the drawer to be inset, I attached the slides to the frame at 1 1/4″ (which is 1/2″ + 3/4″) back from the front of the face frame.
Easiest Method: If you don’t want to do all the math, you can put the slides together on the drawer and insert it into the frame. Close the drawer to where you want it to sit and mark the location of the slide. Pull the drawer out and line the slide up where you marked it.
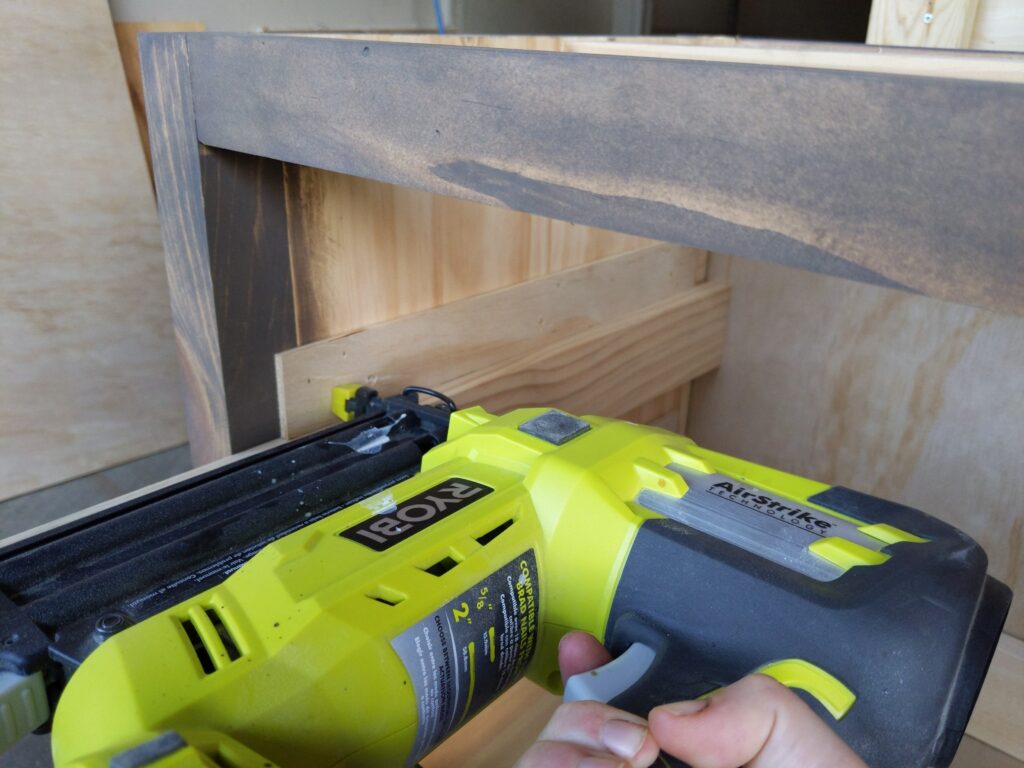
Once you figure out the front-to-back location, set the slide on your support board and attach it to the frame.

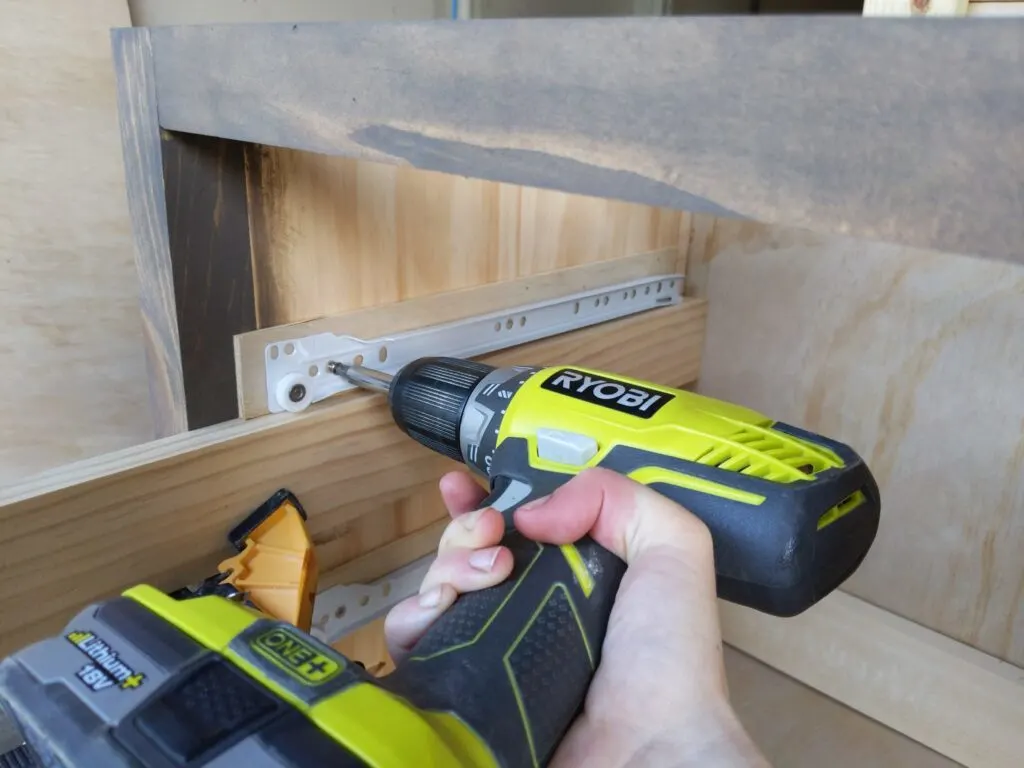
It’s very important that the opposing slides on either side of the frame are at the exact same position so the drawer doesn’t wiggle.
Repeat for as many drawers as necessary.


Make sure to take your time and triple check that things are level as you go.
Please let me know if you have any questions and I’ll get back to you as soon as possible.


Thanks for stopping by!
For more project ideas, you can find me on Pinterest. And to stay up to date with the latest shenanigans, follow me on Instagram.