
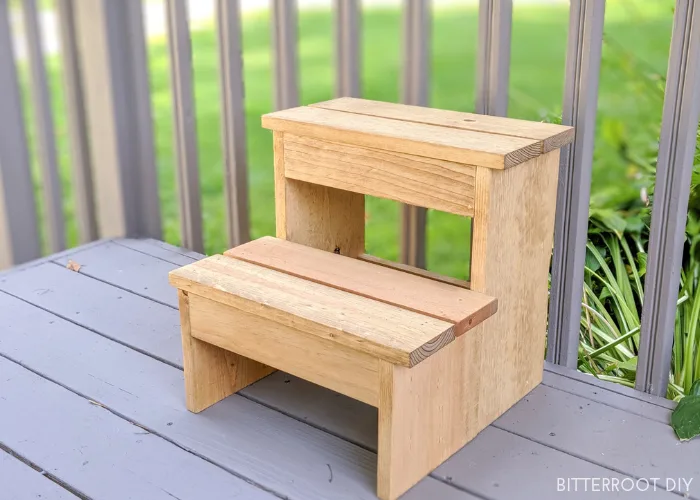
Build a simple kids step stool with this step by step tutorial.

This post may contain affiliate links. If you make a purchase from one of the links, I may make a small commission at NO EXTRA COST to you. This helps keep the tutorials and plans free here at Bitterroot DIY. Thank you for your support! See my full disclosure here.
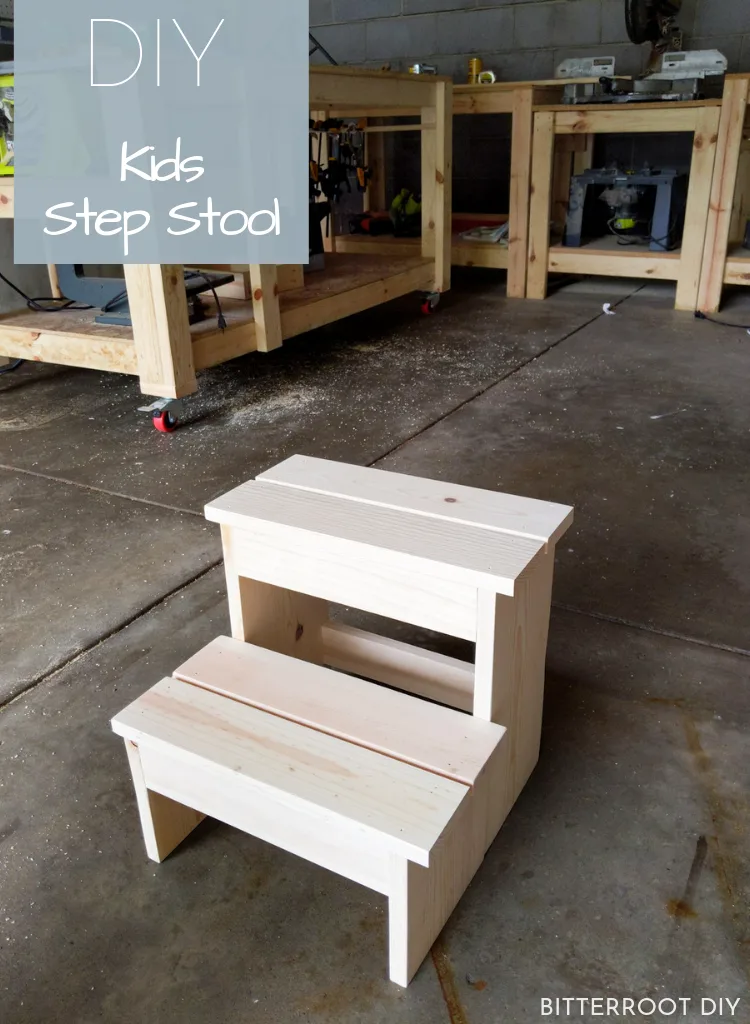
There are so many ways to build a kids step stool, but I think this is one of my faves. It’s medium sized, quick to build, and a great way to use up some scrap wood. All you need is a few 1x4s, 1x3s, and 1x8s.
Enjoy the plans!
Tools & Supplies:
- Miter Saw
- Kreg Pocket Hole Jig
- Drill
- Brad Nailer
- Tape Measure
- Clamps
- Exterior Wood Glue
- 1 1/4″ Screws
- 1 1/2″ Finish Nails
- Speed Square
- Pencil
- Safety Glasses
- Ear Protection
Lumber:
- 1 | 1 x 4 @ 6′
- 1 | 1 x 3 @ 6′
- 1 | 1 x 8 @ 6′
** or use up scrap wood **
Cuts:
- 4 | 1 x 4 @ 15″ (steps)
- 4 | 1 x 3 @ 12″ (supports)
- 2 | 1 x 8 @ 7″ (short sides)
- 2 | 1 x 8 @ 14″ (tall sides)
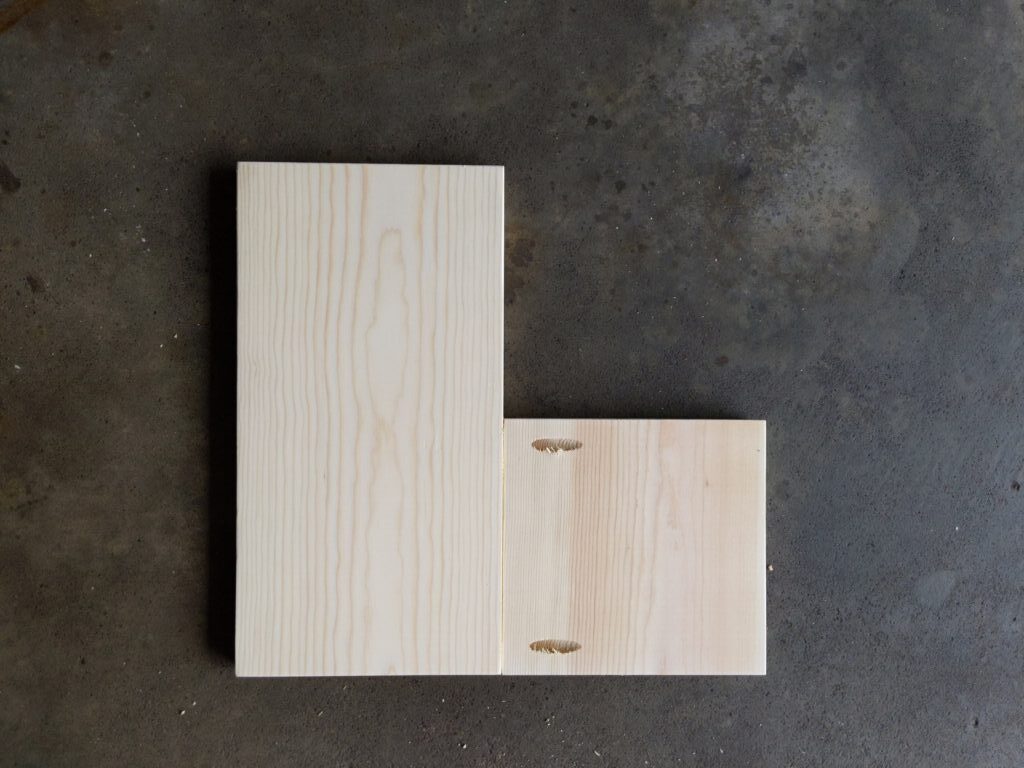
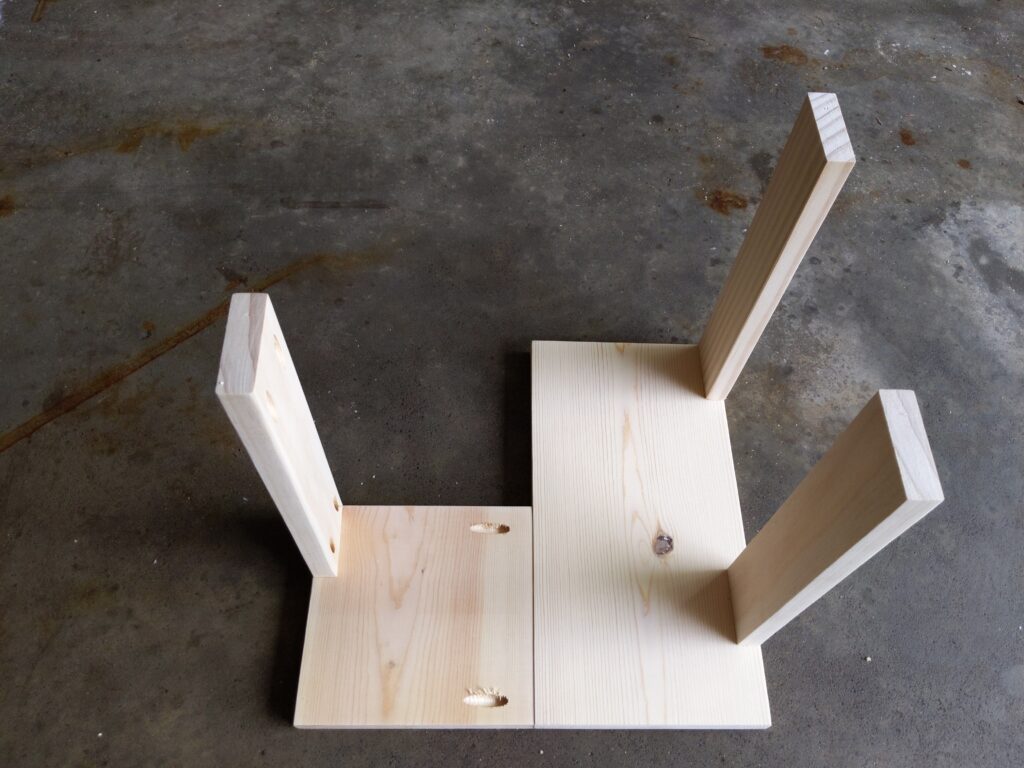
Step 1.
Build the sides of the step stool. Attach the shorter 1×8 to the taller 1×8 with wood glue and 1 1/4″ pocket hole screws.
Build the sides opposite each other so the pocket holes face inward when you put them together.

Step 2.
Use wood glue and 1 1/4″ pocket holes to attach both sides of the stool to each other with 1x3s.
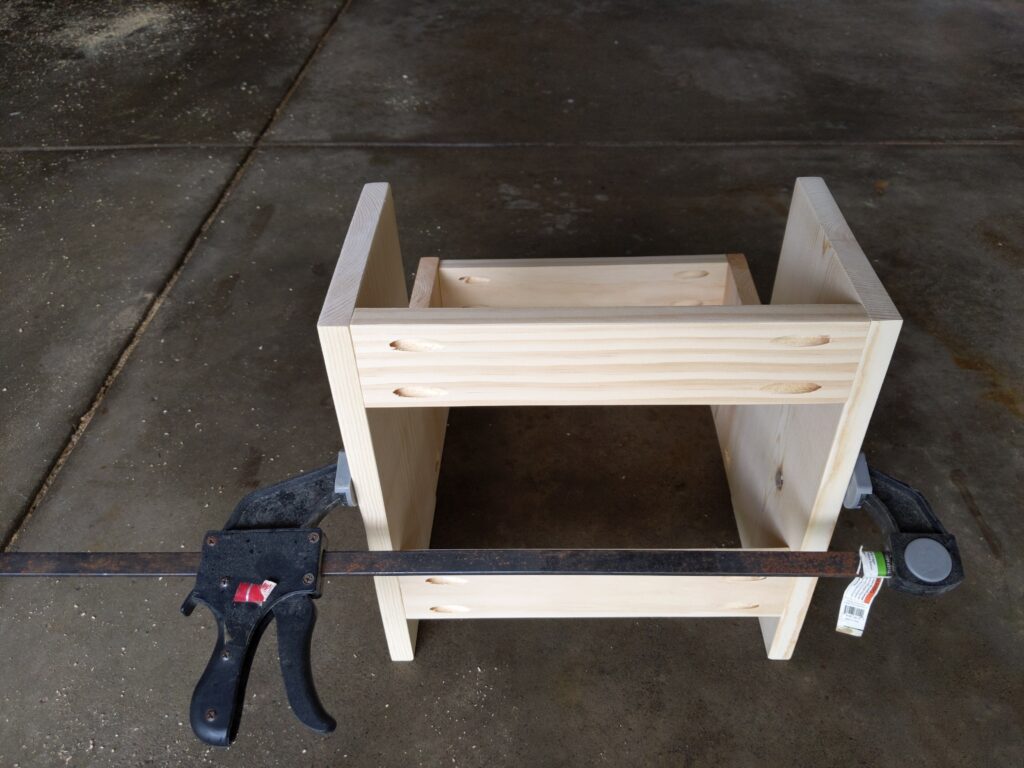
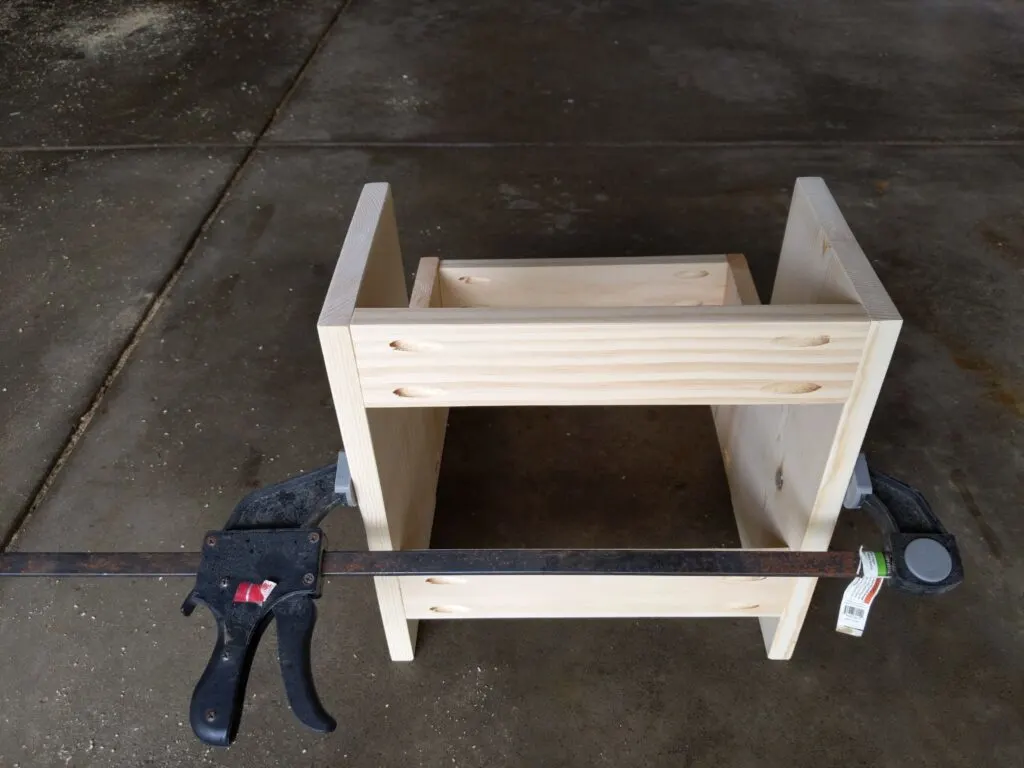
Place a 1×3 flush on the front and back of each step and one about 3″ from the bottom on the back.

The above photo is missing the front support on the top step … I may have forgotten to attach it before attaching the bottom step … but you can see it below:

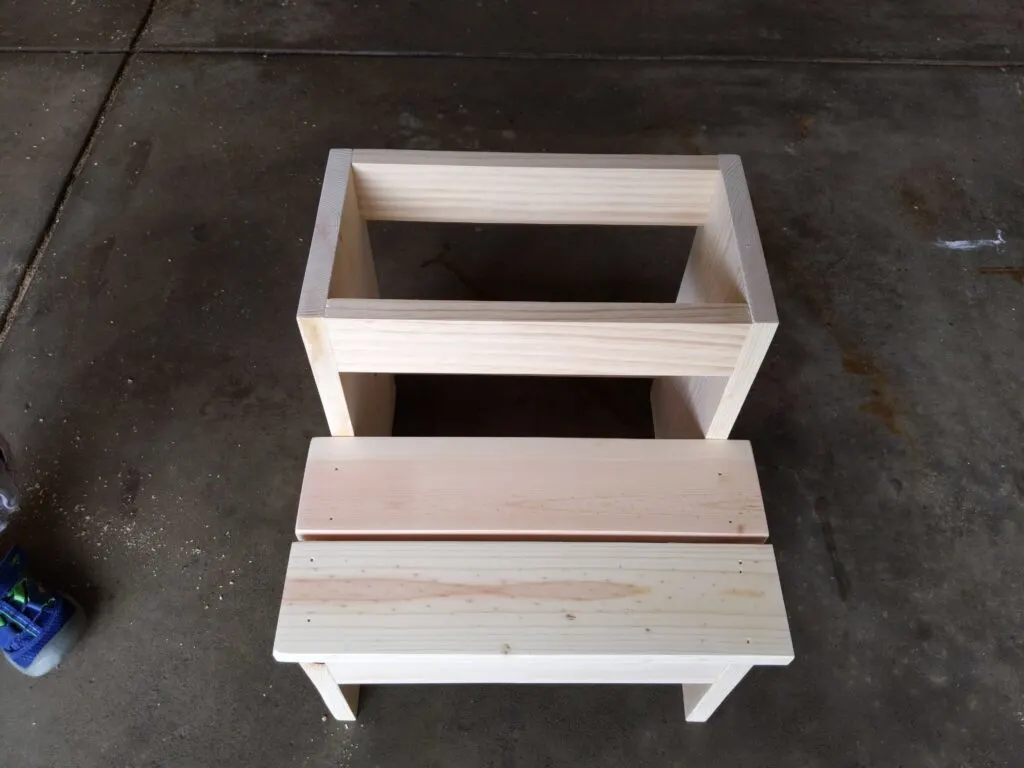
Face pocket holes towards the back of the stool to best hide them.
You may not be able to fit a full size drill between the sides of the stool to attach the bottom step supports. I used my impact driver since it’s a little shorter, which worked well. Try a short drill or driver if you run into the same issue. Or you can always screw the supports in from the outside, countersink the screws, and fill with wood filler.


Step 3.
Center the steps and attach them with wood glue and 1 1/2″ finish nails.
Leave a 3/4″ overhang on both sides and about a 1/2″ gap between slats.

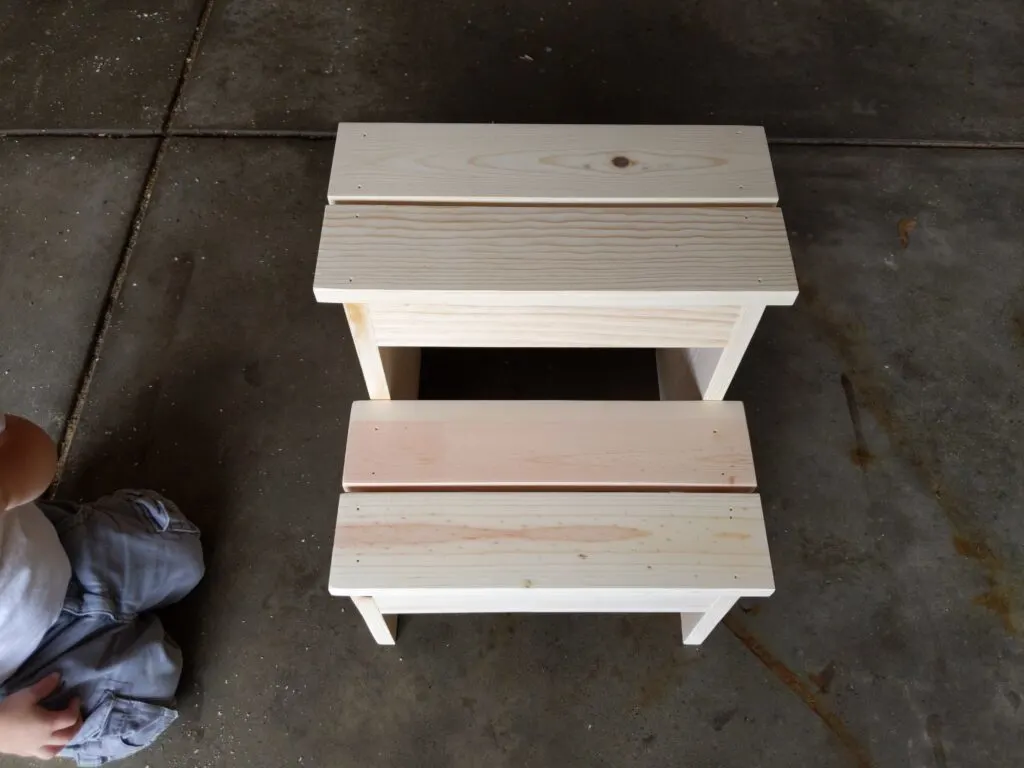
Position the back slats flush with the back of both steps. When you leave the 1/2″ gap, it will push the front slat out just slightly for a little overhang to the front of each step.
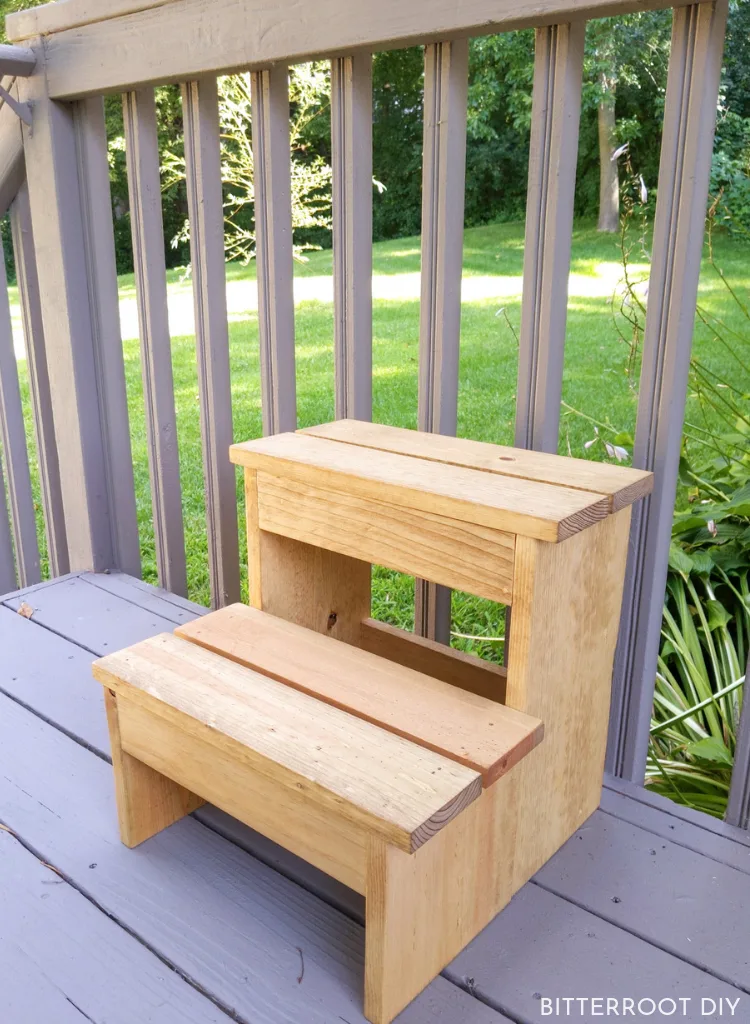
Let all the wood glue dry, sand, and finish as desired! I finished this stool with Watco Danish Oil in medium walnut.

Please let me know if you have any questions and I’ll get back to you as soon as possible!


Thanks for stopping by!
For more project ideas, you can find me on Pinterest. And to stay up to date with the latest shenanigans, follow me on Instagram.

rasel
Friday 21st of August 2020
This is very helpful for us. we can build kids step stool by tutorial.thank you so much.