
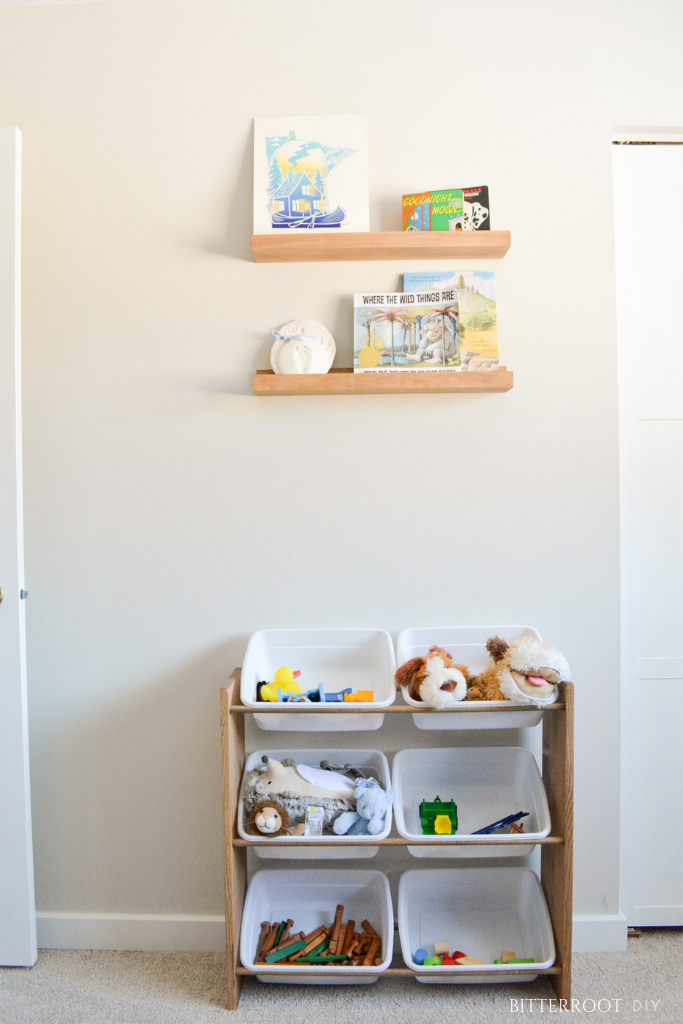
Today I have the plans for piece #2 of Weston’s new bedroom furniture set! In case you missed it, I shared piece #1 on Tuesday – a custom DIY 3 Drawer Dresser!
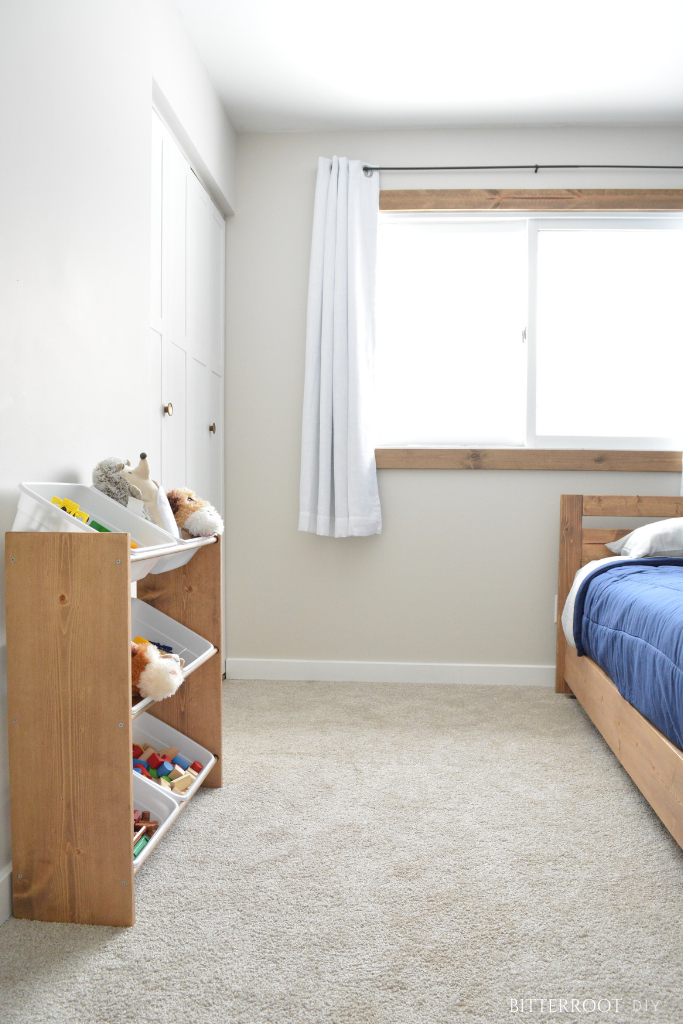
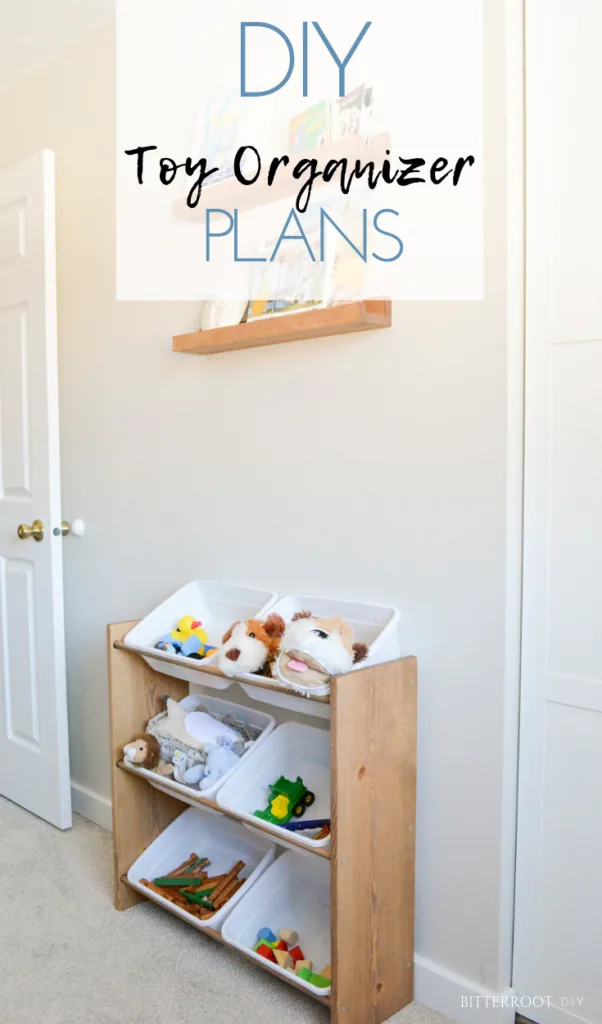
This year I’m participating in a monthly challenge with a group of very talented bloggers and, as luck would have it, February’s theme is “Build to Organize”. So, sticking with the same theme of “places to put things”, the second furniture piece is a DIY Kids Toy Organizer!

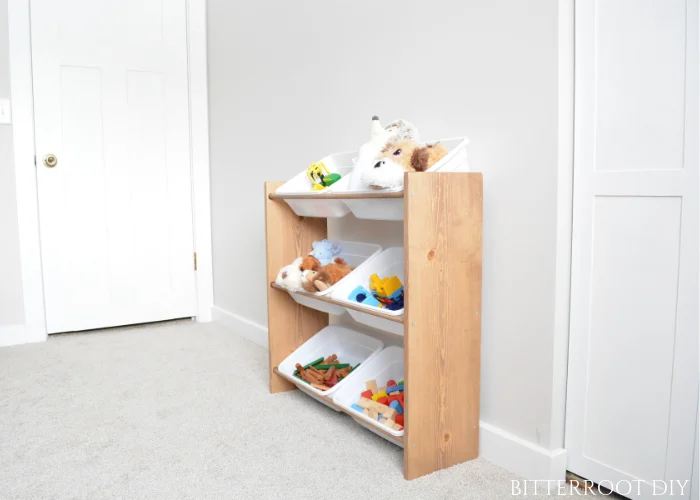
I’ve seen these shelves floating around online and really like the sleek design. The bedroom is pretty small, so I was looking for something simple that wouldn’t take up a lot of space. The biggest challenge was finding baskets that didn’t break the bank … is it just me, or are baskets and cute storage containers a little pricey!?! I love the look of cute baskets but can’t always justify the cost. So, if you’re in the same boat, I discovered a little trick for this toy organizer – Walmart dish bins (8 Qt). I don’t have a link because they’re more expensive online than in the store, but they’re near the kitchen organization stuff. They’re just basic, white, plastic containers. Since they aren’t considered “storage baskets”, they’re cheap cheap cheap … $0.96 cheap. Yes. $0.96 … Such a score.
Now, if you’re looking for more stylish bins … and really, no judgement here – I’d like to get cute bins eventually … here are a few options that will fit this shelf:
And, one of the best parts of DIY, you can adjust the measurements if you find a different set of baskets you want to use!
Enjoy the plans! And don’t forget to check out all the other blogger’s great DIY organizer ideas at the bottom of this tutorial!

This post may contain affiliate links. If you make a purchase from one of the links, I may make a small commission at NO EXTRA COST to you. This helps keep the tutorials and plans free here at Bitterroot DIY. Thank you for your support! See my full disclosure here.
Tools & Supplies:
- Miter Saw
- Orbital Sander
- Drill
- 3/4″ Forstner Bit
- 1/8″ Drill Bit
- 1 1/4″ Screws
- Wood Glue
- Tape Measure
- Pencil
- Safety Glasses
- Ear Protection
Lumber:
- 1 | 1 x 10 @ 6′
- 6 | 3/4″ Dowels @ 3′
Cuts:
- 2 | 1 x 10 @ 27″ (legs)
- 6 | 3/4″ Dowels @ 29 1/4″ (rails)
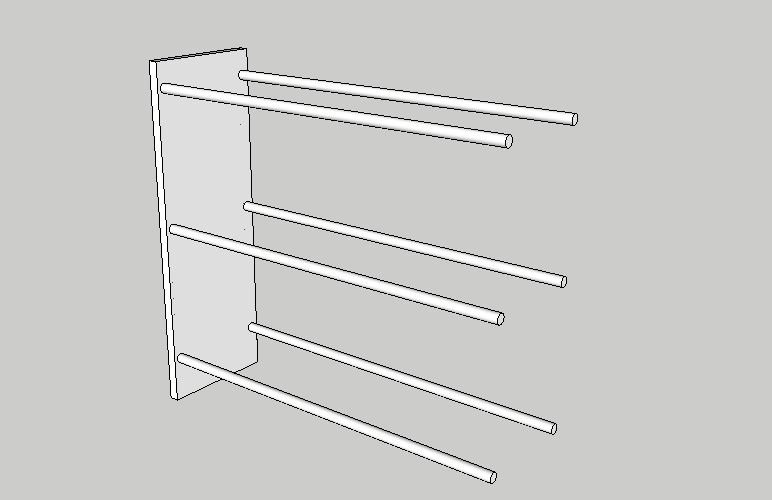
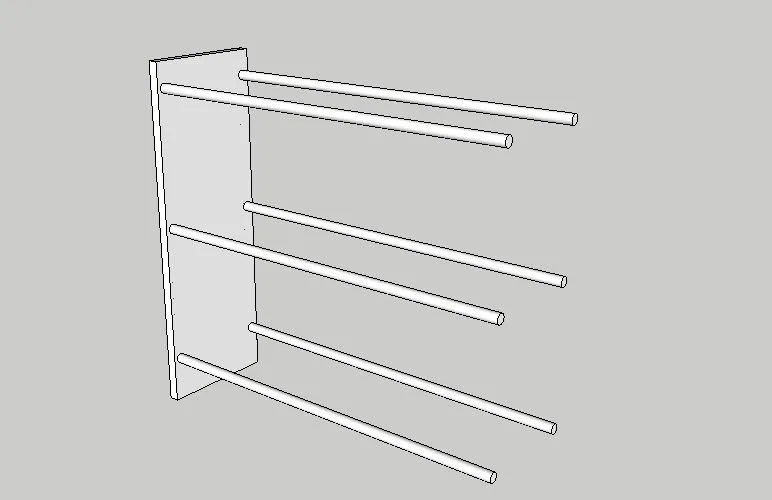
Step 1.
Start by marking the center for each dowel hole on the shelf legs. The dimensions shown are to the center-points of each dowel. Place the center of the holes 1/2″ from the outside edge of the board (so the edge of the dowel will be approximately 1/4″ from the edge).
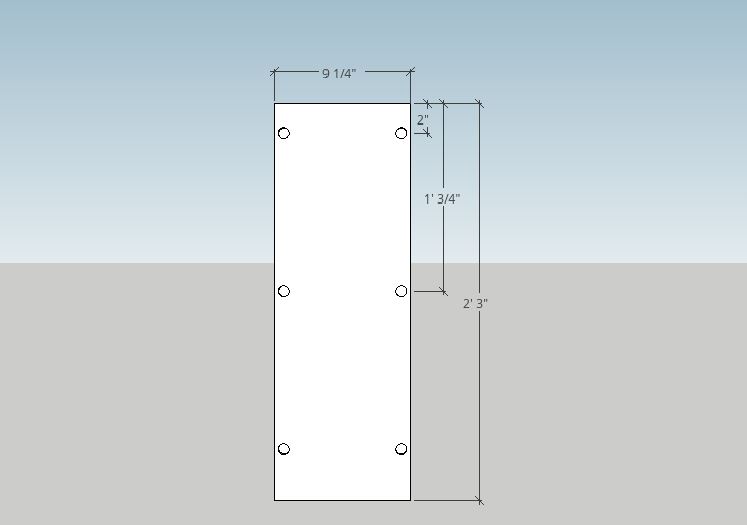

Drill out each dowel hole 3/8″ deep with a 3/4″ forstner bit. Once you’ve drilled the 3/4″ holes, drill all the way through the center of each hole with an 1/8″ bit. These are the pre-drilled holes to secure the dowels with screws later.
Step 2.
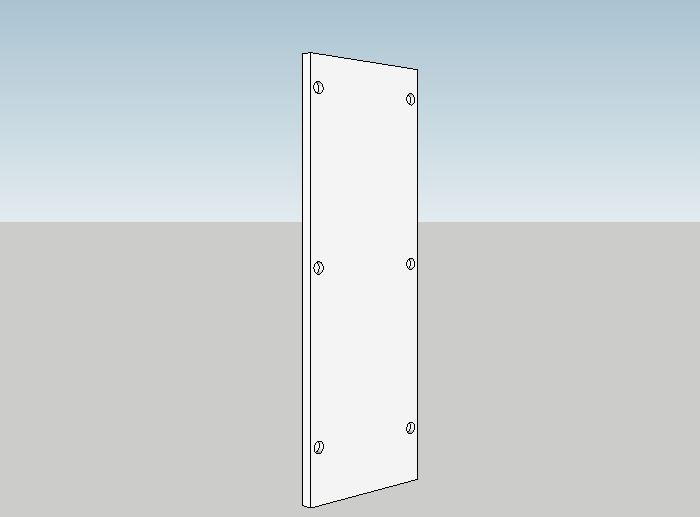
Repeat for the opposite leg board. When you’re done, you should have 2 legs that look like this:

Step 3.
Add a dollop of wood glue to each dowel end and position the dowels in place on one shelf leg. The dowels should be a pretty tight fit so they’ll stay in place while you work on the opposite leg.
Adjust and work the second leg into place on the dowels.
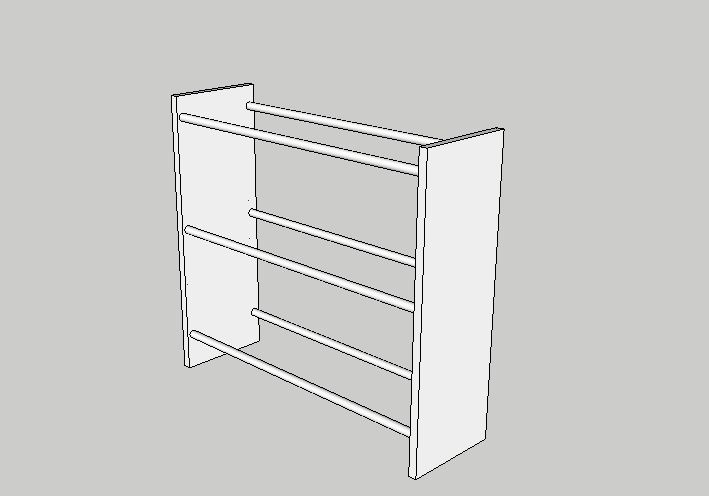
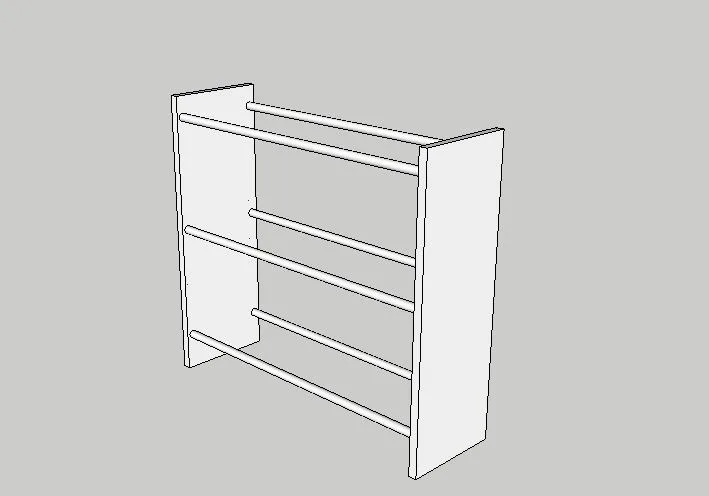
Once all the dowels are in place, reinforce the dowels with 1 1/4″ screws through the end of each dowel from the outside of each leg.
Step 4.
Once the wood glue dries, sand and finish as desired. I used a custom mix of Varathane Provincial and Sun-bleached and then sealed it with semi-gloss spray on polyurethane.
You can paint the exposed screws to match your decor, or leave them as-is. I was originally planning to paint them black, but they’re not very visible so I may just leave them as-is … time will tell!
Please let me know if you have any questions and I’ll get back to you as soon as possible!
And I’d love to see it if you build from these plans! Tag me on Instagram @bitterrootdiy.


Thanks for stopping by!
For more project ideas, you can find me on Pinterest. And to stay up to date with the latest shenanigans, follow me on Instagram.


Amanda
Friday 18th of September 2020
Love this!!! What size bins did you get?!
tylynn_sattler
Monday 21st of September 2020
8 quart dish bins from Walmart. They're in the pots/pans/dishes section :)
Christine
Thursday 28th of February 2019
What a great way to organize the kiddos stuff- I could even see using that in a mudroom or something! Great plan- thanks for sharing!
Amy
Wednesday 27th of February 2019
Such a great project! And yes when did baskets and storage options become so expensive, that's awesome that those are dish pans!
Lisa
Tuesday 26th of February 2019
This is such a great DIY project - so much better than the flimsy bin racks you can buy!
tylynn_sattler
Tuesday 26th of February 2019
Thanks Lisa!
Jamie @ Southern Revivals
Tuesday 19th of February 2019
Seriously great idea because can you ever have enough toy storage?! Super cute, too!
tylynn_sattler
Tuesday 26th of February 2019
Thanks Jaime!