
Build a DIY mobile workbench with space for a table saw with these step-by-step plans.

This post may contain affiliate links. If you make a purchase from one of the links, I may make a small commission at NO EXTRA COST to you. This helps keep the tutorials and plans free here at Terrace Place. Thank you for your support! See my full disclosure here.
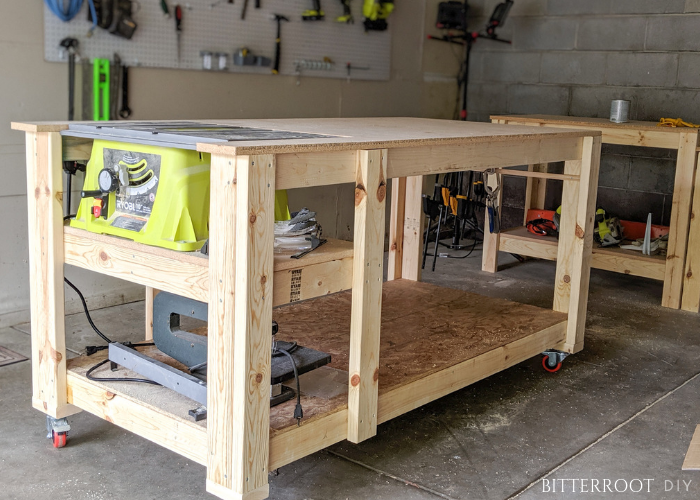
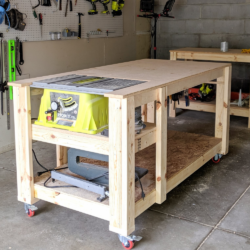
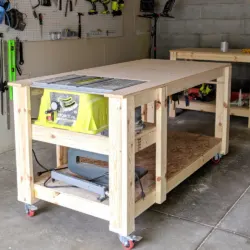
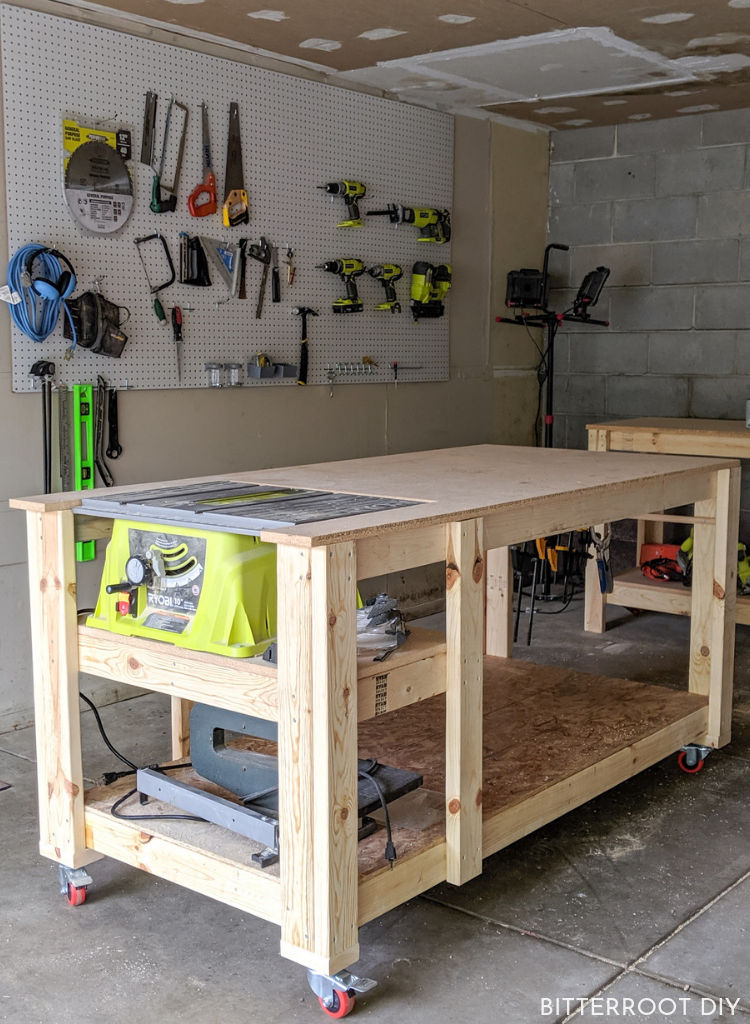
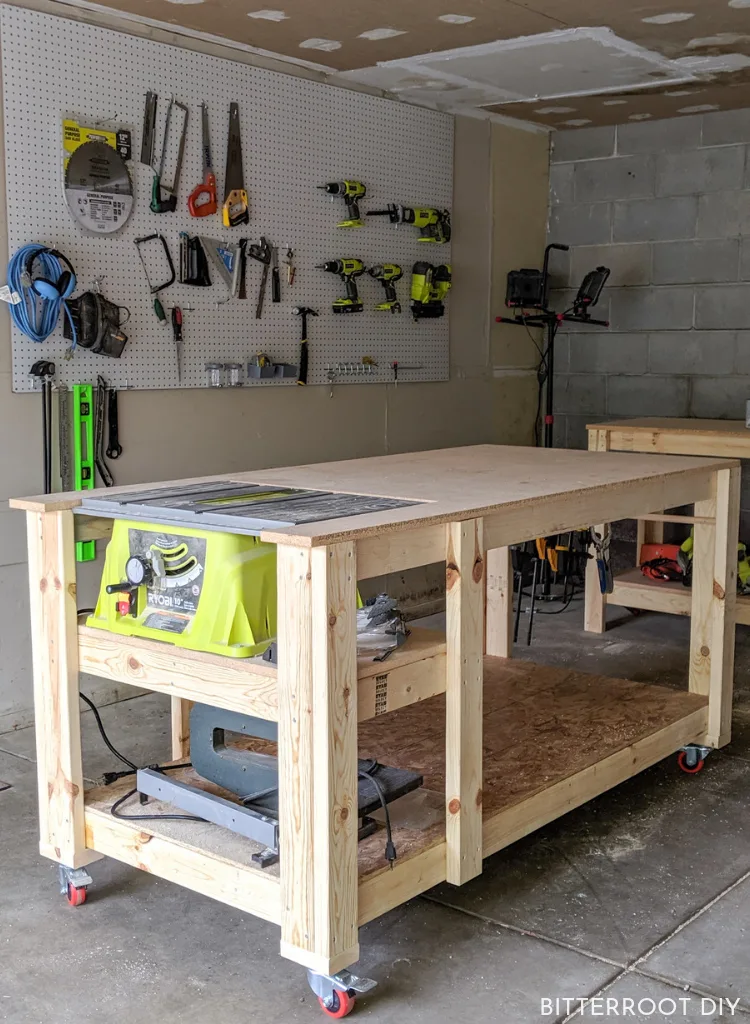
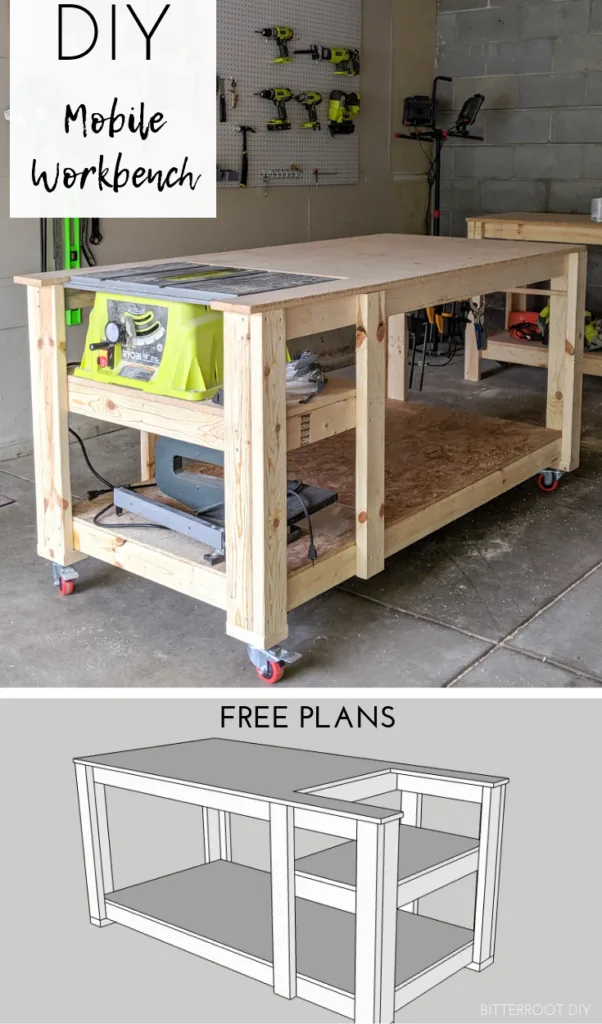
I’ve been working on getting my shop in order lately and finally built a couple workbenches. In case you missed it, last week I shared the plans for the new miter saw stand. My goal with the shop is to maximize space, but still be able to park the car in there when necessary. The miter saw stand is a permanent workbench at the back of the shop, but I also put together a DIY mobile workbench. It sits against the side wall when not in use (so the car fits), but I can move it anywhere in the shop when I’m working on a project. I built it around the table saw so it works as an out-feed table when I use the saw, but then I can lower the blade and use the whole table top. Win-win!
** UPDATE 9/24/20 – this update is sponsored by MicroJig
This workbench is HANDS-DOWN the most used table in my shop. I use it every day and assemble every. single. project on this thing. There have been SO MANY times I’ve needed to clamp boards down in the middle of the tabletop, so this week I added some MicroJig dovetail clamps. They’re awesome for those situations when your normal clamps can’t quite reach far enough. I’ve already been using them like crazy, so I highly recommend adding them! See Step 11 for all the details.
- Four 3″ Locking Casters
- Miter Saw
- Jigsaw
- Circular Saw or Table Saw
- Drill
- Tape Measure
- Clamps
- Level
- Speed Square
- Pencil
- Safety Glasses
- Ear Protection
- 2 ½” Screws
- 1 ¼” Screws
If you want to add the MicroJig Dovetail clamps, you also need:
The lumber and cut lists are available for purchase. Your purchase also includes a downloadable PDF of the plans. If you prefer, the plans are available in the post below – you simply have to calculate the lumber and cut lists yourself. Thank you for your support.
Enjoy the plans!
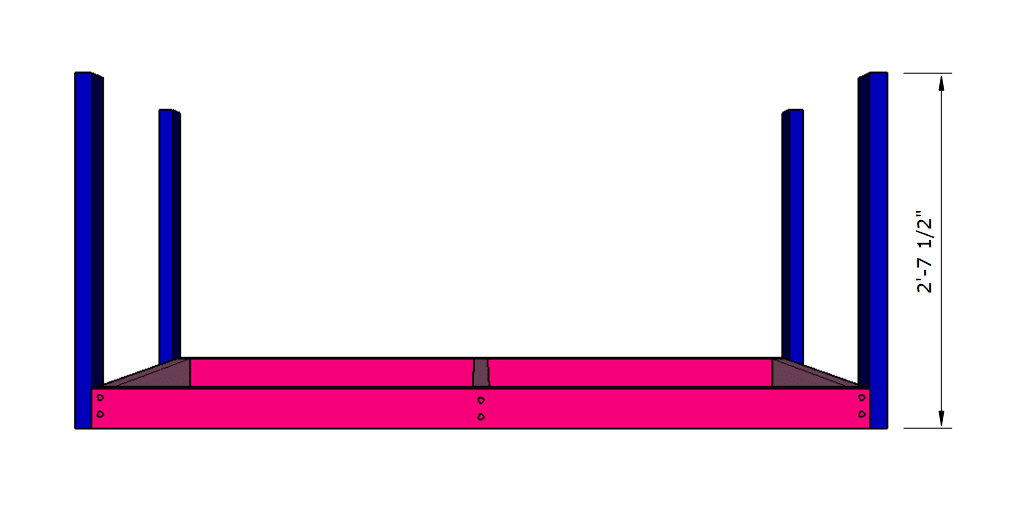
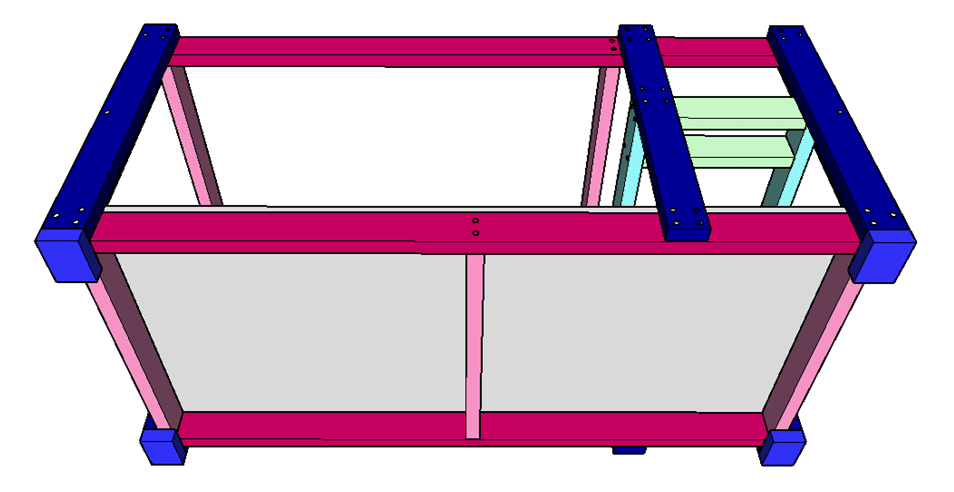
Step 1.
Assemble the bottom frame as shown below. Use 2 1/2″ self tapping screws through the frame to attach the 2x4s.

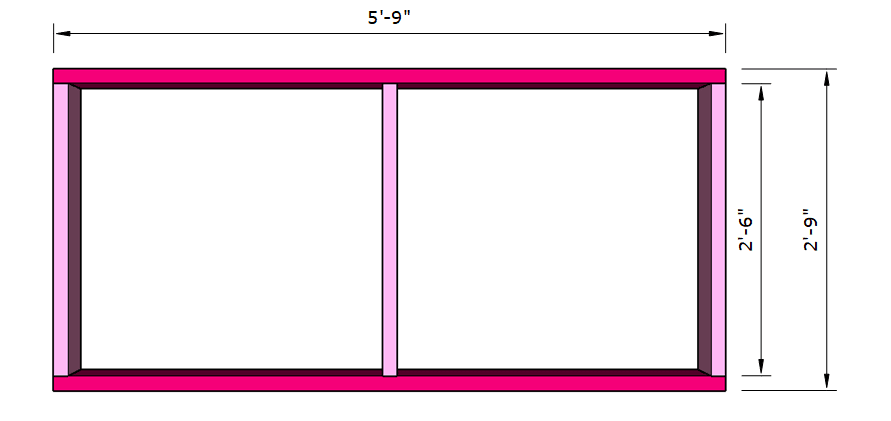
Pocket holes are a great option if you don’t want to see the screws from the front of the bench. However, since this is just a workbench, I simply screwed through the frame into the shorter 2x4s.
Step 2.
Attach the side legs to the bottom frame with 2 1/2″ screws. The bottom of the frame should sit flush with the bottom of the legs.

Attach the front and back legs to the frame and side legs with 2 1/2″ screws. I attached the side legs to the frame first and then drove a couple screws through the legs into the narrow side of the front and back legs to secure them together. You can see the approximate location of the screws in the diagram below.

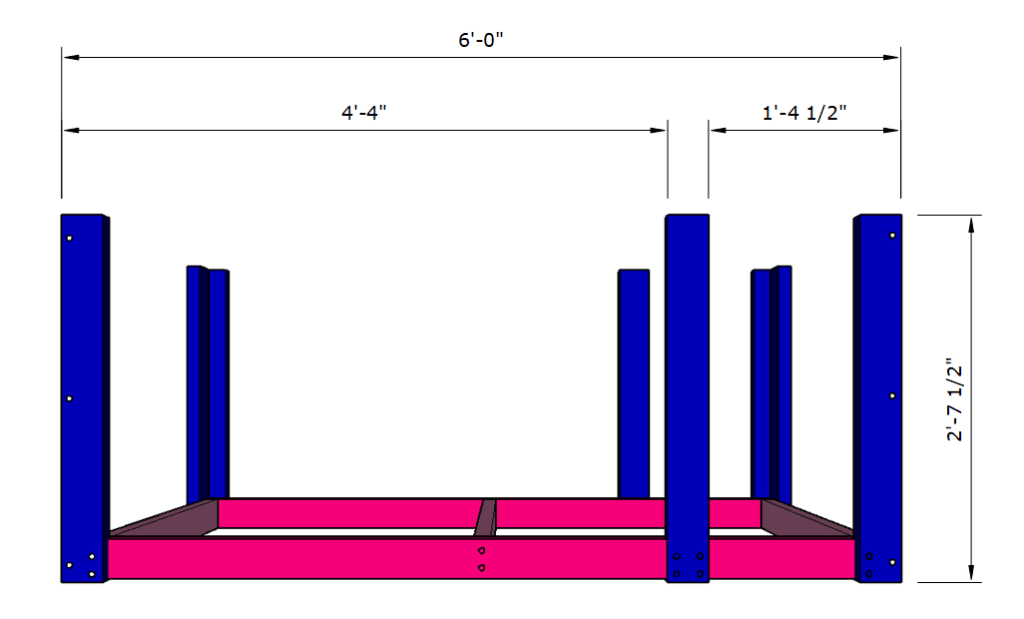
Here’s a top view:

Put the bottom shelf in place on the bottom frame and attach with 1 1/4″ screws. Countersink the screws so they won’t get in the way.

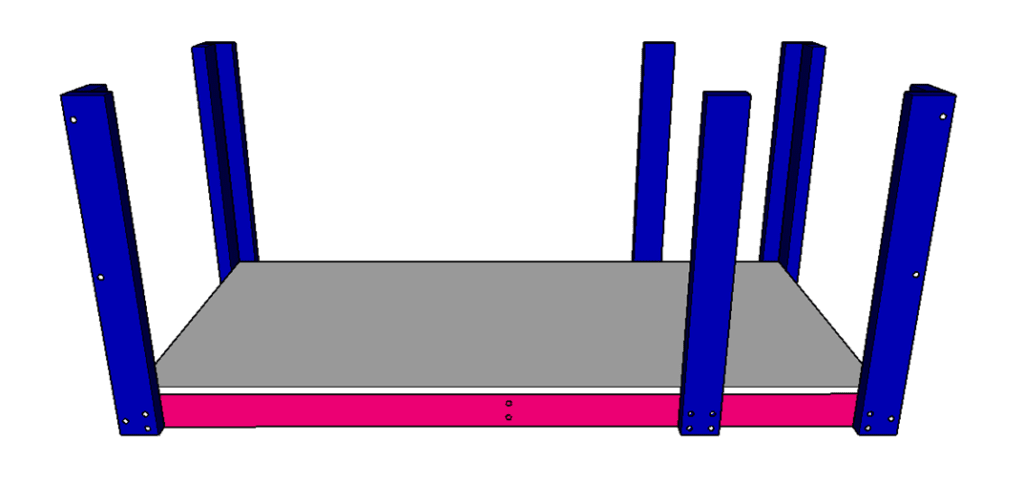
It’s very difficult to put the bottom shelf in later (ask me how I know …), so definitely put it in before attaching the top frame in Step 3.
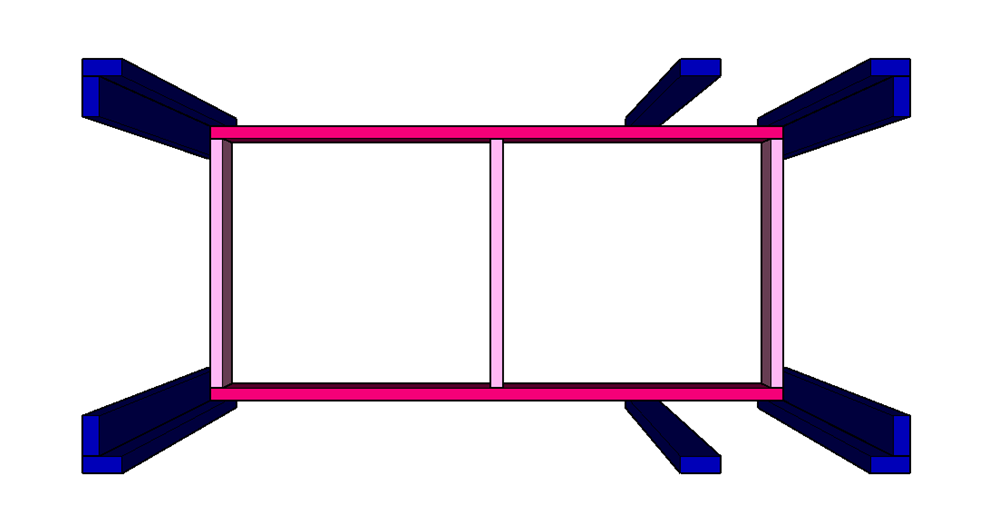
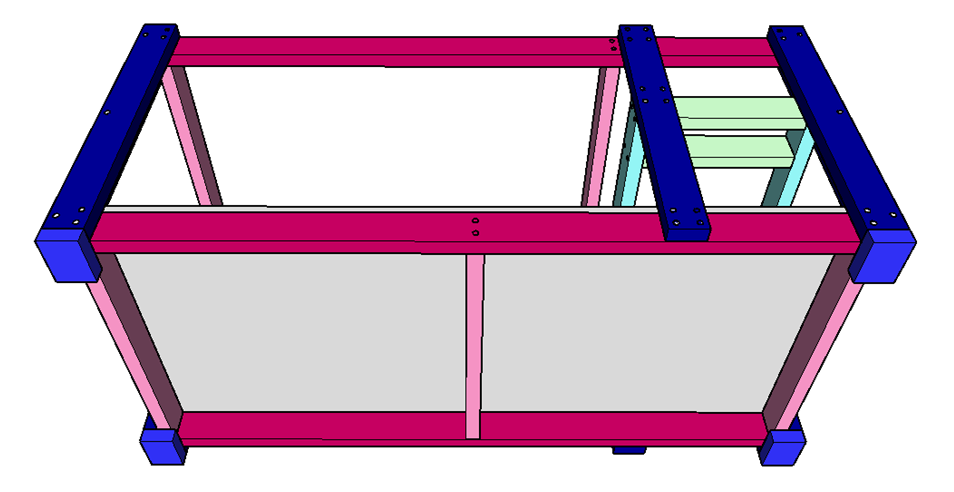
Step 3.
Build the top frame as shown. Use 2 1/2″ screws to attach the long sides to the supports.


Step 4.
Attach the top frame to the legs with 2 1/2″ screws.
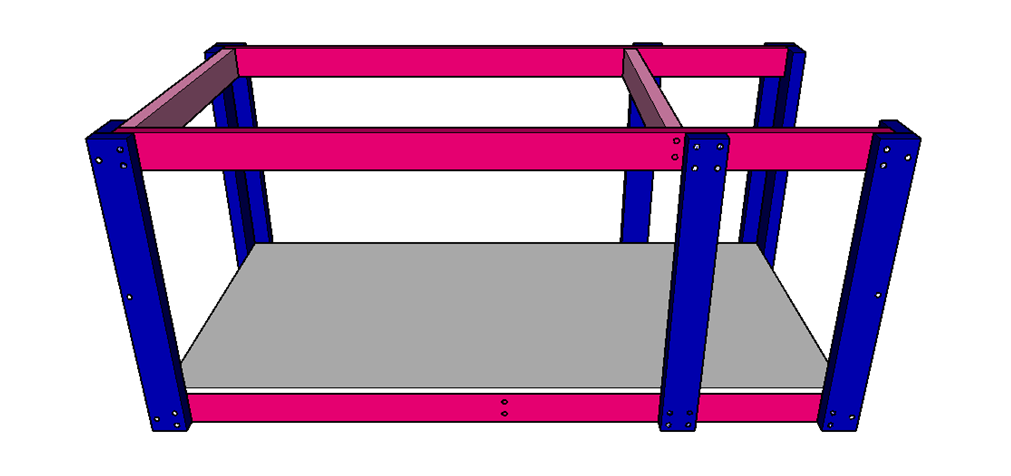
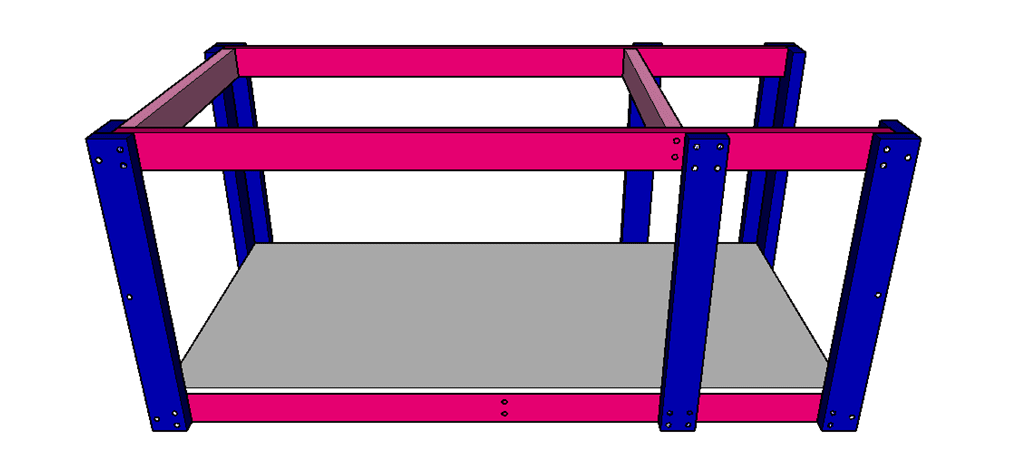
I assembled the frame upside down to get top frame flush with the tops of the legs. Simply flip the bench over, move the new top frame into place, make sure everything is sitting flat on the ground, and attach the legs to the frame. No need to worry about clamping or balancing the top frame in mid-air while you try to attach it!
Step 5.
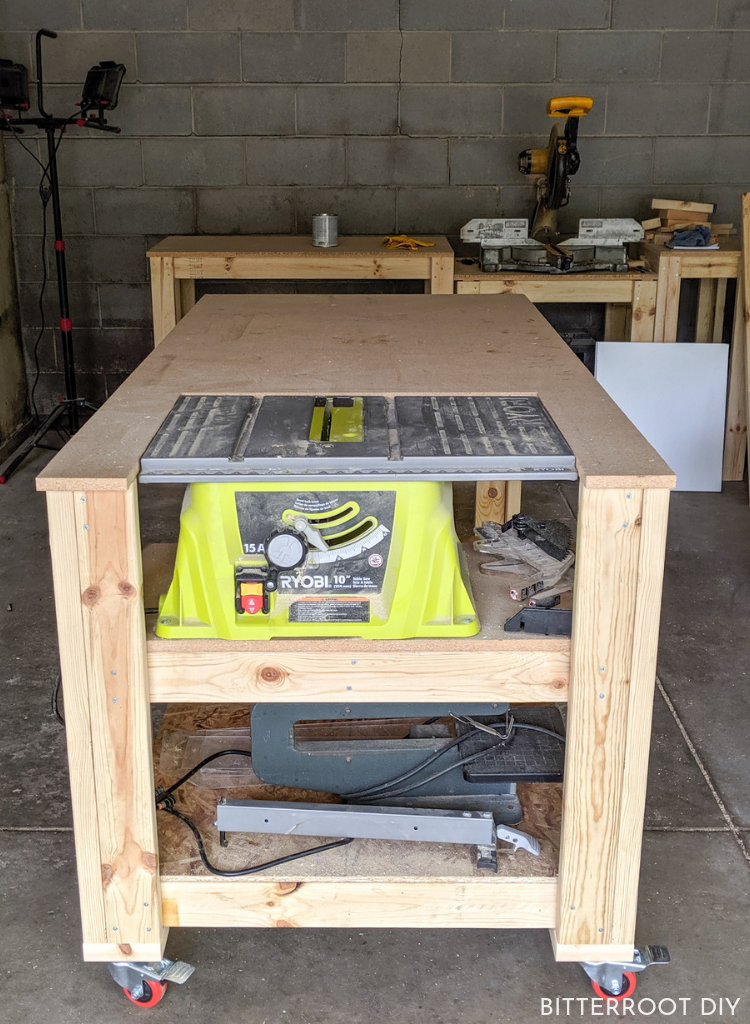
Assemble the frame for the table saw shelf with 2 1/2″ screws. Place those two center 2×4 supports wherever necessary to support the base of your table saw.

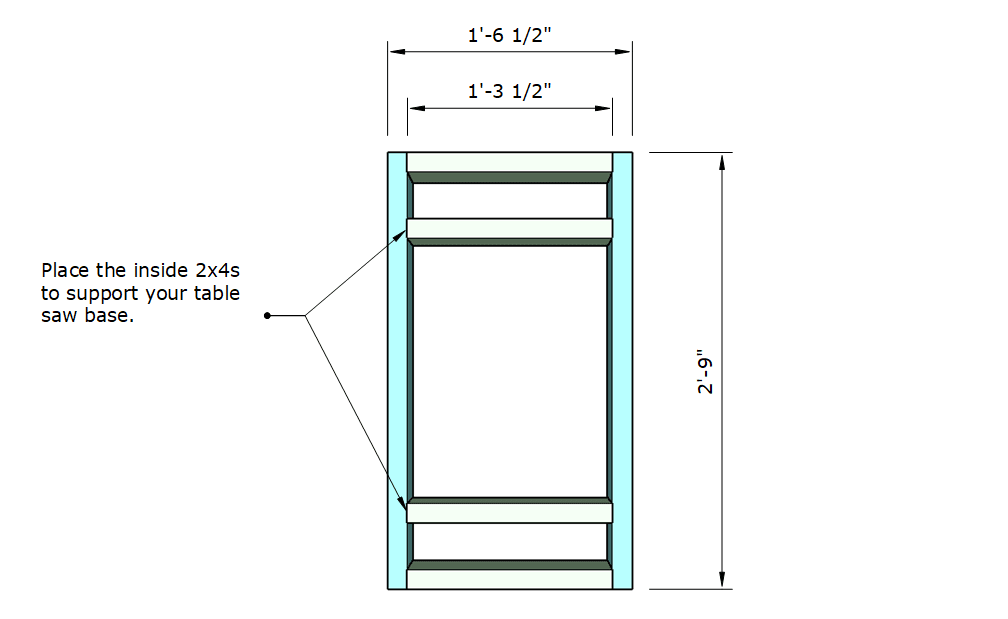
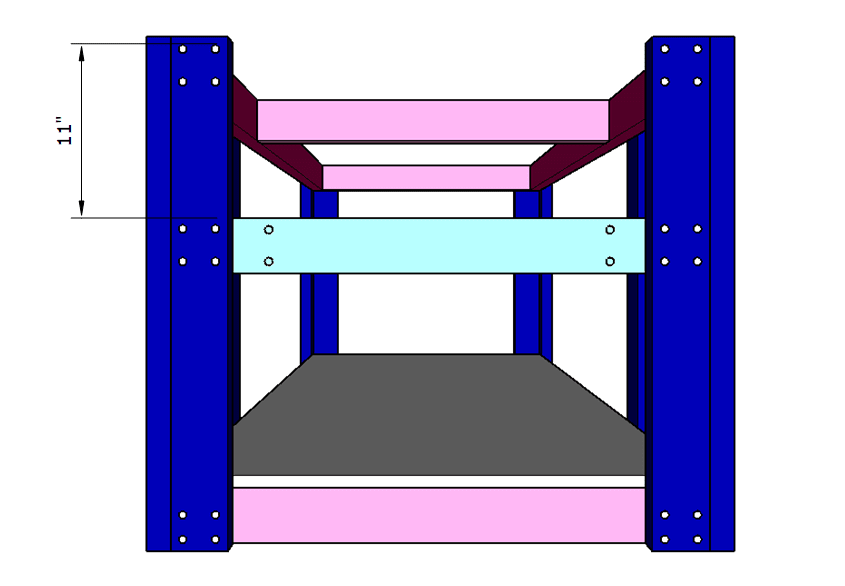
Step 6.
Place the shelf at the appropriate height for your table saw (mine was 11″) and attach to the workbench frame with 2 1/2″ screws.

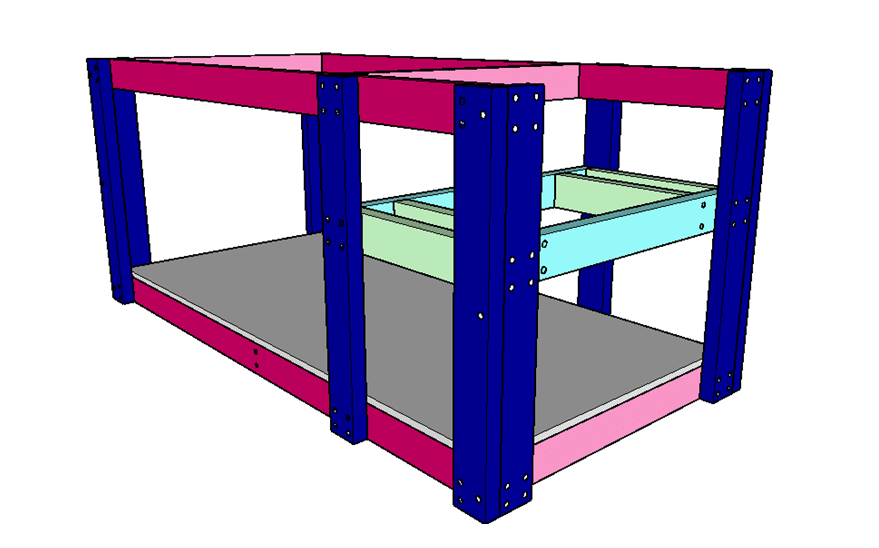
Here’s a side view:

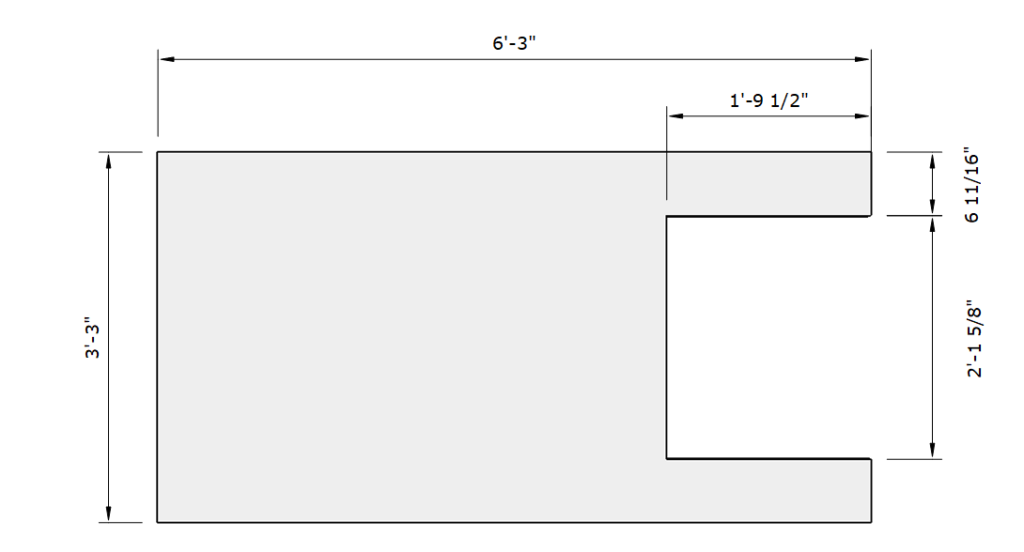
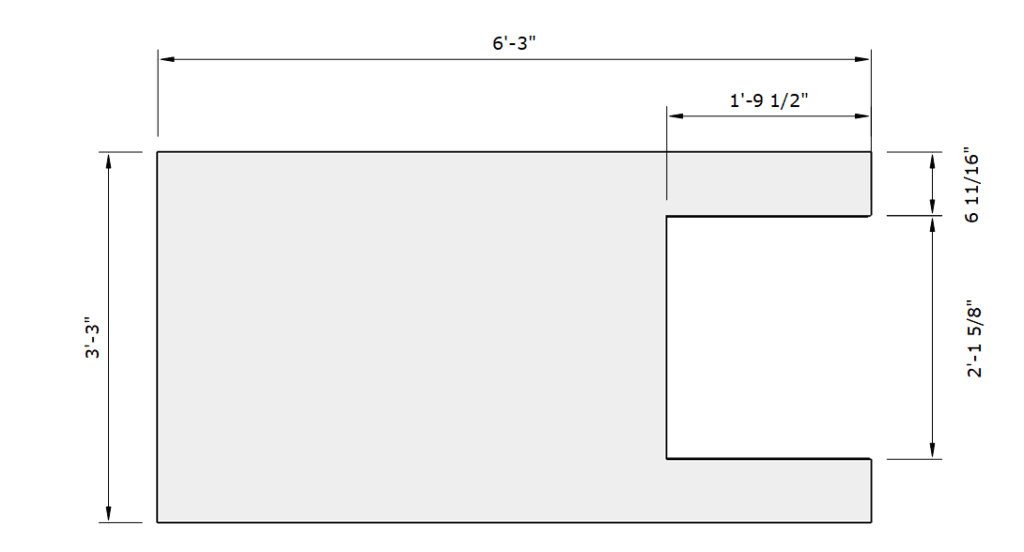
Step 7.
Use a jigsaw to cut the section for your table saw out of the table top. The dimensions shown work for my table saw. Adjust as necessary.
Step 8.
Attach the 2×4 feet to the legs with 2 1/2″ screws.
Fasten the locking casters to the feet with 1 1/4″ screws. I used washers on each screw since the screw heads were smaller than the holes in the caster wheels. You could also use washer head screws.
Step 9.
Center the tabletop and attach it to the frame with 1 1/4″ screws. There should be a 1 1/2″ overhang around the tabletop where it meets the legs.
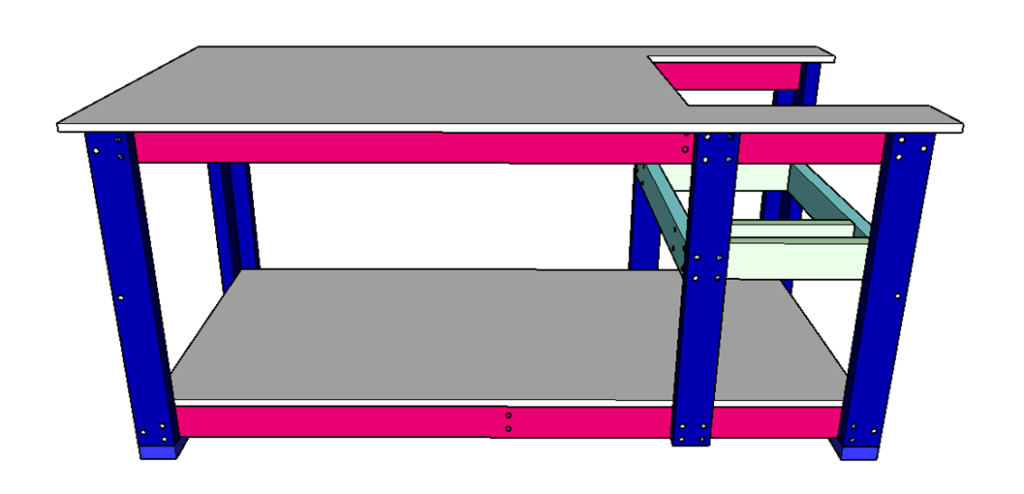

Countersink the screws into the particle board so they won’t get in the way of your work.
Step 10.
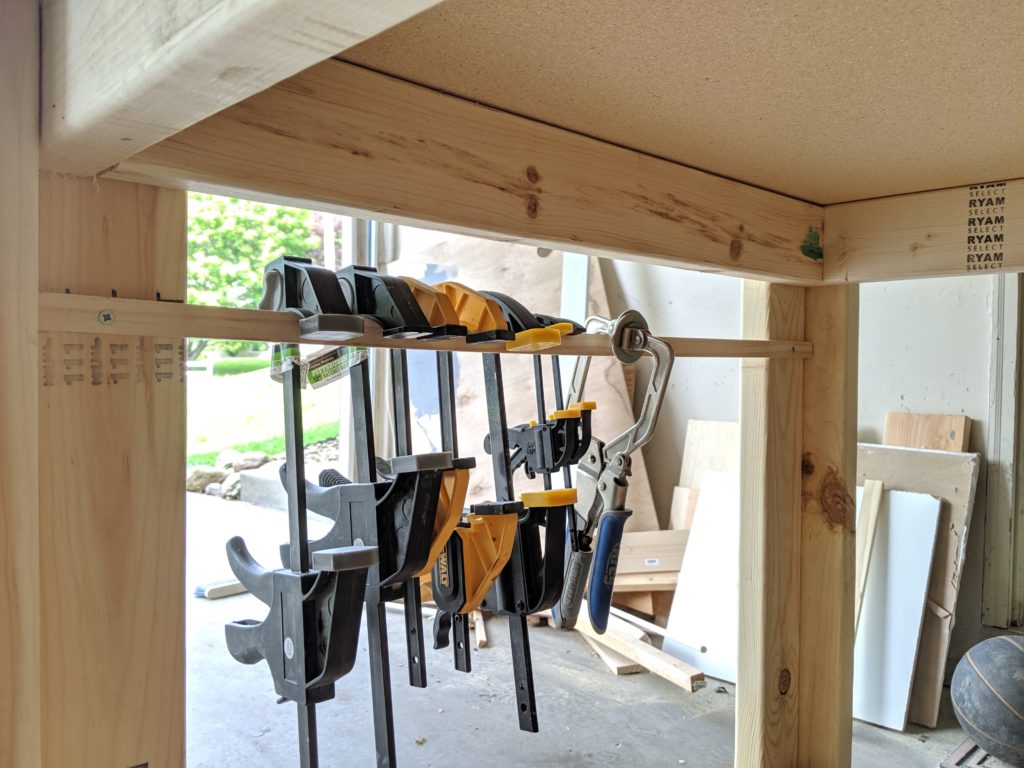
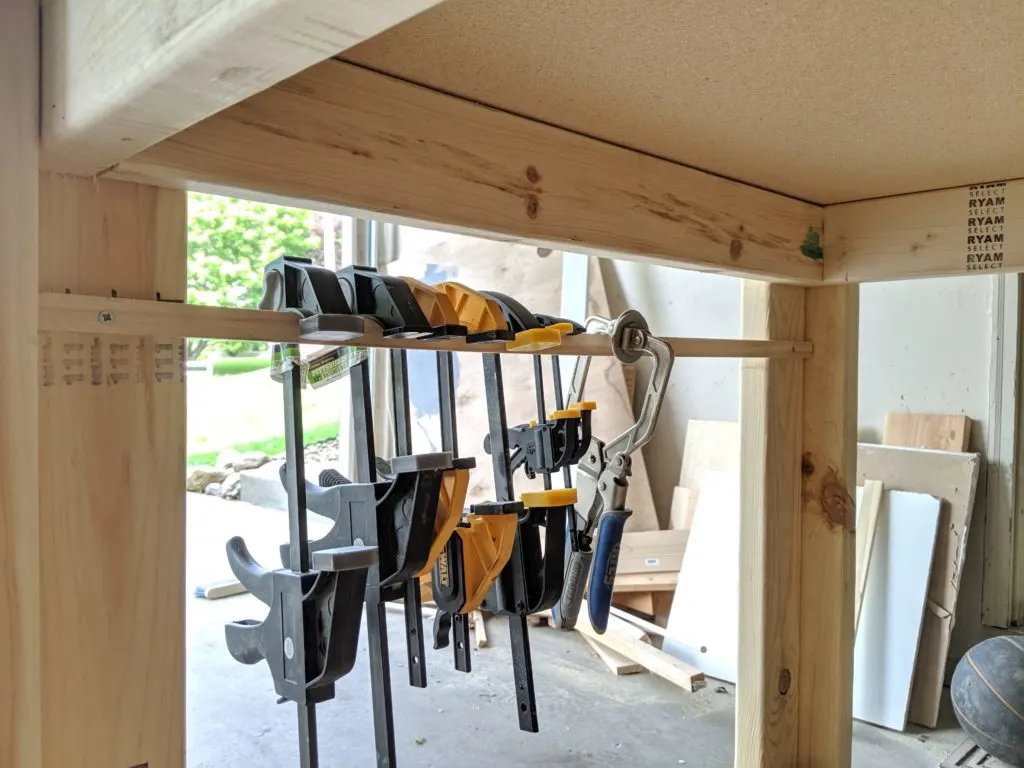
I added a simple clamp rack along one end once the bench was finished.
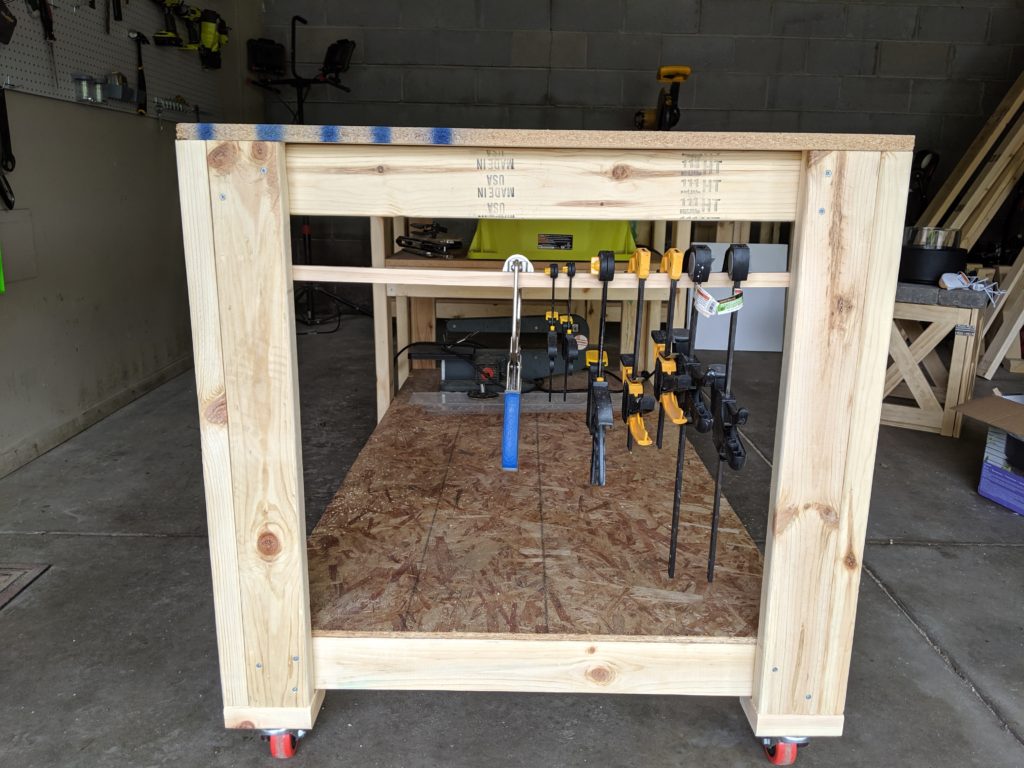
Simply attach a small scrap board to the inside of the legs.
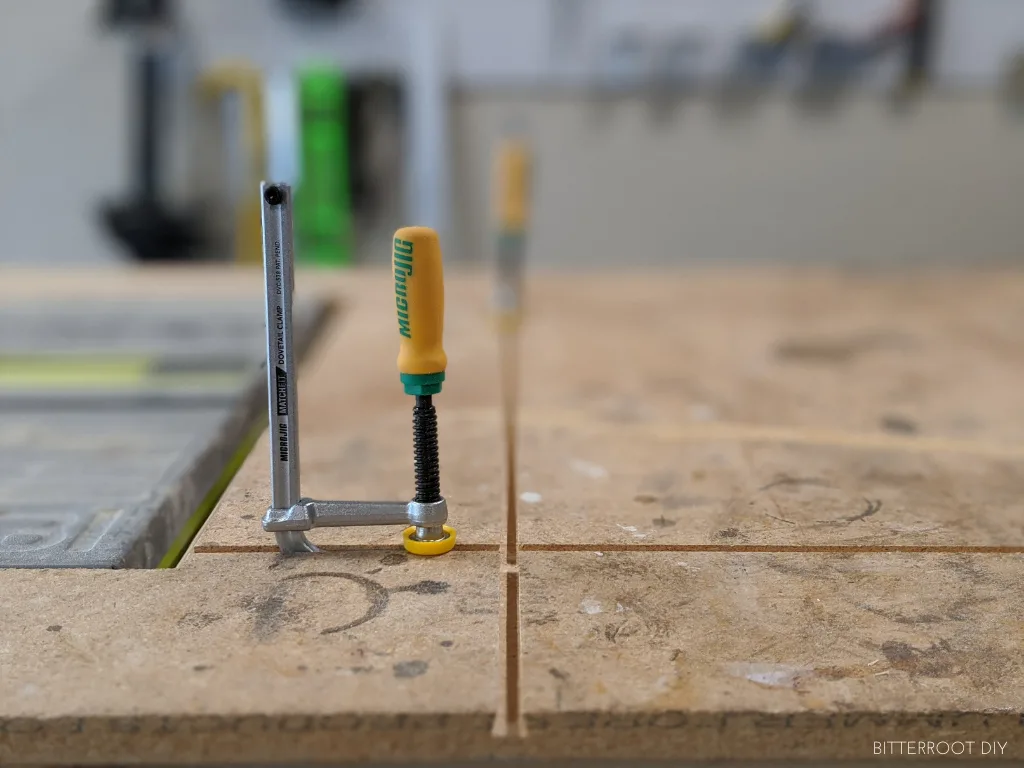
Step 11.
**UPDATE 9/24/20**
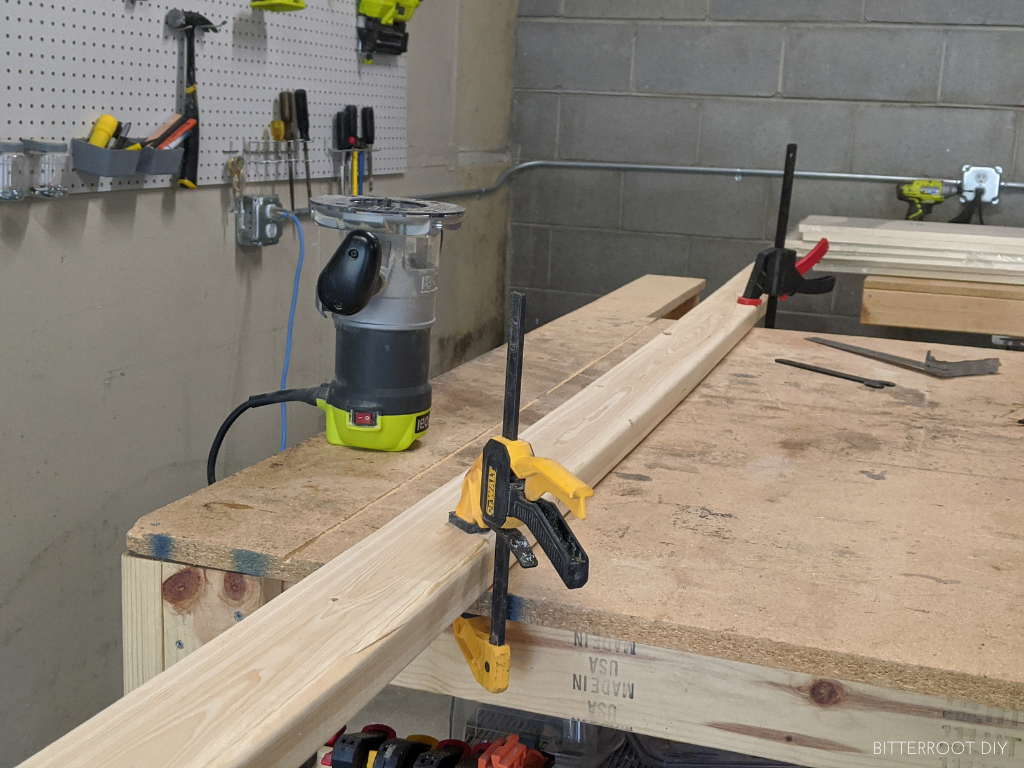
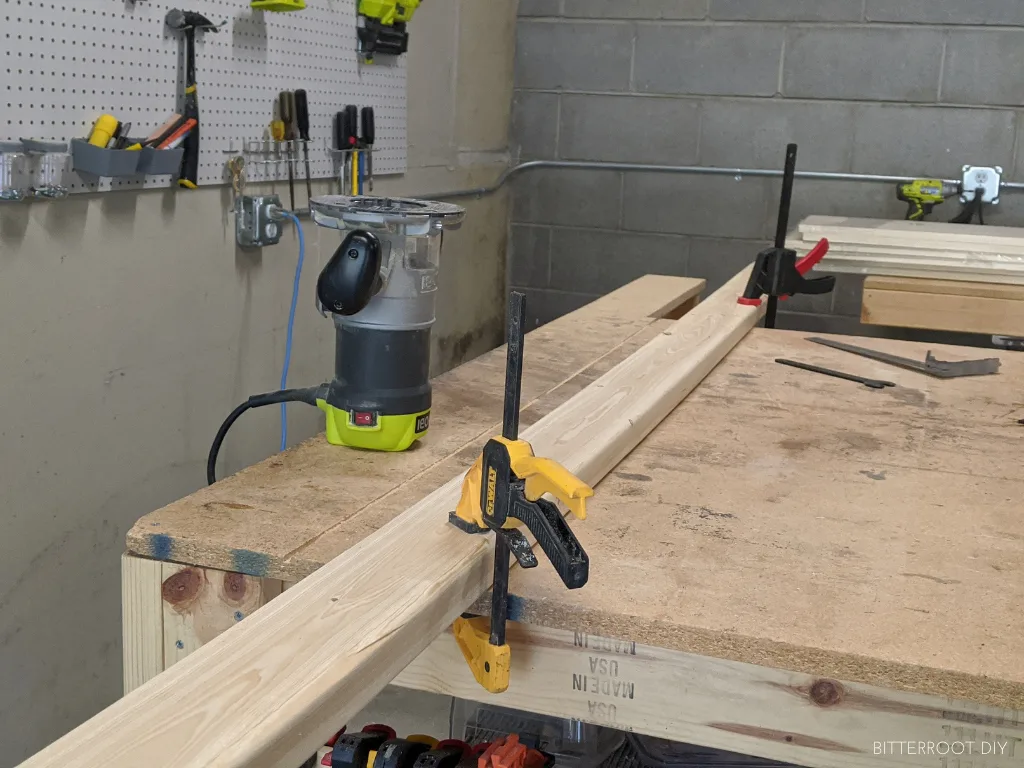
To add the MicroJig dovetail clamps, simply route a dovetail along the workbench wherever you want to place the clamps. No need to add any metal track or anything like that!
If you have 1 1/2 HP router (which is what my Ryobi is), start by routing a 1/4″ relief groove. I clamped a 2×4 to the workbench as a guide for the router to make these cuts:
Next, use the MicroJig dovetail router bit to cut the dovetail:
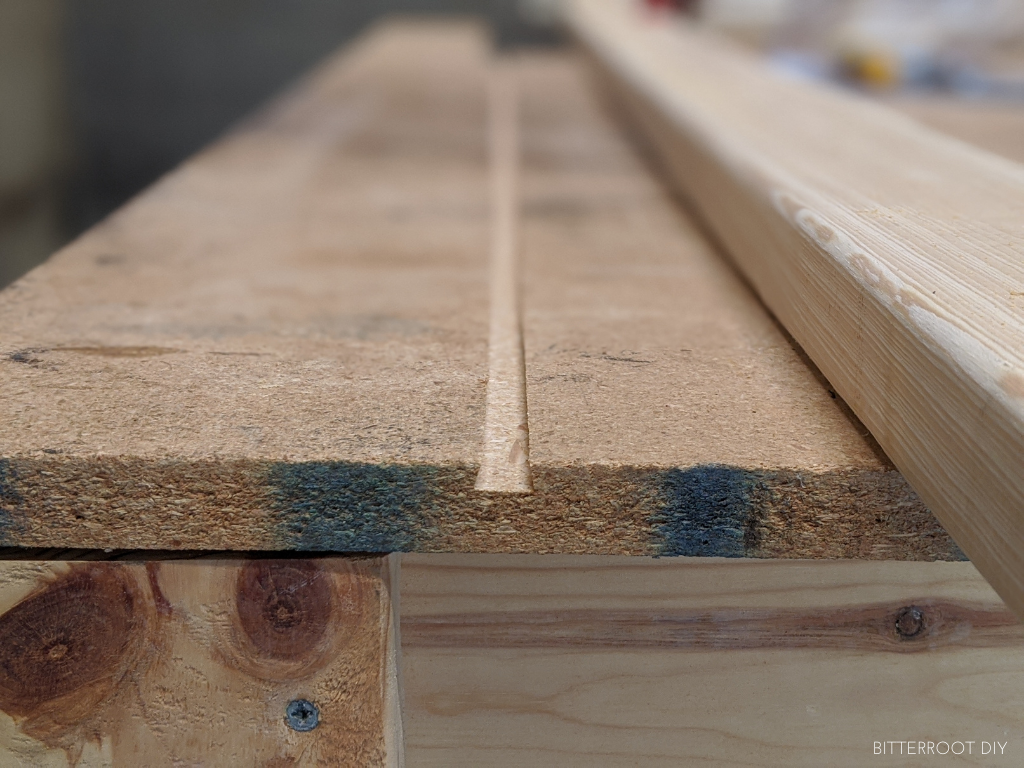
Make sure to cut the dovetail in the center of the 1/4″ relief groove if you had to cut that first. I just left the 2×4 guide in place when I switched from the straight bit to the dovetail bit to make sure I cut along the exact same line.
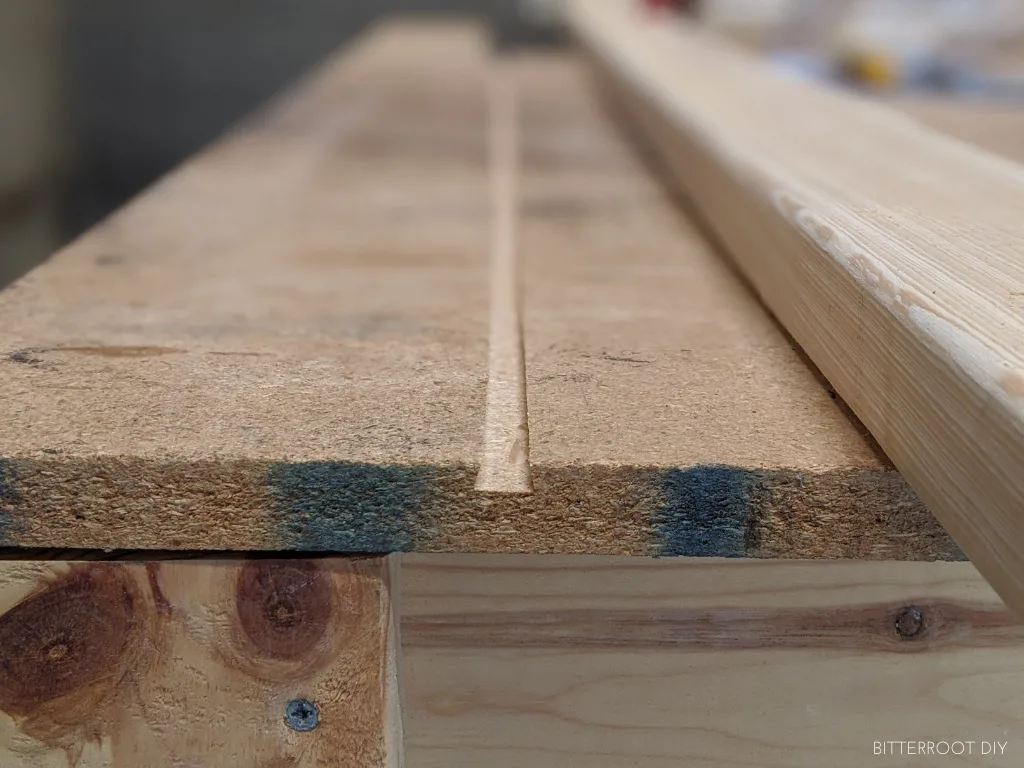
I added tracks along all four sides of the tabletop:


Once you’ve cut the tracks, the clamps just slide right into place:
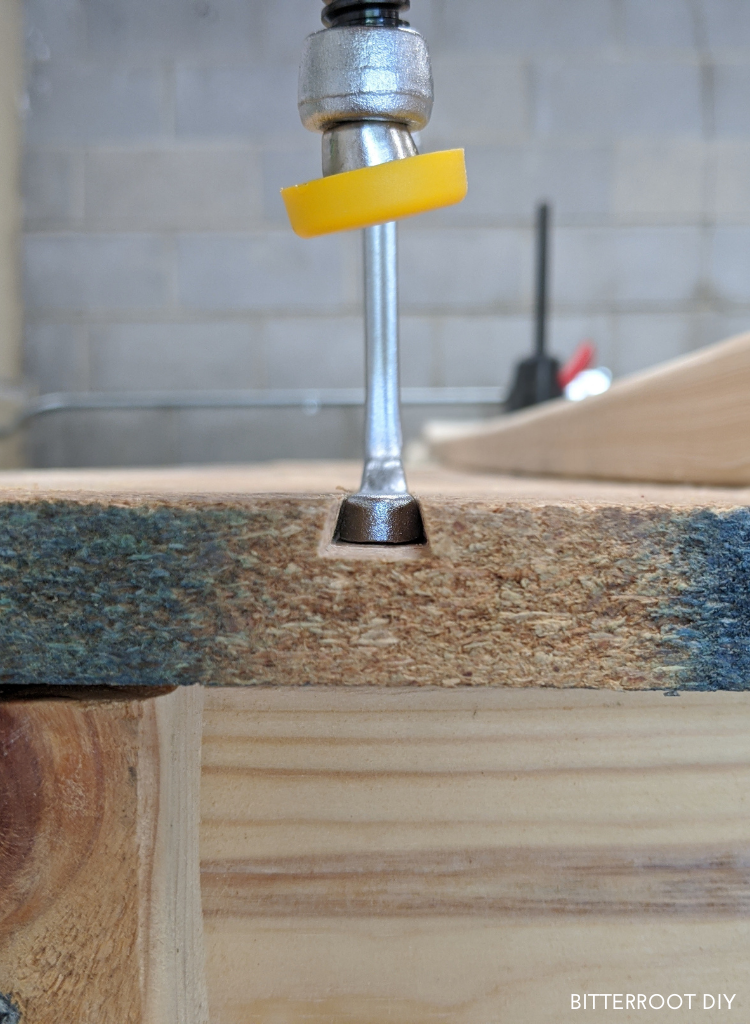
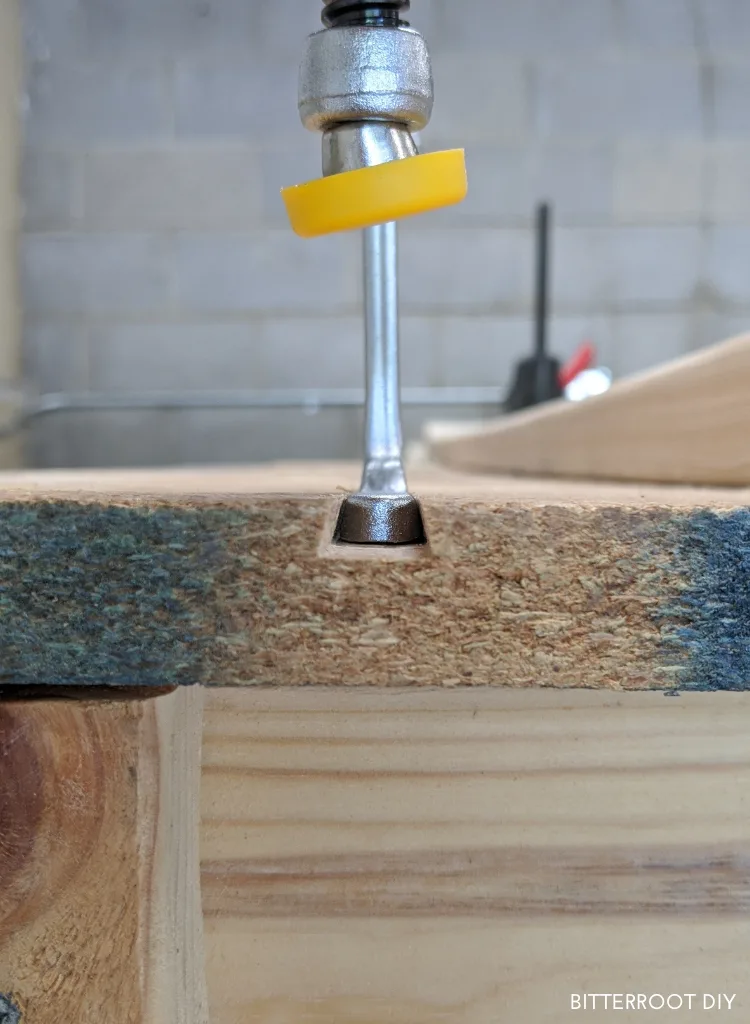
I’m not sure how the particleboard is going to hold up to the clamping pressure long-term, but it’s been fine so far. If I run into issues, I’ll replace the top with nicer plywood or something more durable.
If you’re planning to add these clamps, I’d recommend going with a plywood top, rather than the particleboard like I did. It’ll be more durable in the long run.

And there you have it!
Just a heads up – I built this bench to fit my Ryobi table saw. Make sure to measure your table saw and adjust accordingly.

Please let me know if you have any questions and I’ll get back to you as soon as possible!
Thanks for stopping by!
For more project ideas, you can find me on Pinterest. And to stay up to date with the latest shenanigans, follow me on Instagram.
| Tylynn |
Don’t forget to pin for later!

Bryan Bussell
Sunday 2nd of May 2021
I built a bench using your diagrams and measurements it turned out good. I'm going to modify the other end of bench and install my router table.
James Resoldier
Friday 2nd of April 2021
I made a double ended version!
I modified your cutout to match my equipment. (29", instead of 25-5/8" opening) Then I mirrored the dropped shelf on the other end as well. Turns out my Craftsman saw is a bit wider than yours, and same for the router table I put on the other end. I also used retractable casters, since I found that the 3 inch wheels I first installed were developing flat spots under the load, and weren't too stable to begin with.
https://www.dropbox.com/s/ld9x6ua1bui9li4/WorkBench.jpg?dl=0
tylynn_sattler
Monday 5th of April 2021
That turned out great! I like the router table on the other end!
Ivan
Wednesday 31st of March 2021
I am very impressed with your work. I just ordered a table saw and will be using your plan as my guide. Have the materials and tools lined up and can't wait to start. Thanks.
tylynn_sattler
Friday 2nd of April 2021
Thanks Ivan!
Good luck with the project.
David Patchen
Monday 18th of January 2021
Just did this build, thanks for the solid plans. I tweaked it to be quite a bit shorter and cut bevels and channels to fit the DeWalt rack and pinion fence. I also used retractable casters since that seemed more stable vs. locking. I may add a drawer or three, power strip and vice.
As I was fiddling with the shelf height to ensure the table saw surface would be perfectly flush with the work table, I wondered if as the lumber settles, I could lose flushness. This got me thinking that maybe the shelf for the table saw should be located on all-thread, or something that could easily raise and lower the shelf by a few millimeters. Of course you can shim, but cooler designs are more fun to ponder. Perhaps losing flushness is a non-issue.
James Resoldier
Friday 2nd of April 2021
Rather than flush, I would suggest that the table be 1/8" higher than surrounding outfeed, to prevent catching. I also made a crosscut sled, and routed out channels for the runners past the saw. Adding dust collection under the table saw also raised it by a fraction...
I agree with, and also implemented the retractable wheels, and lowered height.
tylynn_sattler
Monday 25th of January 2021
Those are great updates!
I've had it for 3 years now and haven't had any issues with settling. Probably depends on how you build it, but I think you should be fine.
Adriana
Saturday 16th of January 2021
Hi Tylynn! I was planning to build this workbench but thanks to covid my shop (aka bonus room) has to double as a secondary work-from-home office. I was thinking I can still go ahead and build the workbench without the cutout for the table saw and maybe paint a bit. Do you recommend any changes to the tabletop?
Thanks!
tylynn_sattler
Monday 25th of January 2021
That's a great idea. You can either extend the tabletop so it's close where you would normally put the tablesaw, or just stop the tabletop and frame short and don't include that section for the table saw at all. Totally up to you and how much space you want to save!