
Today’s the day!
After 8 long weeks of nap-time and late-night hustle, the kitchen remodel & renovation is done! It’s been quite the learning experience, let me tell ya. From painting the cabinets, to building them to the ceiling, to knocking down a wall, to installing new lights, to patching flooring – demo to rebuild, the whole nine yards – it’s been a process. But it was so worth it.


This post contains affiliate links. If you make a purchase from one of the links, I may make a small commission at NO EXTRA COST to you. This helps keep the tutorials and plans free here at Bitterroot DIY. Thank you for your support! See my full disclosure here.
We closed on our first house at the end of April this year and started the renovation pretty soon after. The whole place was in good condition, but definitely needed updates. Where better to start than the heart of the home!
So the first line of business was to open up the wall between the kitchen and living room, as well as the wall around the entryway & staircase. It’s a small house, so the kitchen, living room, and entryway are all just one big space. Once we started with one, it just trickled into everything at once … you know how it goes.
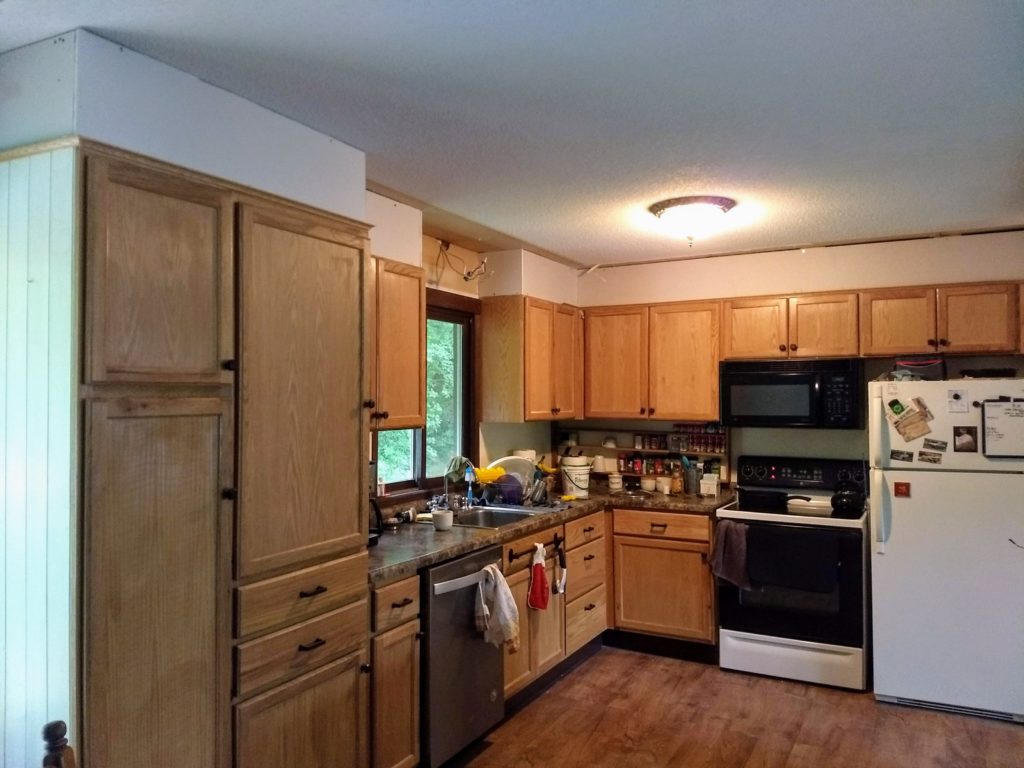
I like to call these the before the before (right after we moved in):


*please excuse the mess … we really had just moved!


The whole place was very comfy, but we were looking for more of an open concept … so down the wall went:


As you can see, we had a whole slew of electrical stuff to figure out when we removed the wall. We re-routed everything into the wall on the right and the column over on the left (shown in photos below.) I cannot recommend the book Complete Wiring enough. It really helped us through that whole process. We also have an electrician friend who came over to help a few times and made sure we did things correctly.
**Make sure to have a licensed electrician do (or at least check and approve) any electrical work. And check out the codes in your area to follow the correct procedure for renovating.
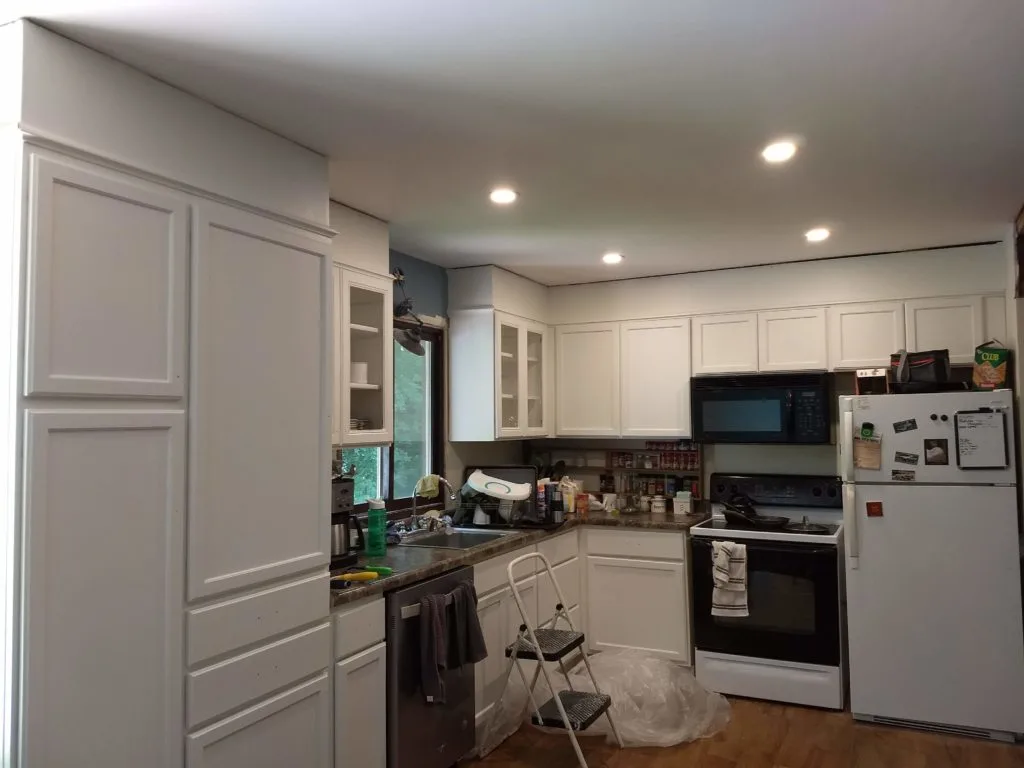
Next up – I removed the fur down above the cabinets and built the cabinets to the ceiling.
Here’s another before the before (with fur down intact):


before (cabinets newly extended to the ceiling):

I mud and taped the new tops of the cabinets, scraped the texture off the ceiling, patched and repainted everything, and added new can lights.
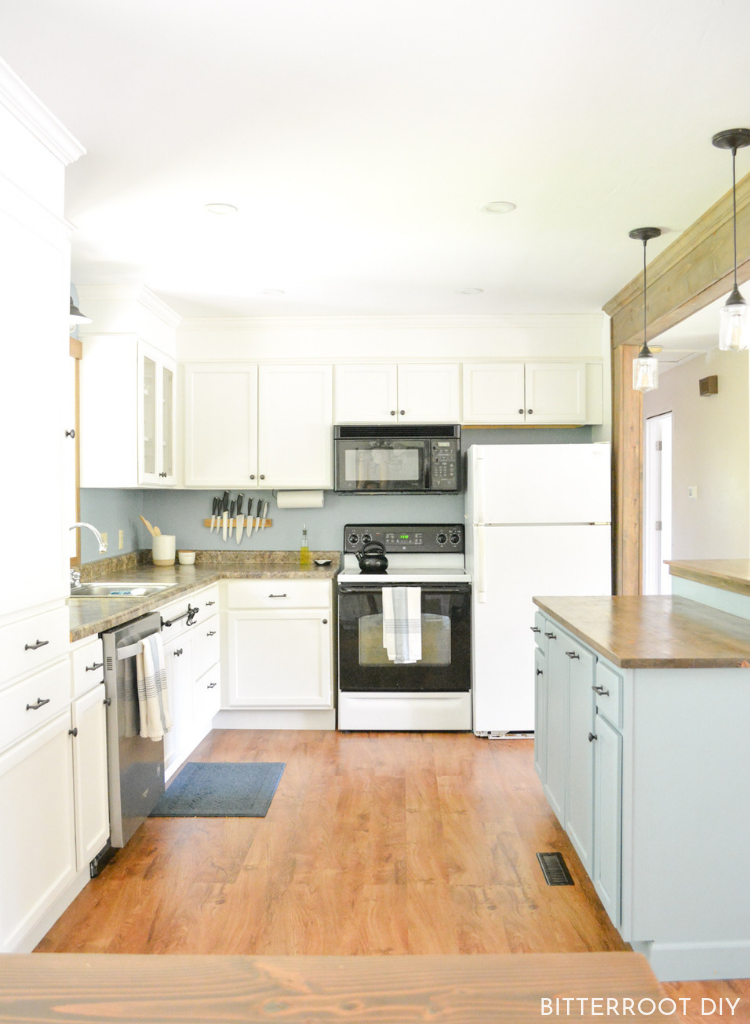
I also painted the cabinets and added glass doors to four of them:

It amazes me what a little paint can do.
Want a quick, simple update? Get yo’self some paint – that’s the biggest change between the last two photos, and it’s unbelievable!
From there it was a lot of finishing work – installing trim, touch-ups, caulking etc.
And here it is:

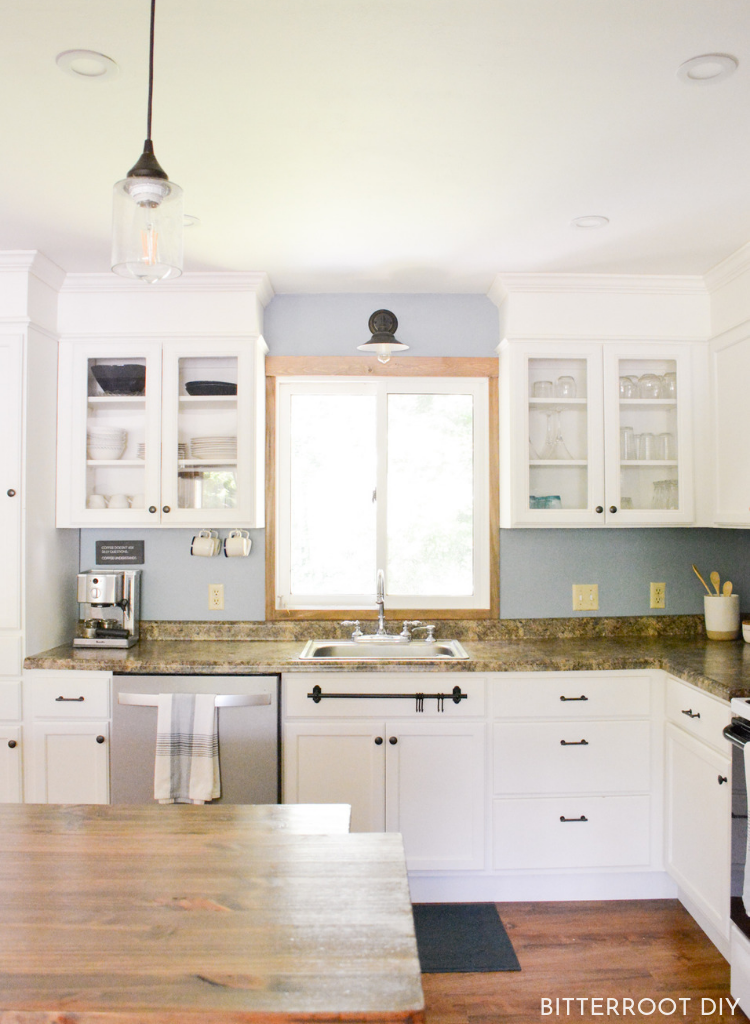
The cabinets are Alabaster SW 7008 Emerald Urethane Trim Enamel – one of my new favorite colors – it brightens the space so much, but isn’t cold.
All the trim, window frame, and door frame are Extra White SW 7006 Emerald Urethane Trim Enamel. It compliments the Alabaster so nicely.
The accent blue is Debonair SW 9139 Emerald Interior Paint.
I love how it looks against the wood window trim:

And that old wall that used to close everything off?
It’s an island now:


WHAAAAAATTT
**starts dancing in beautiful celebration**


And to top it all off, I updated our dining table last week:


This really was the budget-y-est (it’s a thing … ) of budget kitchen makeovers. I’ll be the first to tell you that this isn’t my designed- by-joanna-gaines-perfect-dream kitchen. But it was totally doable and didn’t break the bank.
How did I keep costs down?
Well I think the best advice I can give (besides doing it DIY style) is to pick the things that give you the best bang for your buck. I would LOVE to replace our countertops – just wasn’t in the budget for now. However, the bright white cabinets almost make the counters look new as is! I also really wanted to tile the backsplash – couldn’t make it happen this time. Replacing all the appliances with that new gooorgeous black stainless stuff from Home Depot – hopefully in a couple few years …
But painting everything, extending the cabinets, opening the space up – that all made a HUGE difference for relatively little cost.
So consider all your options and start with the work that will really brighten and open the space. Add the extras later!


And that about wraps up the modern farmhouse kitchen makeover!
One more before:
And after:
If you’re interested in anything in the kitchen, here is a full list of sources:
- Island Pendant Lights
- Magnetic Knife Strip
- Sconce Light
- Kitchen Mat is from Walmart but this is a similar one
- Dish Towels are from the Magnolia Home line at Target, but here are similar Classic Dish Towels
- Towel Bar with Hooks
- 3″ Drawer Pulls
- Cabinet Knobs
- Paper Towel Holder
- Espresso Machine
- Mini Whiskey Barrel
- Floating Corner Shelves
To follow along from start to finish, check out all of the updates here:
- Modern Rustic Kitchen Design Inspiration
- Paint your Kitchen Cabinets
- Add Glass to Kitchen Cabinet Doors
- How to Extend your Cabinets to the Ceiling
- DIY Kitchen Island
- Pots & Pans Shelves
- Install Recessed Lighting
- Install Sconce Light
- Floating Corner Shelves
- Plate Rack


This post is sponsored by Sherwin-Williams. All thoughts and opinions are my own. See my full disclosure here.


Stephanie
Tuesday 7th of August 2018
What did you do to move the electrical wires in the wall to half wall transformation? I have one too and mine has electric and registers in it. I have such a similar room you would think we are house twins!!
tylynn_sattler
Thursday 9th of August 2018
One more thing haha! I added a link to the book we used to help us with a lot of the wiring. It explains things super well. Here's the link if you're interested: Complete Wiring
tylynn_sattler
Thursday 9th of August 2018
Oh, and we also had to re-locate a return HVAC vent. That was just a matter of seeing where it all lined up in the basement and then re-routing the pipes. We moved the vent from the wall (where the kitchen island is) into the floor ... so we cut a rectangle out of our floor and moved the pipes around in the basement to line it all up and then put a new floor vent cover over it. Hope that all helps!
tylynn_sattler
Thursday 9th of August 2018
Yay, house twins! Must've been the popular style when the houses were built! We pulled all the wires up into the attic and then re-routed a few of them down through the wall on the right and a few down through the column in the middle (near the dining room). It's just a matter of figuring out where you want your switches, and then re-route the wires to that spot. We had to run a couple new wires all the way from the basement (where the box is located in our house) that were longer so they would reach all the way to the new column. It's basically just a giant puzzle to figure out where to relocate everything :)
Kelly
Tuesday 31st of July 2018
Oh my goodness, you ROCK! This looks ah-mazing! Such a beautiful before-and-after. Now, time to relax and enjoy your new space! Best, Kelly
tylynn_sattler
Tuesday 31st of July 2018
Thanks Kelly! It was a labor of love haha ;)