Alrighty guys. This is not a small project … It’s completely doable, but it does take a little time.
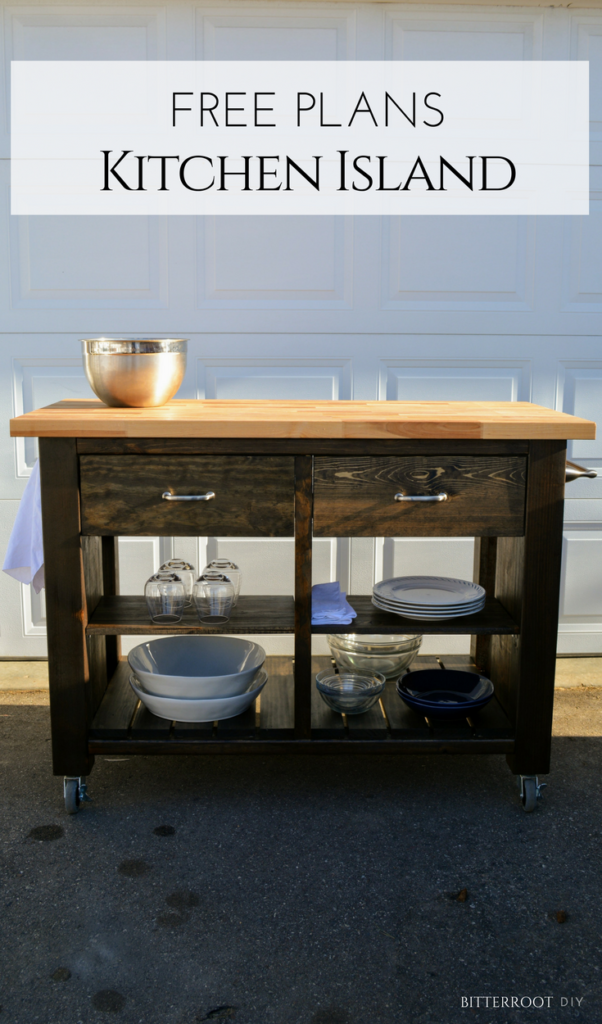
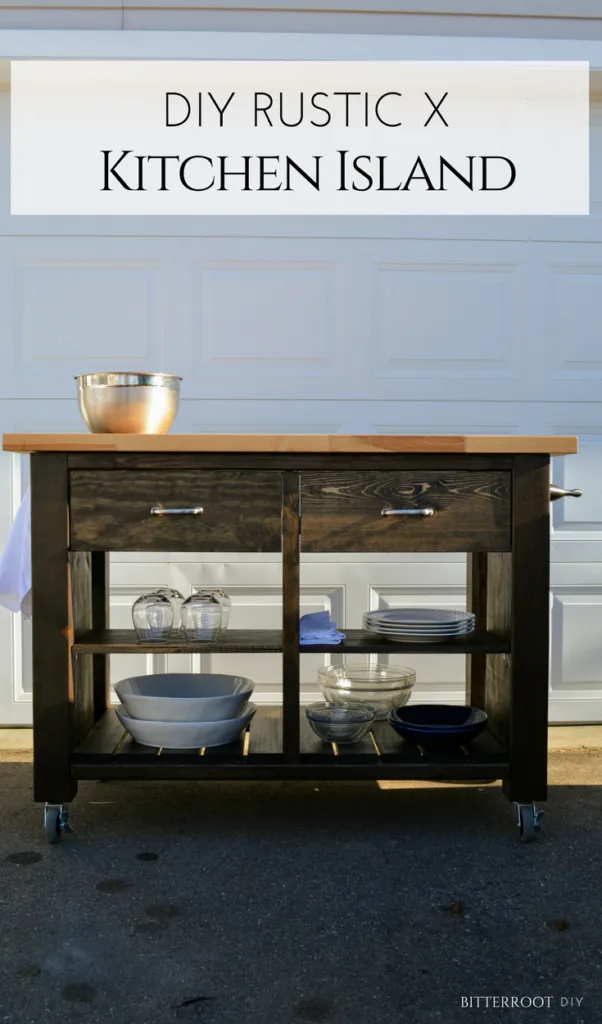
Our friends just bought their first house and were in need of some more counter and storage space in the kitchen, so I volunteered to build an island. We found this beautiful island from Pottery Barn, and I thought I’d give it a go.
This is the biggest build I’ve completed to date and I’m just totally in love with how it turned out. I still can’t believe I pulled it off haha 🙂
If you’re looking for a beautiful island, but can’t stomach the price, this DIY is for you!
Enjoy the free plans!
 This post contains affiliate links. If you make a purchase from one of the links, I may make a small commission at NO EXTRA COST to you. This helps keep the tutorials and plans free here at Bitterroot DIY. Thank you for your support! See my full disclosure here.
TOOLS & SUPPLIES:
- Caster Wheels
- Tee Nuts
- Drawer Pulls
- 10″ Drawer Slides
- Towel Hooks
- Towel Bar
- Right Angle Brackets
- Kreg Jig
- 1-1/4” PH Screws
- 2-1/2″ PH Screws
- Wood Filler
- Finish Nailer
- Drill
- Miter Saw or Circular Saw
- Orbital Sander
- Corner Sander
- Tape Measure
- Square
- Pencil
- Safety Glasses
- Hearing Protection
Lumber:
- 4 x 4 | 2 @ 8′
- 2 x 4 | 5 @ 8′
- 1 x 2 | 1 @ 8′
- 1 x 4 | 3 @ 8′
- 1 x 6 | 2 @ 6′
- 1 x 8 | 1 @ 6′
- 1 x 10 | 1 @ 6′
- 1 x 12 | 1 @ 6′
- 1/4″ Plywood | 2′ x 4′
- Butcher Block Counter Top | 25″ x 50″ (found at Home Depot)
Cuts for Island:
- 4 x 4 | 4 @ 30 3/4″ (legs)
- 2 x 4 | 8 @ 16″ (side & middle frame top & bottom)
- 2 x 4 | 4 @ 39″ (front & back frame top & bottom)
- 2 x 4 | cut to fit X braces (see plans)
- 1 x 2 | 1 @ 25 3/4″ (face frame)
- 1 x 4 | 10 @ 21 1/2″ (bottom shelf slats)
- 1 x 10 | 2 @ 23 3/4″ (side carcass)
- 1 x 12 | 1 @ 25 3/4″ (middle carcass)
- 1 x 12 | 2 @ 19 1/8″ (middle shelves)
Cuts for Both Drawers:
- 1 x 6 | 4 @ 10″ (sides)
- 1 x 6 | 4 @ 14 3/8″ (front & back)
- 1 x 8 | 2 @ 18 1/2″ (face)
- 1/4″ Plywood | 2 @ 14 7/8″ x 9″ (base)
Island
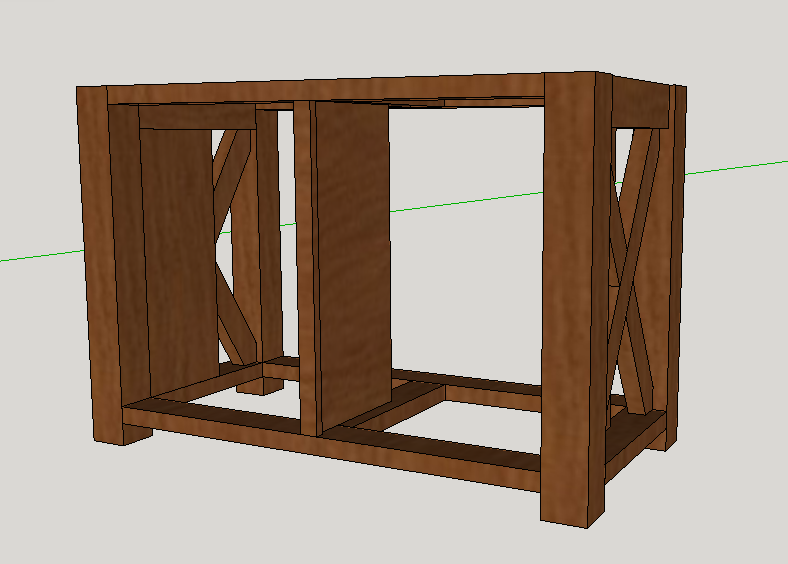
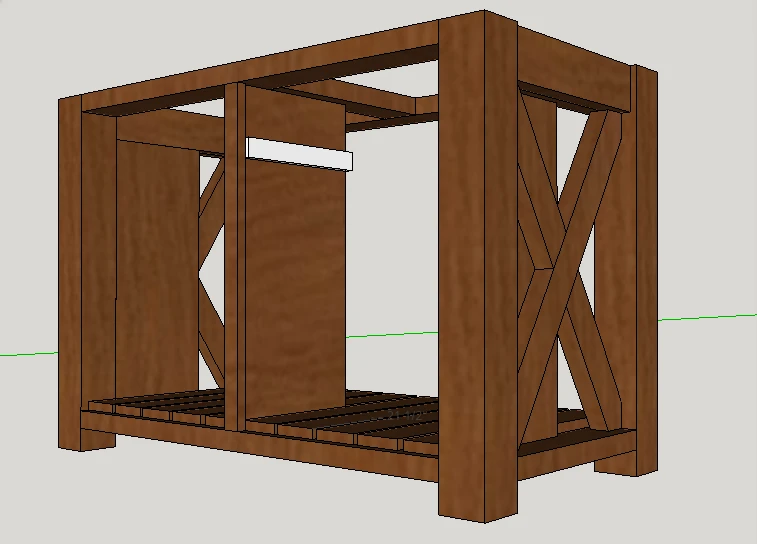
Step 1.
Start with the sides of the kitchen island.

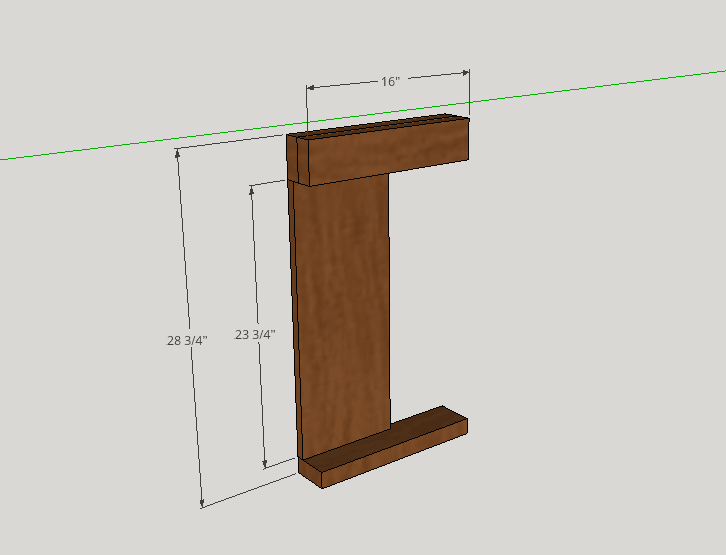
Glue and attach two 2 x 4s with 2 1/2″ wood screws (inserted from the back to hide them). These will serve as the top side frame for the island. Make two sets – one for each side.
Position the side carcass flush with the back front corner of the top & bottom 2 x 4 frames. This will be on the interior at the front of the island.
Attach the side carcass to the top and bottom side frame with 1 1/4″ pocket hole screws and wood glue. Place pocket holes at the back of the frame in order to best hide them. Make two sets – one for each side.
Step 2.
Attach the side frames to the legs.
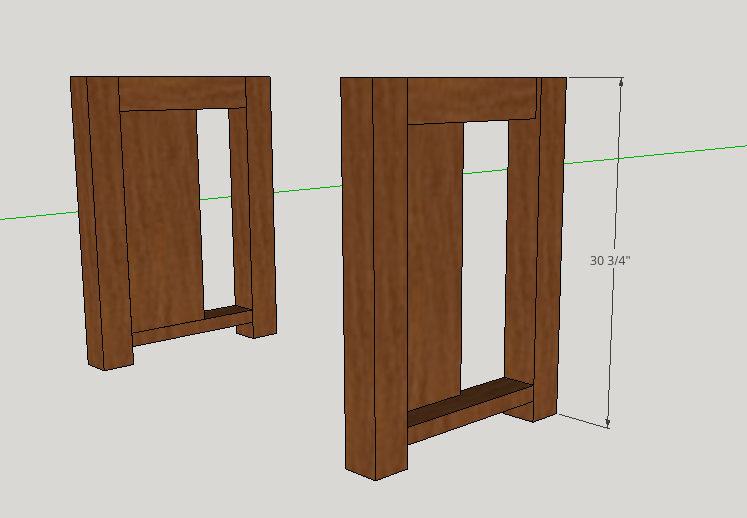

Place pocket holes on the interior top frame 2 x 4s and use 2 1/2″ pocket hole screws and wood glue to attach. Also place pocket holes on the bottom of the bottom frame 2 x 4s and use 2 1/2″ pocket hole screws and wood glue to attach.
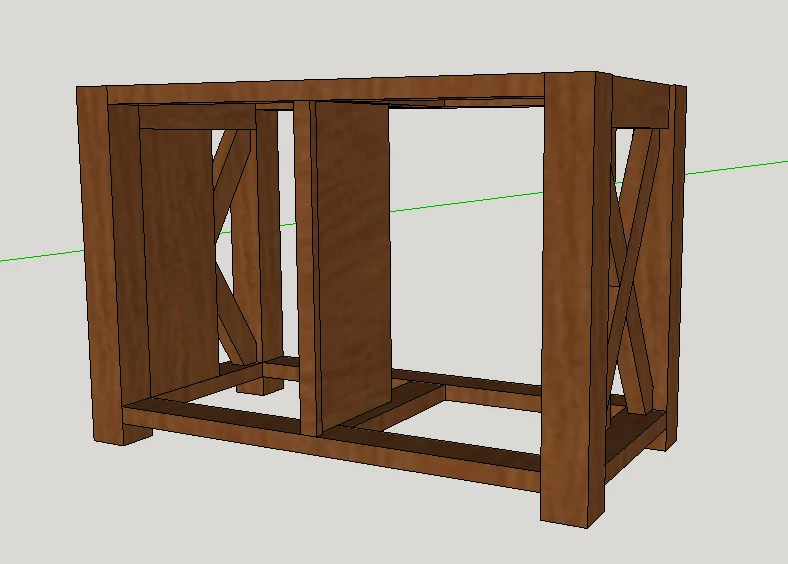
Step 3.
Cut the X braces to fit and attach.
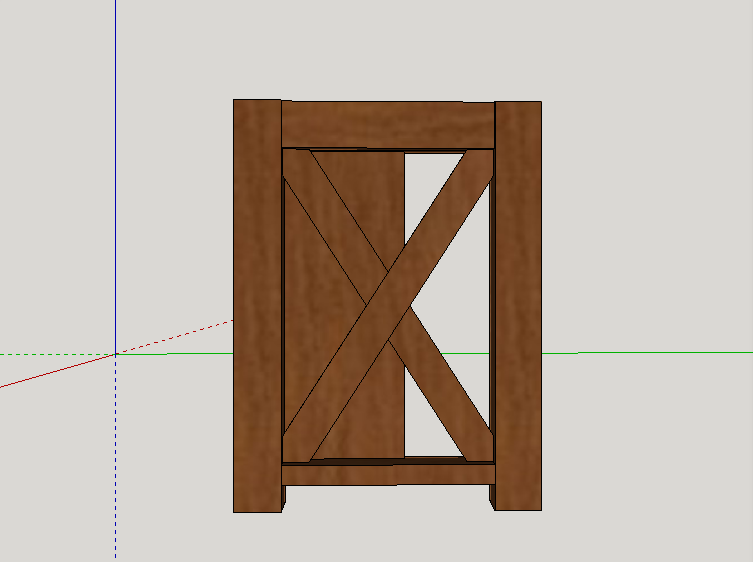

The easiest way to cut the X braces is to measure the diagonal length once you have the side frame assembled and use a circular saw to cut from the center of the 2 x 4 at 45 to each side. This will give you a 90 corner at the correct length.
Place the continuous X brace first. Then cut the first 90 corner for the two-part X brace, position it in the frame and mark where to cut it for the intersection with the continuous brace. Repeat for the second half of the two-part X brace.
**If you have questions, please leave a comment below. I’m doing my best to explain how I made the X, but I realize it’s a little muddled. There are a million ways to make these cuts work, so use your best judgement for your situation and the tools you have available.
I did not put dimensions on the diagram. As I was building, I found that it was best to measure the frame as-built. Dimensional lumber can be difficult to get exactly lined up, and some of the dimensions change slightly as you go.
Alternatively, you can use a miter saw to cut the X brace at a continuous angle on each end, rather than two 45 cuts. Line the 2 x 4 up with the frame, mark the angle, and cut to fit.
Once you have the X brace assembled, attach to the side frame with wood glue and 2 1/2″ wood screws. I drilled screws through the bottom of the bottom side frame into the X brace to hold it in place. You could also use pocket holes at the back of the X brace. Use your best judgement and the tools you have available.
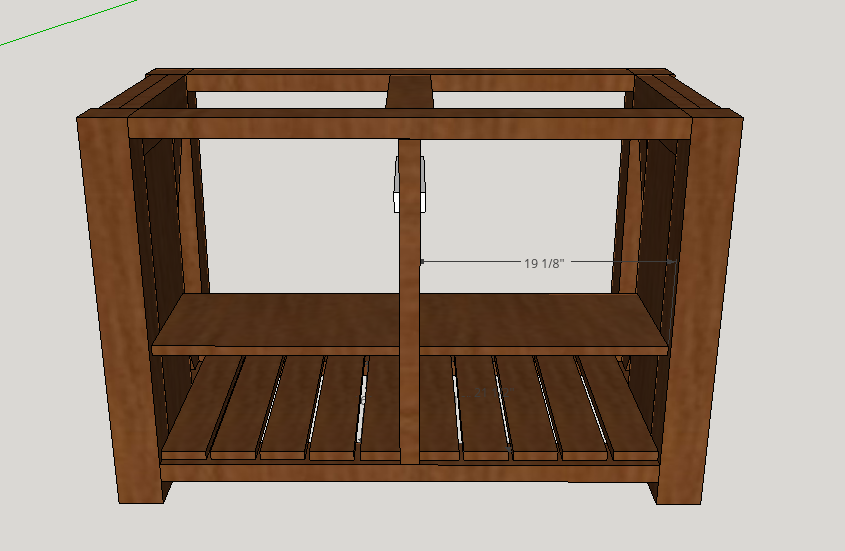
Step 4.

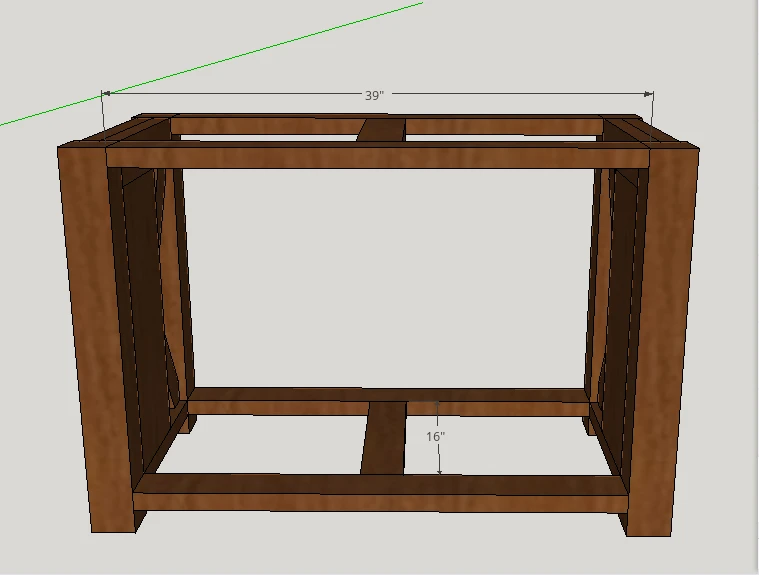
Attach the front & back frame to the side frames. Use wood glue and 2 1/2″ pocket hole screws placed on the bottom of the front and back frame.
Step 5.

Position the middle carcass 3/4″ back from the front of the frame (leaving room for the face frame), and attach at the center of the island. Attach on the top and bottom with 1 1/4″ pocket hole screws and wood glue.
Step 6.
Place the face frame centered over the middle carcass and attach with 1 1/2″ finish nails and wood glue.
Step 7.

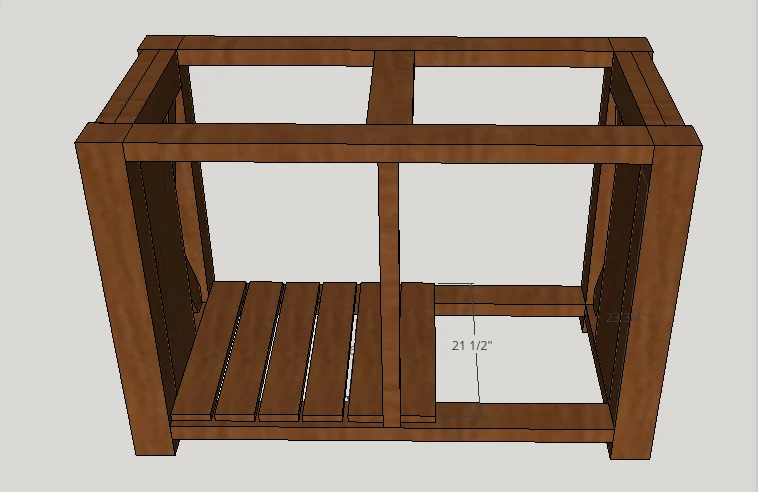
Add the bottom shelf slats and attach with 1 1/2″ finish nails and wood glue. Space the slats about 1/4″ apart.

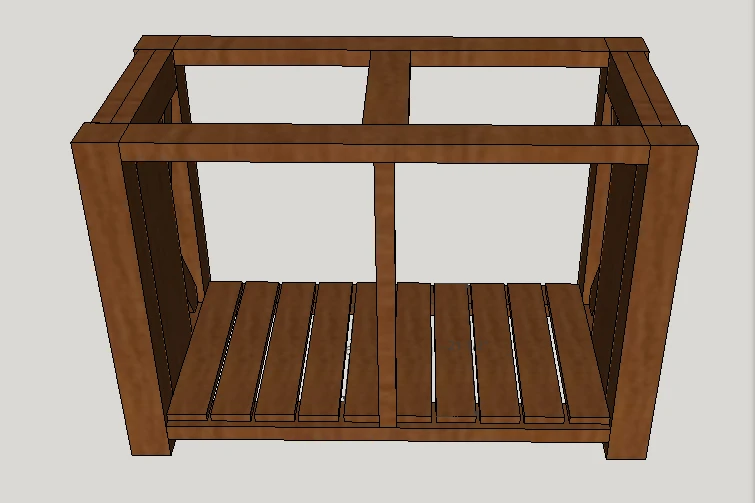
Step 8.
Because the 1 x 2 face frame is wider than the middle carcass, wood shims are necessary to set the drawer slides wider than the face frame so they slide.

I used spare 1 x 2 pieces cut at 10″ and attached them to the middle carcass with wood glue. I clamped them in place until the wood glue dried and then just used 1 1/2″ screws to attach the drawer slides so that they extended through both the shim and the middle carcass.
I positioned the wood shims 4″ down from the top frame so that they sat half way down the side of the drawers once they were in place.
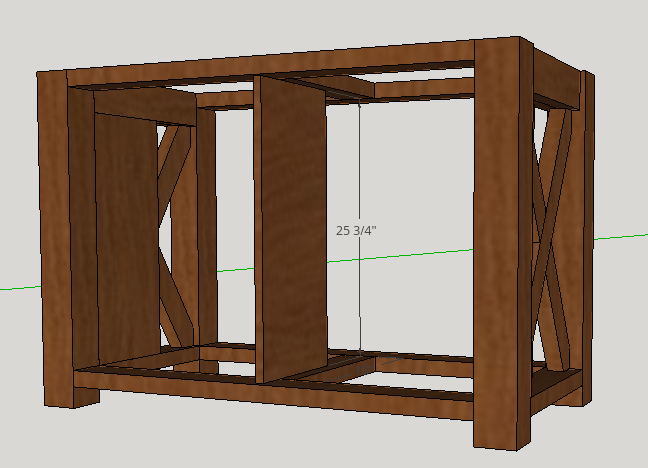
Step 9.
I used corner brackets for the middle shelves and set the shelves 9″ up from the bottom shelf.
Step 10.
Sand and finish as desired.
I used Minwax Dark Walnut and spray-on Semi-Gloss Polyurethane.
I decided to go with spray polyurethane to save time. I cannot recommend it enough. It cut the finish time down by dayzzz!
For real. It was amazing.
Total game changer.
I used about three cans and did four coats to ensure adequate coverage. It was a piece of cake to finish this bad boy up and the poly is sooooo smooth. 🙂
Once it’s all stained and poly-ed, attach the butcher block counter-top from the bottom with corner brackets. The corner brackets allow the wood to move a little as it shrinks and swells so that it won’t split or pull the island frame off square.

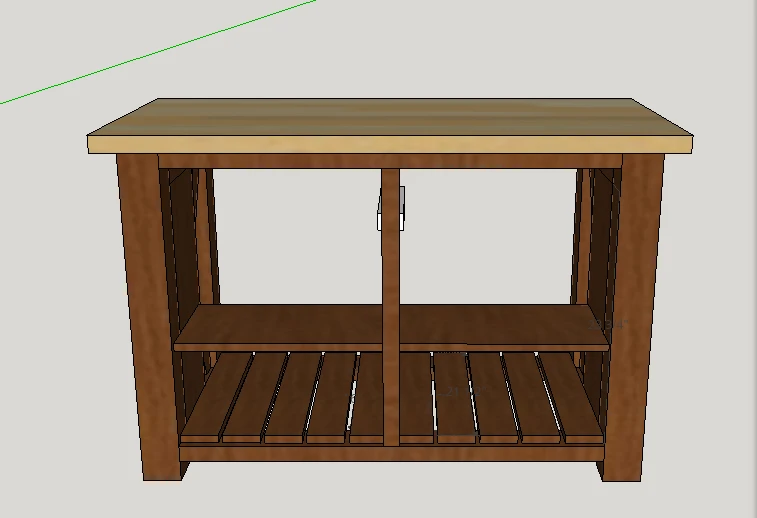
You can purchase butcher block counter-tops from Home Depot or Amazon. I used a 48″ x 25″ x 1 1/2″ butcher block top.
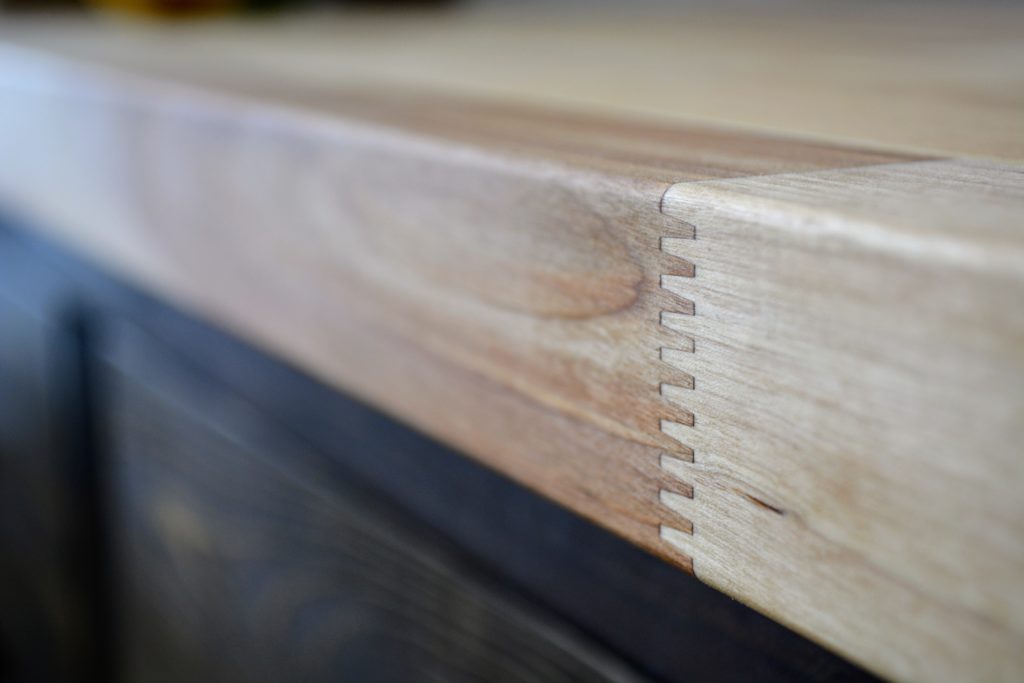

Drawers
I built the drawers for this island using a dado cut for the base, which I’ll explain below. However, if you would prefer the no-fancy-tool version, I have a different tutorial here. Simply adjust the measurements to fit the island.
I waited to build the drawers until I had finished the rest of the island. It’s your call, but I wanted to make sure my dimensions were exact for the drawers. Drawers can be finicky, and if you don’t get them just right, they don’t slide … speaking from experience … drawers are not my friend …
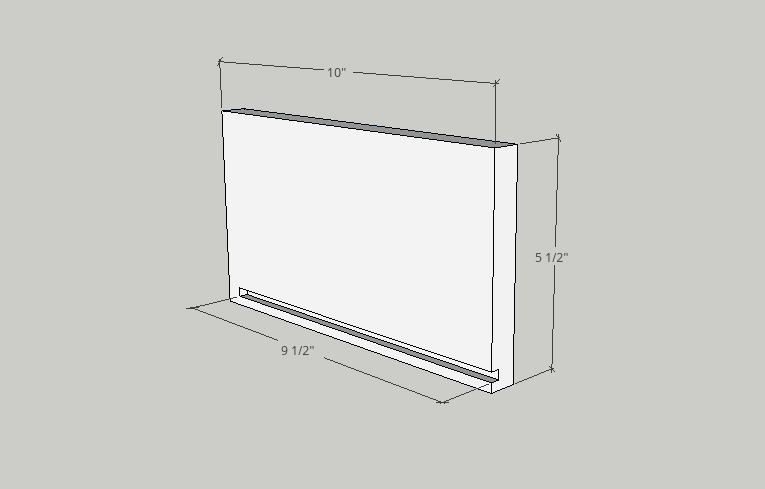
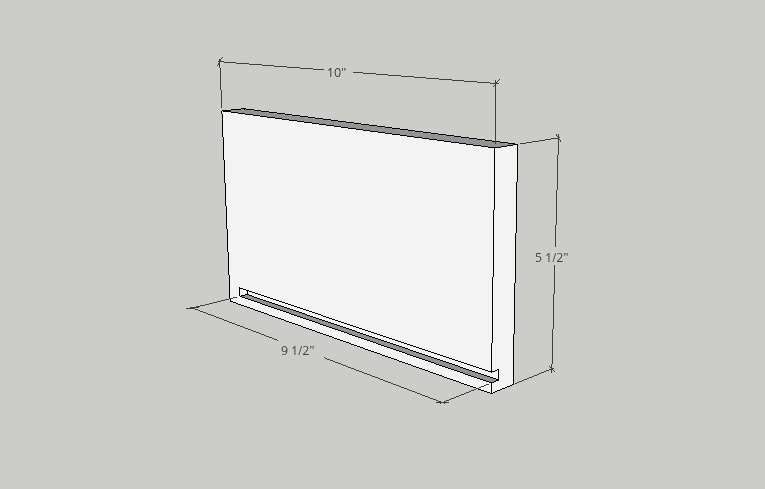
The dimensions I’ve labeled below are the actual dimensions I used for this island. Adjust as necessary. Drawer slides typically require 1/2″ clearance on each side. Double check your drawer slides before building … also speaking from experience …
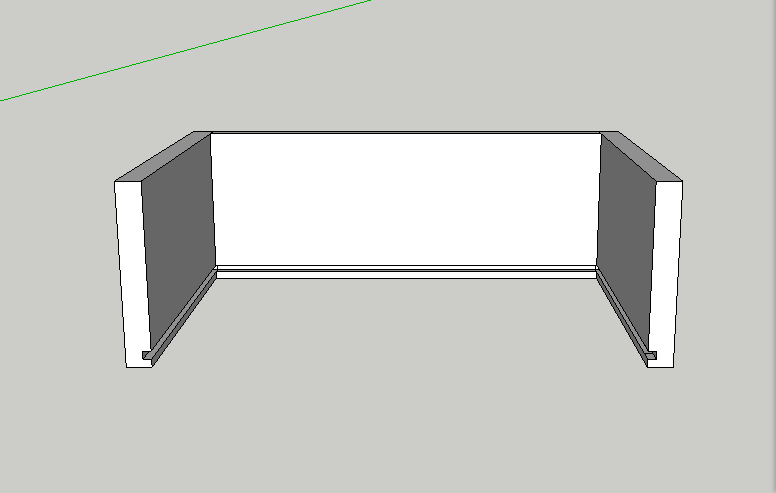
Step 1.
Start by cutting the four drawer sides to 10″.
Cut a 1/4″ x 1/4″ dado at the base of the drawer side, 1/4″ up from the bottom of the board. Stop the dado cut 1/2″ from the end of the board.
I used a table saw to cut the dado. Just cut a little at a time and move the blade out until the cut is 1/4″.
Repeat for 4 drawer sides.
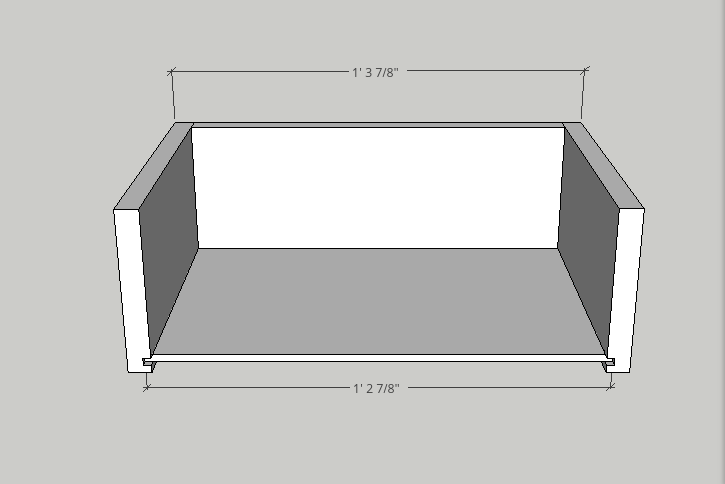
Step 2.
Cut both drawer backs to 14 3/8″.
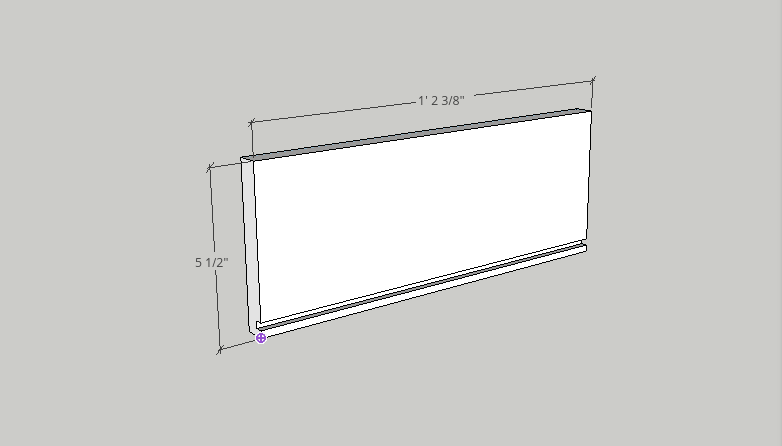

Cut a 1/4″ x 1/4″ dado along the full length of the drawer back (again, 1/4″ from the bottom).
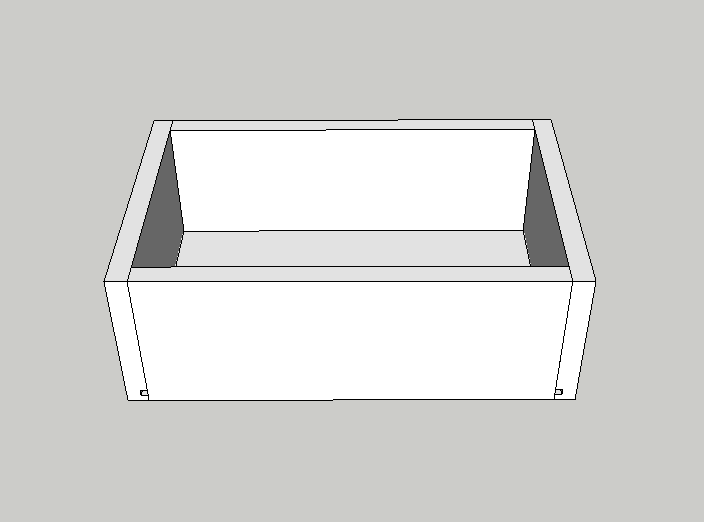
Step 3.
Attach the drawer sides to the back with 1 1/4″ pocket hole screws and wood glue. Place pocket holes on the back of the drawer back to best hide them.

Step 4.
Insert the drawer base and attach with wood glue.

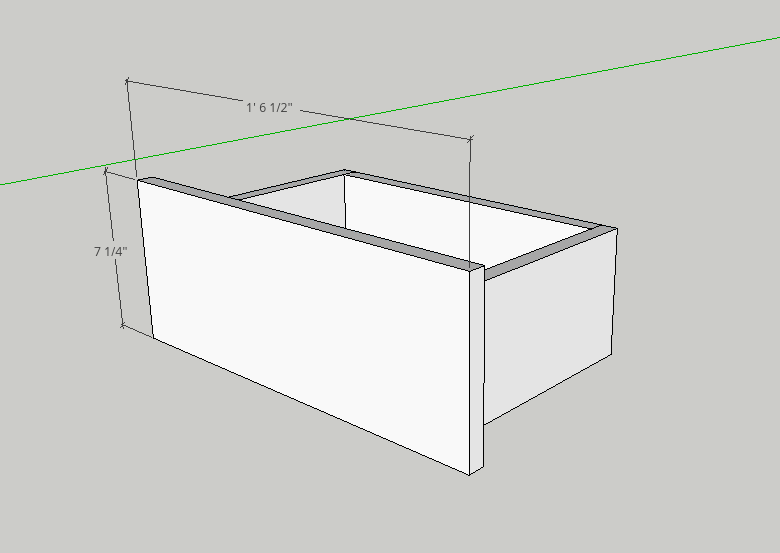
Step 5.
Slide the front of the drawer into position and attach with 1 1/4″ pocket hole screws and wood glue. Place pocket hole screws on the front of the drawer. The drawer face will cover them in the next step.

Step 6.
Attach the drawer face.

I positioned the drawer face with 1/2″ overhang at the bottom of the drawer, but it’s totally up to you.
I recommend putting the drawers on their slides, put wood glue on the back of the drawer face, position the drawer face to where it looks best, and then nail it in place to the front of the drawer with a couple finish nails. Remove the drawers from their slides and clamp the face in place until the wood glue dries. Then just fill the small finish nail holes with wood filler before staining and you’ll never know they’re there.
It is not necessary to add extra screws to adhere the drawer face since the drawer pulls provide a strong connection between the face and drawer.
Sand and finish as desired.
I finished the drawers, shelves, and island at the same.
Assemble and add hardware.
I added locking casters to the legs so it’s easy to move around the kitchen. You can find them here.
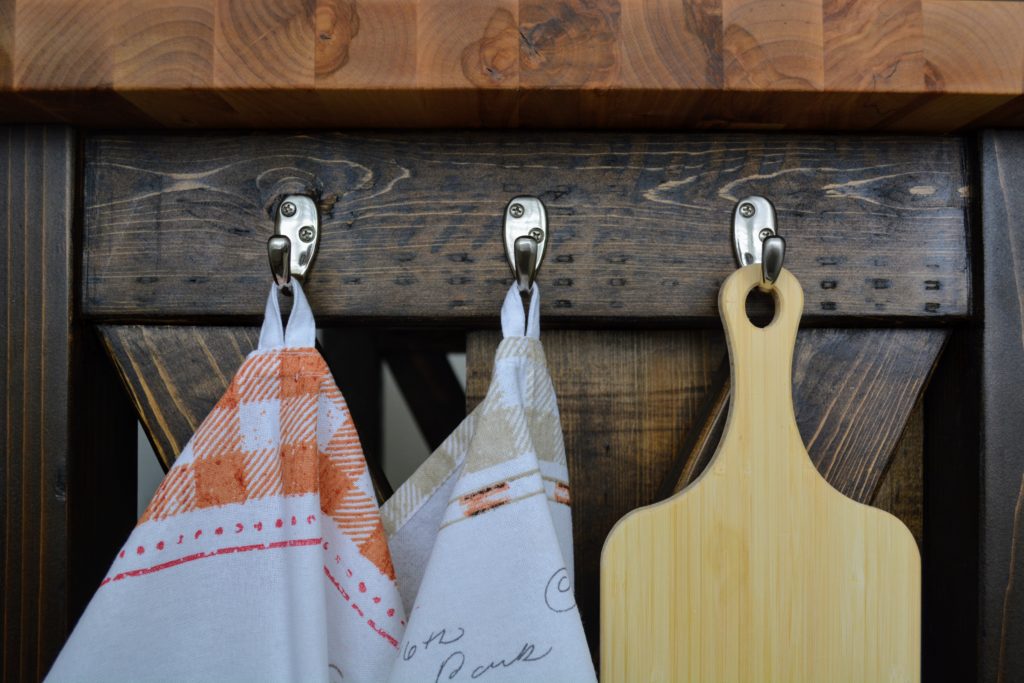


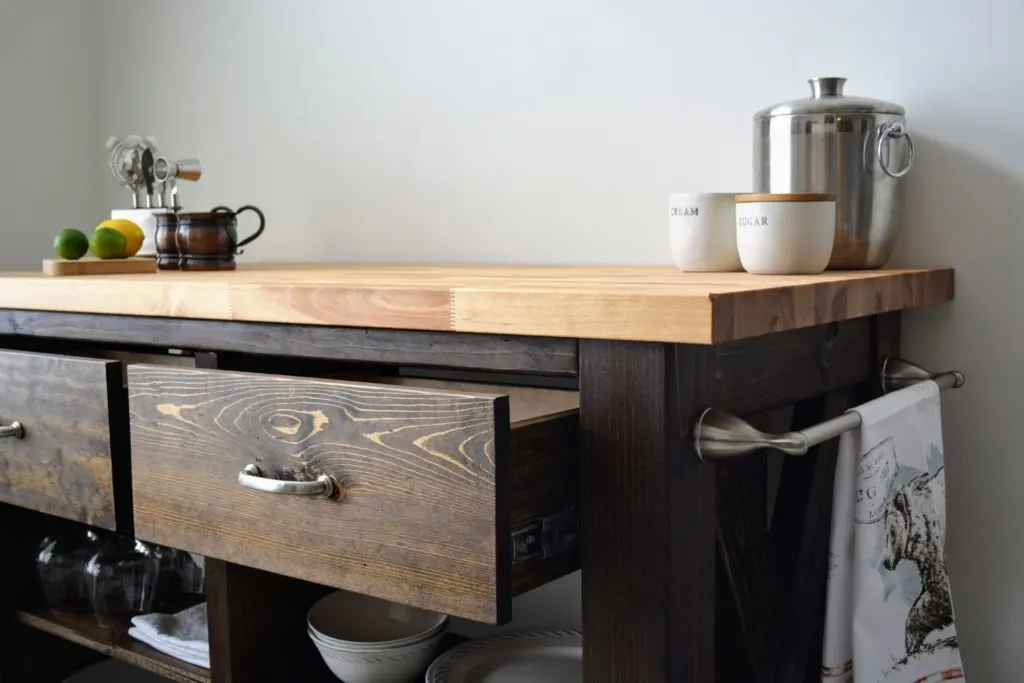
The hardware is up to you. I added three towel hooks to one side and a towel bar on the other side.

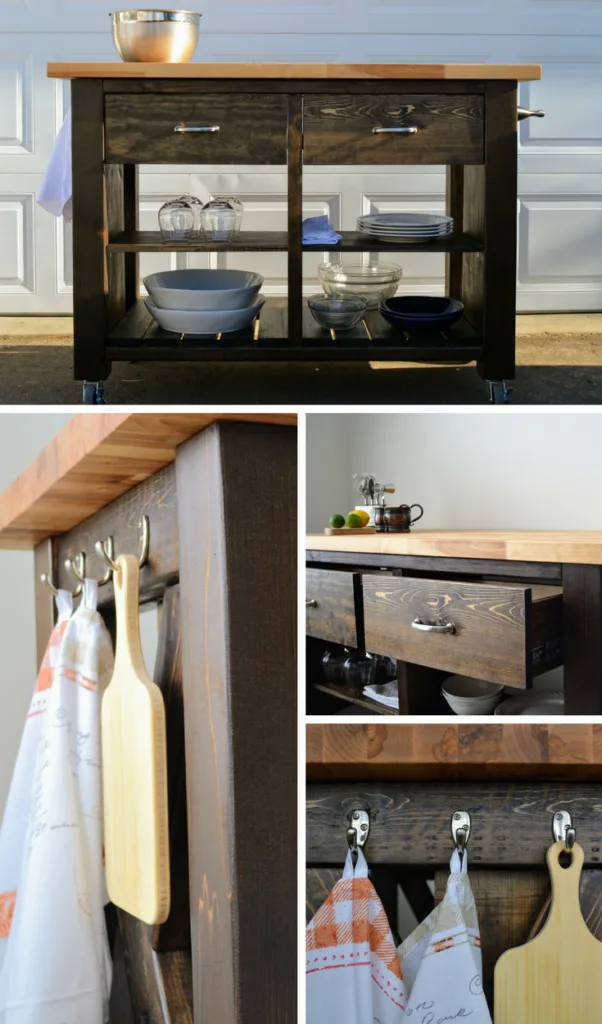
Boom.
Kitchen Island.
Please leave any questions in the comments below and I’ll get back to you as soon as possible!
Happy Building!
![]()
![]()
Thanks for stopping by!
For more project ideas, you can find me on Pinterest. And to stay up to date with the latest shenanigans, follow me on Instagram.