
Hi All,
If you’ve noticed, things have been a little sporadic here at Bitterroot DIY lately.
I have a reason.
We bought a house.
Or should I say – our first home!
I can’t even begin to explain how excited we are.
I’ve been daydreaming like crazy over here.
You better believe I’ll be hitting the home improvement projects – coming soon!
But first.
Unpacking.
One step at a time.
Or at least that’s what Joseph keeps telling me 😉
So with that, on to today’s tutorial!

When we were moving, we decided we didn’t want to haul all my scrap wood along. I figured that was as good an opportunity as ever to use up as much as possible! So I completed 15 small scrap wood projects in April before we packed and am sharing a new one every-other-day of May (Mon, Wed, Fri).
Welcome to the Bitterroot Scrap Wood Series!
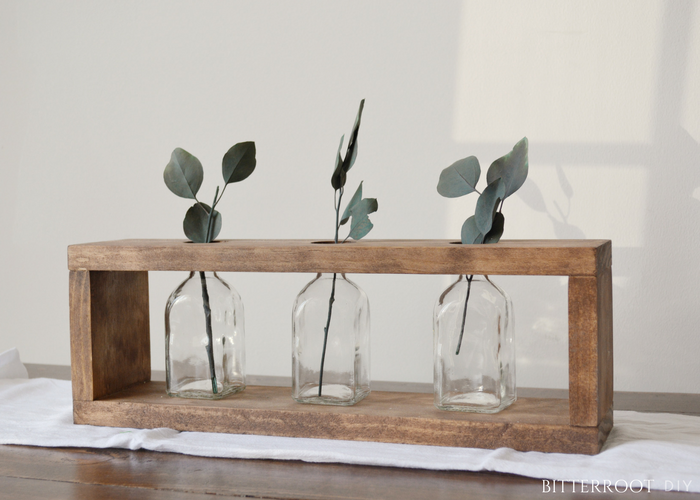
Day 1 – Simple Modern Farmhouse Centerpiece Inspired by Shanty 2 Chic


This post contains affiliate links. If you make a purchase from one of the links, I may make a small commission at NO EXTRA COST to you. This helps keep the tutorials and plans free here at Bitterroot DIY. Thank you for your support! See my full disclosure here.
Tools & Supplies:
- Wood Glue
- Finish Nailer (or hammer and nails)
- Drill
- 1” Spade Bit
- Jars
Lumber:
- 1 | 1 x 4 @ 3.5’
Cuts:
2 | 1 x 4 @ 16” (top & bottom)
2 | 1 x 4 @ 3.5” (ends)
Step 1.
Attach the ends to the bottom 1 x 4 with wood glue and finish nails. Clamp in place and let the glue set.
Step 2.
Drill 1” holes into the top 1 x 4 with a 1” spade bit.
*Tip: clamp your board to a spare board when drilling to avoid tear out on the bottom side.
Step 3.
Depending on the height of your jars, you may want to position them before attaching the top 1 x 4 to the centerpiece. I had enough room to fit the jars in after assembly, but it’s safest to test it out before proceeding.
Attach the top 1 x 4 to the ends with wood glue and finish nails. Clamp in place and let the glue dry.


Step 4.
Sand and finish as desired.
I used on coat of Minwax Special Walnut and Spray-on matte polyurethane.
If you’re interested, check out the inspiration for this centerpiece over at Shanty-2-Chic. Ashley and Whitney have great tutorials and projects.
Let me know if you have any questions and I’ll get back to you as soon as possible!
Don’t forget to stop by on Friday for the next scrap wood project!
Thanks for stopping by!
For more project ideas, you can find me on Pinterest. And to stay up to date with the latest shenanigans, follow me on Instagram.
![]()
![]()


Lydia
Tuesday 7th of January 2020
Where do you find your jars? It’s so cute!
tylynn_sattler
Tuesday 7th of January 2020
Hobby Lobby! Thanks