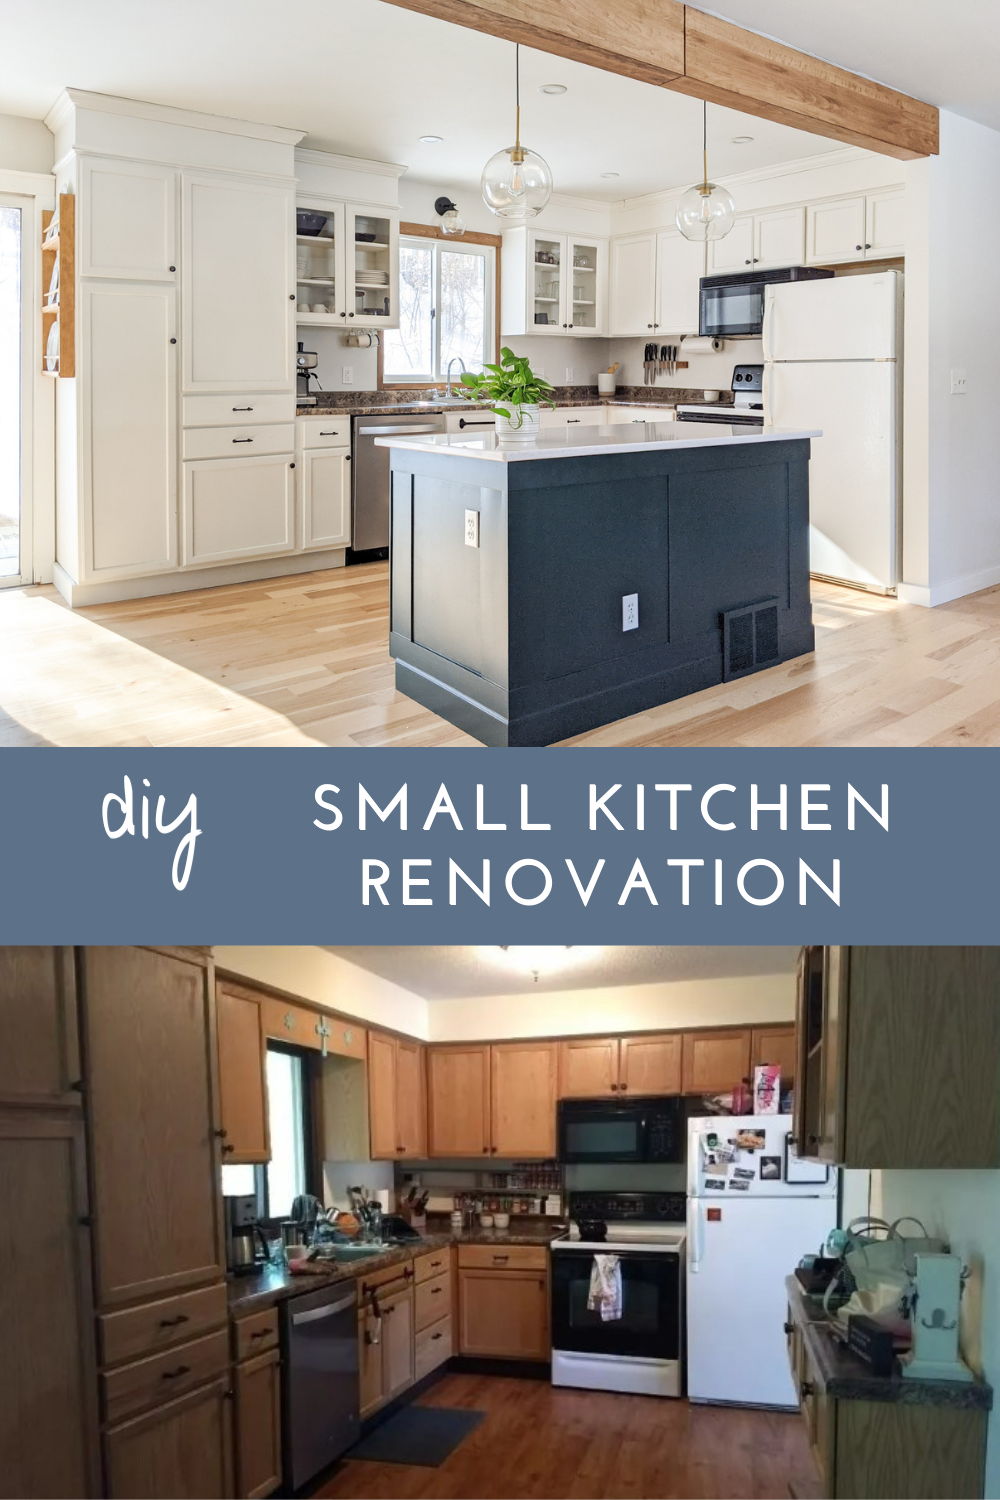
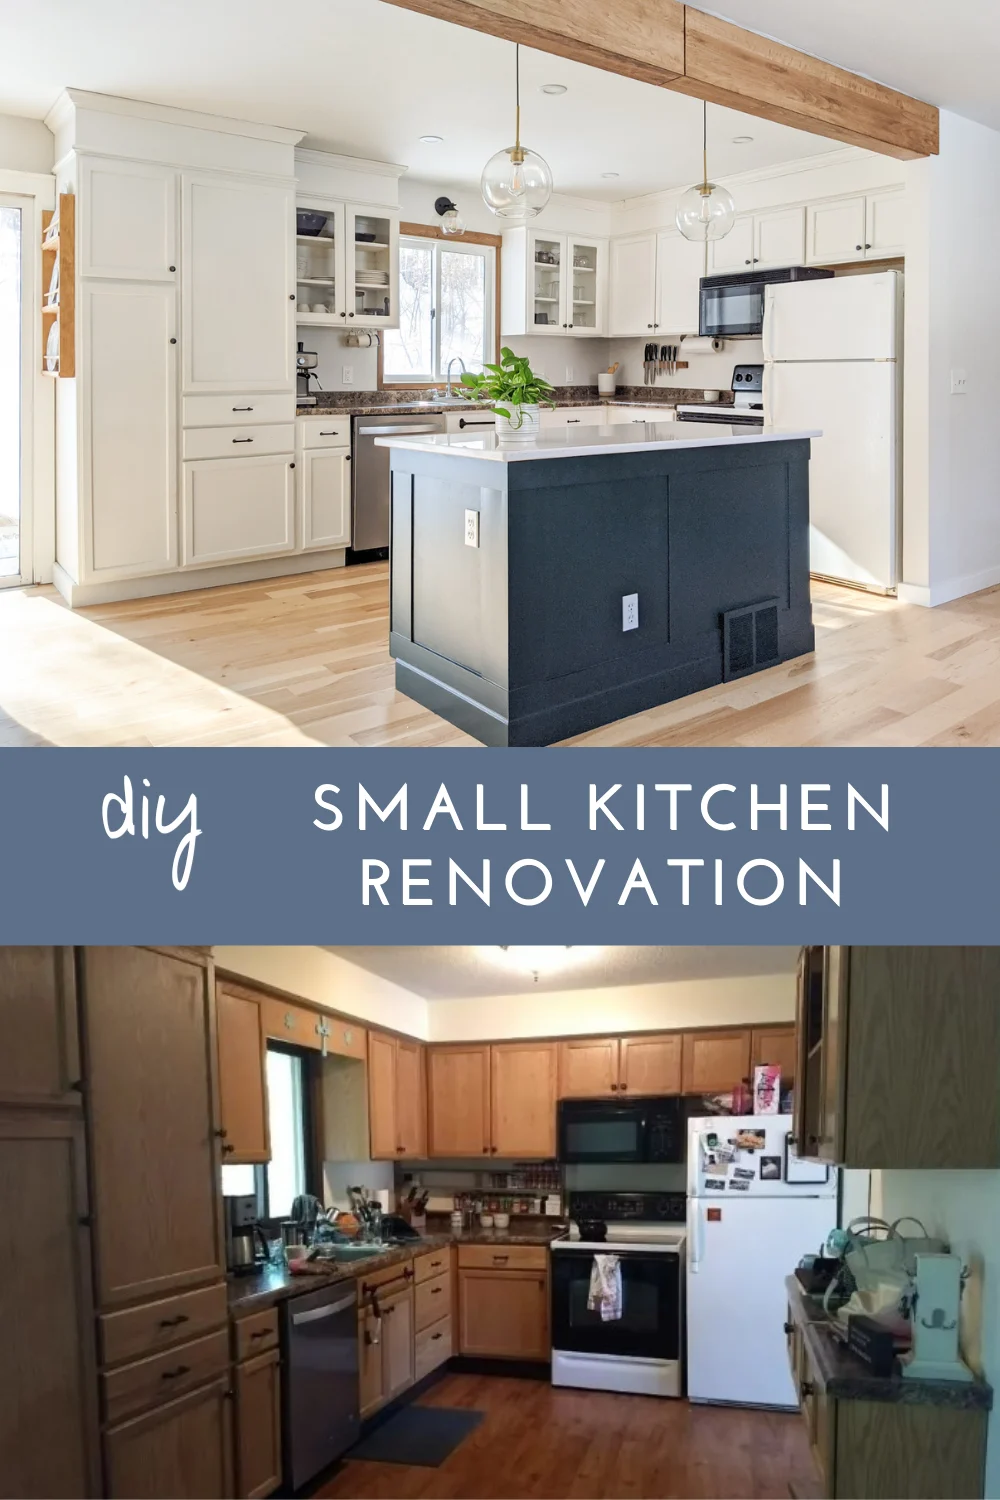
Make the most of your small kitchen with design ideas from our DIY kitchen remodel.

This post contains affiliate links. If you make a purchase from one of the links, I may make a small commission at NO EXTRA COST to you. Thank you for your support! See my full disclosure here.
I’m not sure if anyone reads these posts as they’re published. But, if you do, here’s a random and way overdo reveal from our previous house – my second attempt at our small kitchen! Turns out, I never “officially” shared it (other than the kitchen island makeover). Stellar documentation, I know.
In my defense, there was a LOT going on at the time – I finished it while 6 months pregnant and just in time to list the house for sale. Needless to say, I was a smidge preoccupied. But I’m circling back now to show you how it turned out in the end!
First – a little history.
This is the kitchen from our first home. Prior to purchasing it, we rented a small townhome – as most of us do when we’re just starting out – and I had dabbled in some DIY crafts and built a few pieces of furniture. I started this website to document the projects but was mostly just learning and getting a feel for things – DIY, design, and how to document it.
Fast-forward about a year. We bought and moved into this first house in April 2018. And I basically went “Stand back world, I got this. I’m gonna flip this place, no problemo. It’ll take 3 weeks, TOPS.”
Boy, was I in for a ride.
And lot’s of lessons learned.
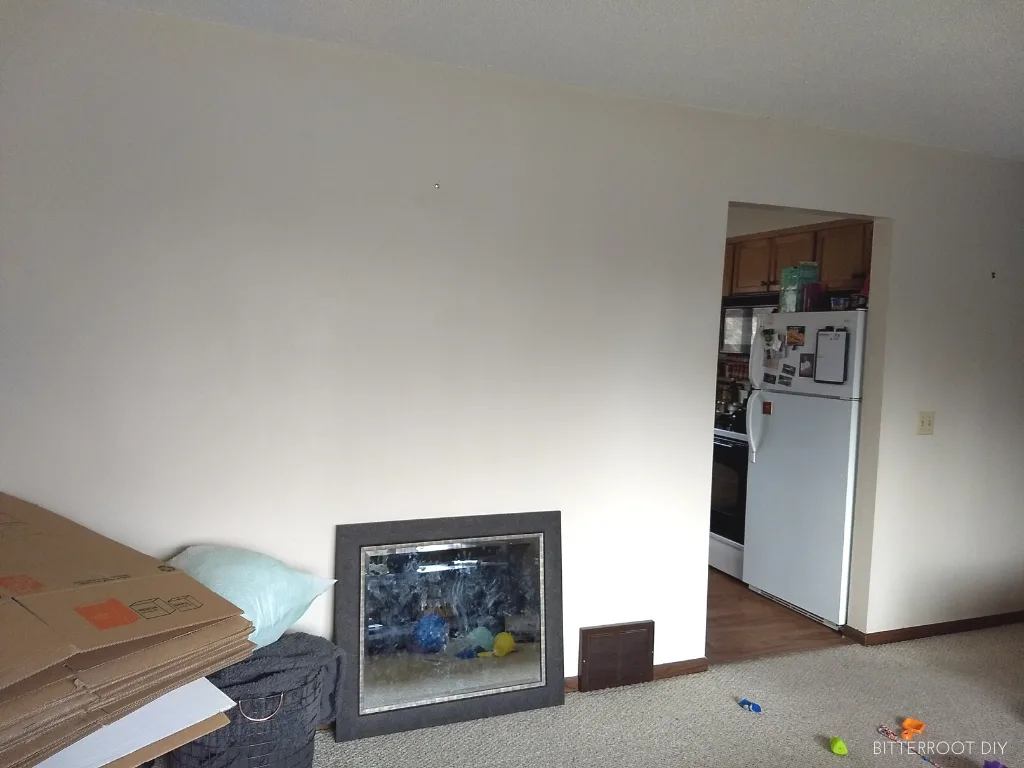
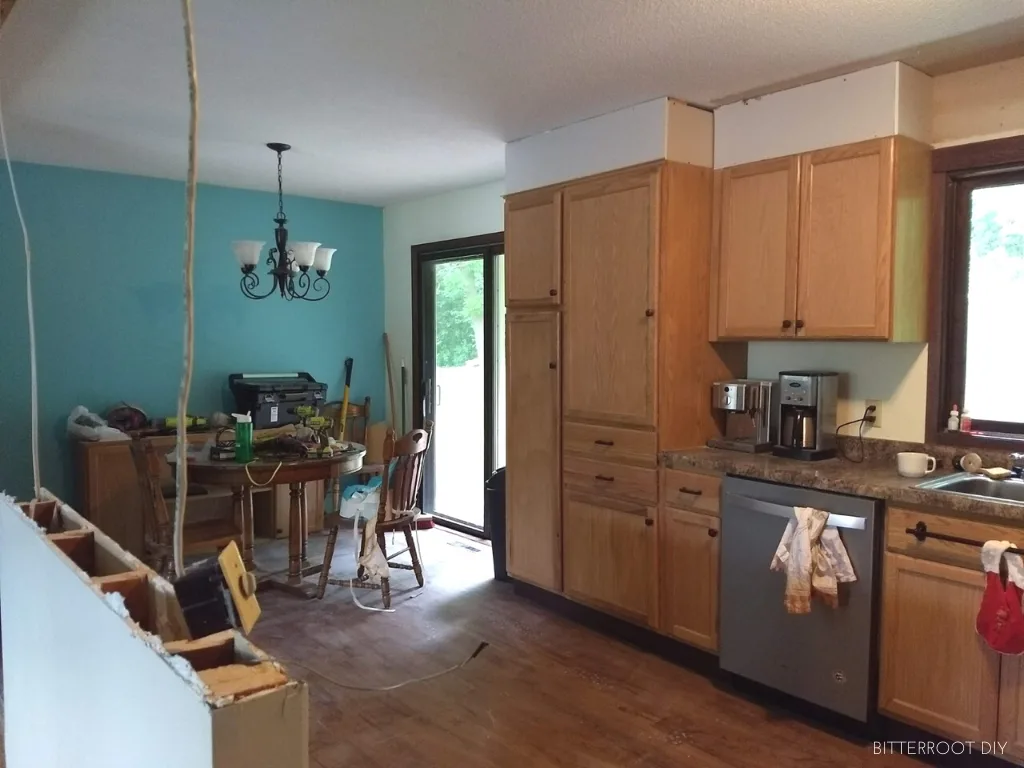
But, naturally, week two after move-in day and I took a sledgehammer to the wall between our kitchen and living room.
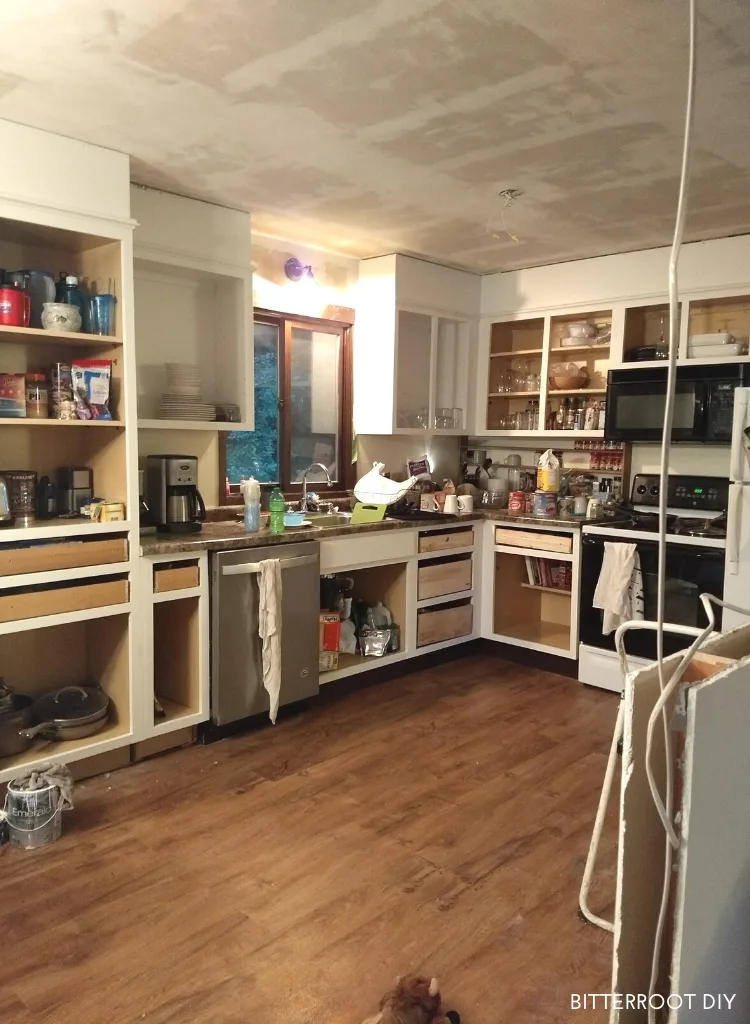
Before:
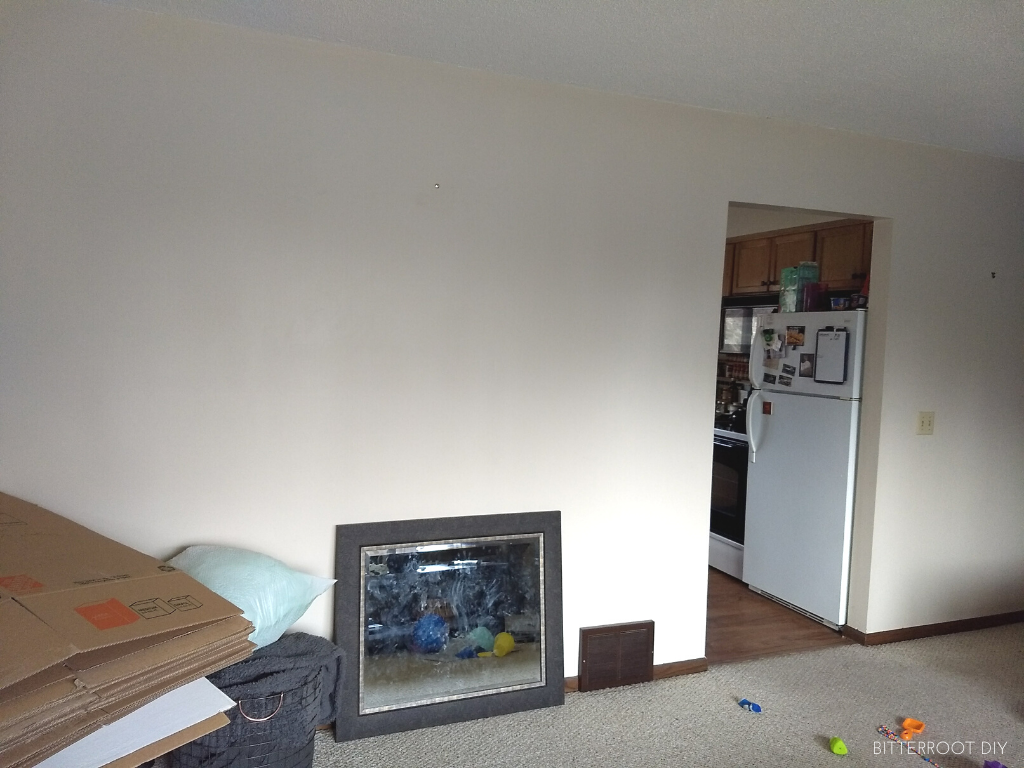

After:


I was fortunate enough to grow up around a family of handy men and women, so I was familiar with power tools and knew some basics. But it was a COMPLETELY different ball game to do it on my own. And, mind you, my family lived 1200 miles away. So this wasn’t a situation where I had a lot of help. I was self-teaching most things.
It was a LOT of work – more than I had anticipated with my whole one year of “experience” – but remarkably, it actually went alright. We (my husband and I) built temporary walls in place, took down the wall, replaced it with the proper beam (it was load bearing), and moved a bunch of electrical (one of our close friends is an electrician). But I didn’t have much design experience and was working with a VERY slim budget.
Now, the definition of “slim budget” is so different for everyone, but I mean like $50-per-month sort of budget. Slim.
I had the ambition and was learning the skills on the fly, but between the budget and the fact that it was my first attempt at any sort of interior design, it was a bit … hmm, let’s say – rough.
But, hey, we all start somewhere!

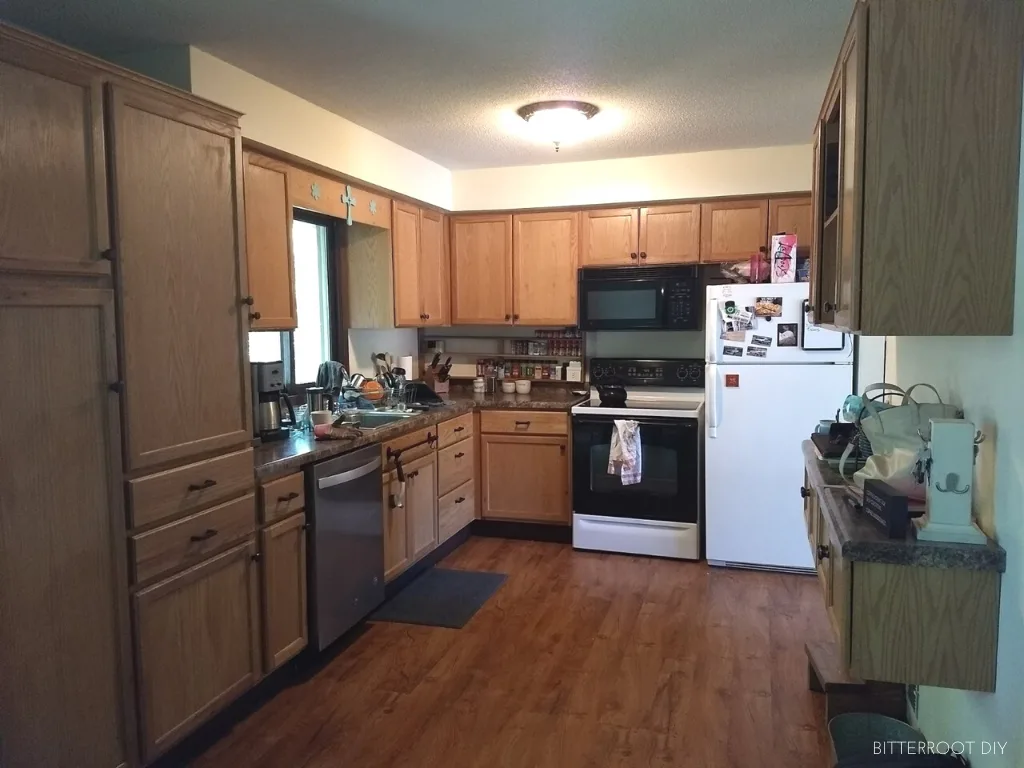
During the first remodel I removed the wall between the living room and kitchen; wrapped the new beam with pine boards; scraped popcorn ceiling; added can lights, pendants, and a light above the sink; built the island; extended the cabinets to the ceiling; added glass to a few cabinet doors; painted the cabinets; and repainted the ceiling and walls.
Here was the first reveal:

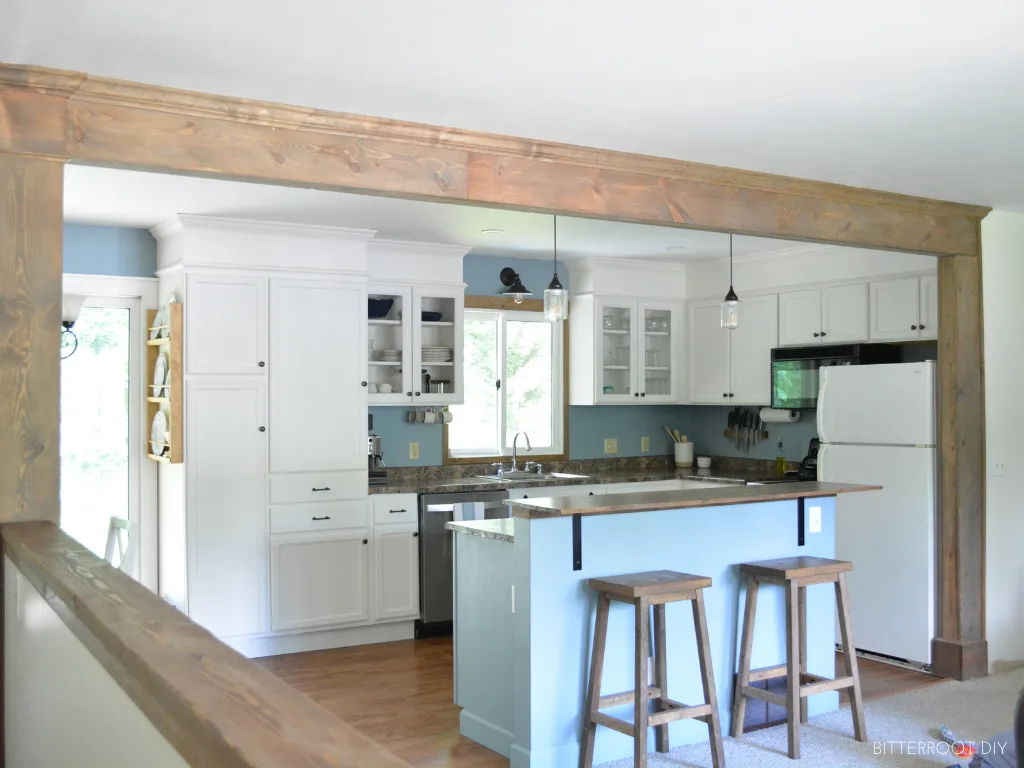
I was so proud. I wrote a whole reveal post, showed it off on social media, sent pictures to family, etc. You can even go read the post still. Yep, I left it out there.
On second thought, maybe don’t go read it – it was one of my earlier pieces haha. Anyhoo.
I’m still proud of that first attempt but with a different perspective: proud that I gave it a try, of all the lessons learned, and to be able to look back and see that that’s where I started.
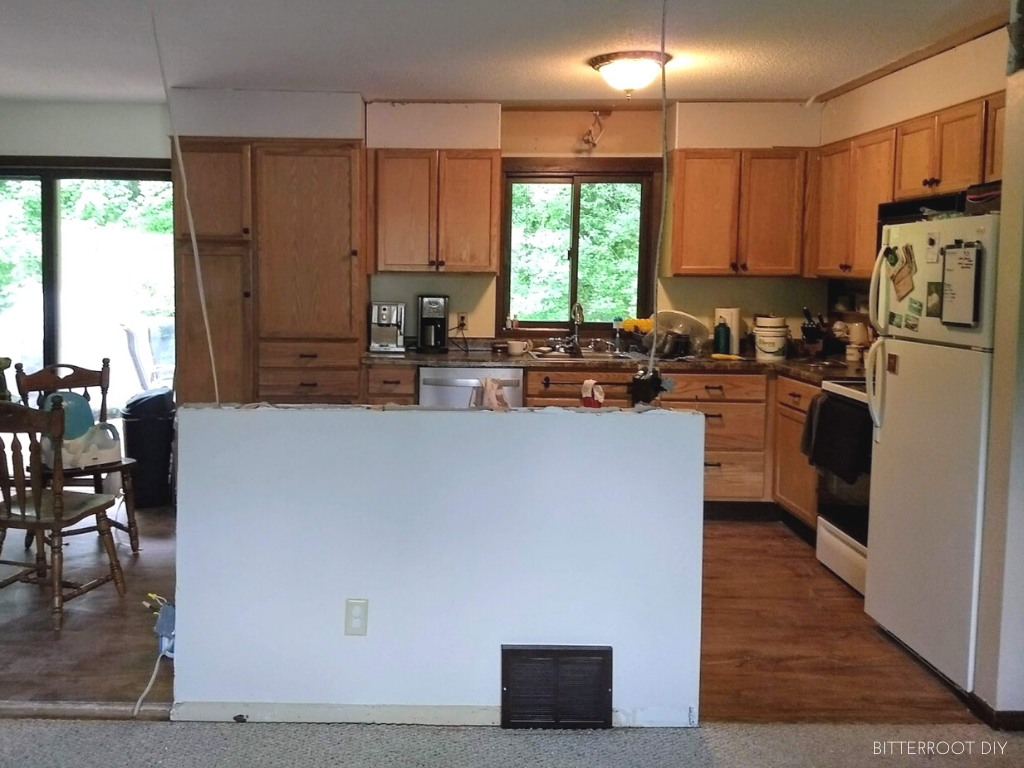
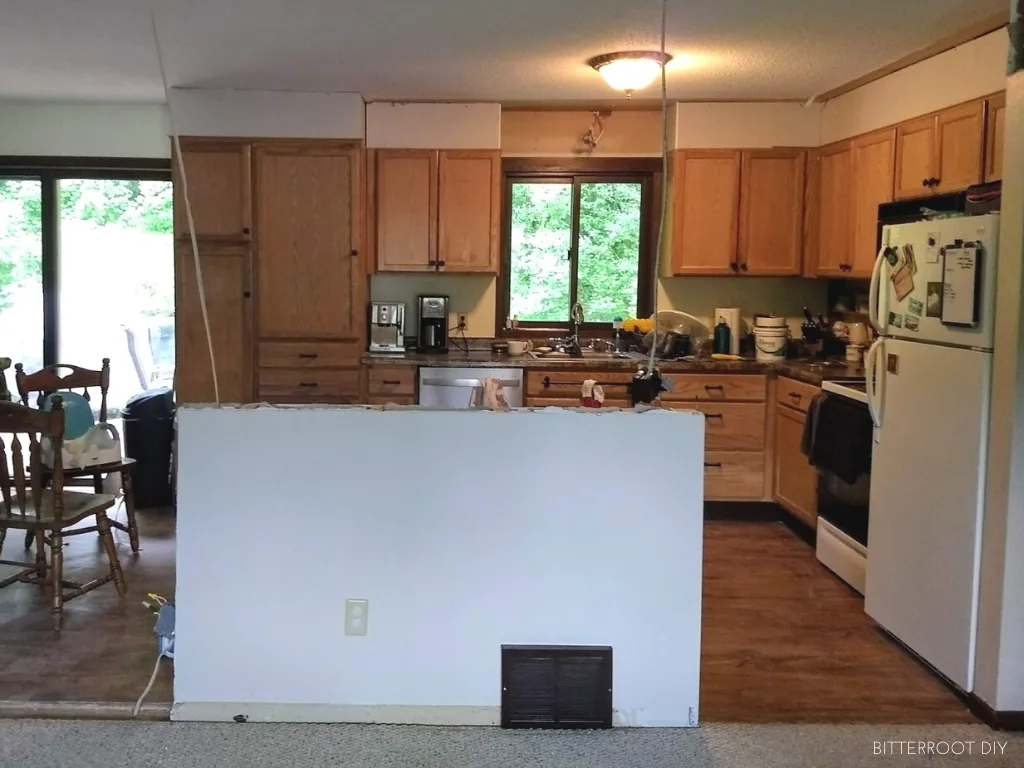
Then I took it all apart and did it again!
Ok, not ALL of it – but a good portion.
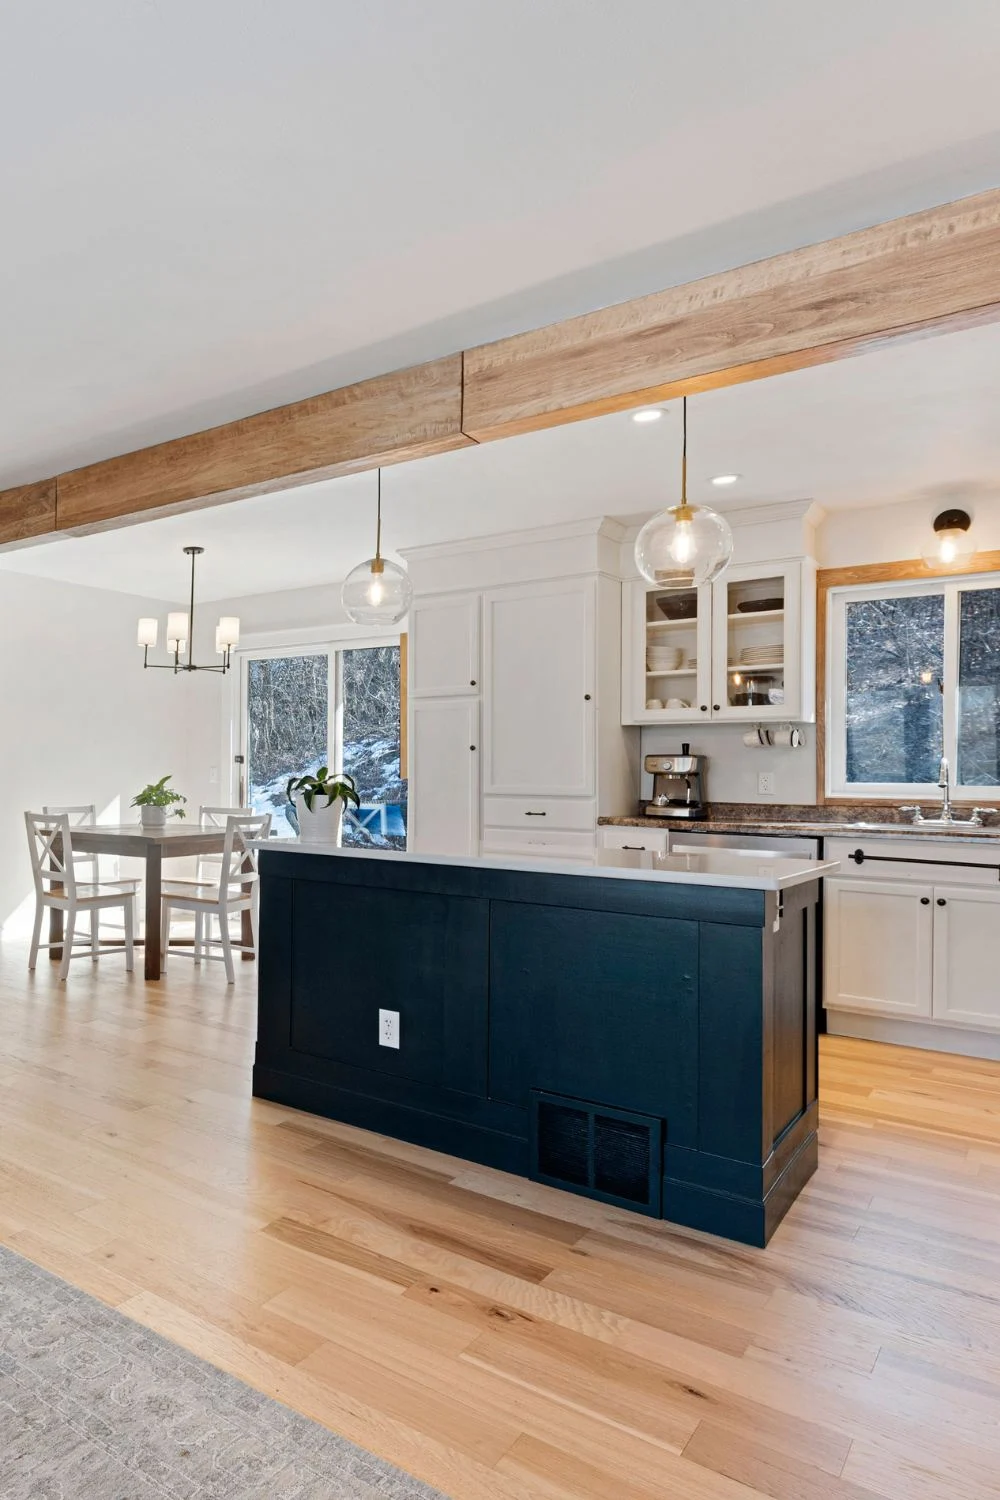
This is what it looked like half way through the second remodel:
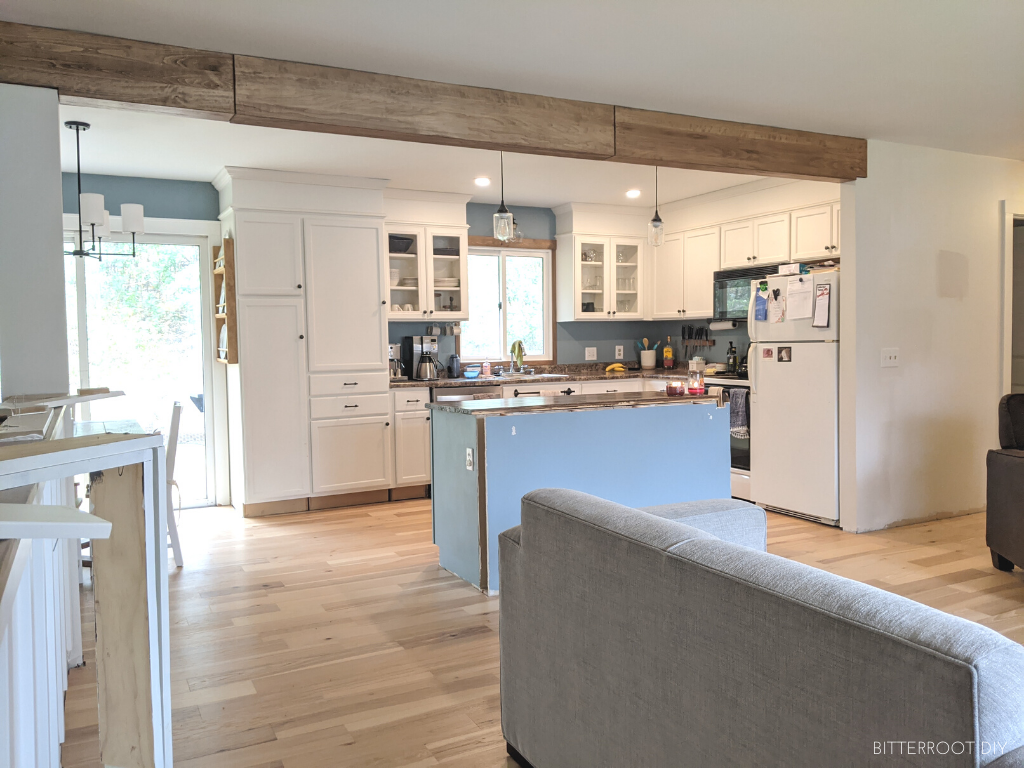

I re-did the beam and column wrap, repainted the walls, changed out the light fixtures, and we laid new flooring across the main floor (which included the kitchen).
I did NOT change any appliances or the main countertops. Those were beyond our budget. But simply changing the wall and floor colors made the whole room much brighter. Though I do like a lot of the “moody” kitchen designs out there, this kitchen really stood out with more of the light & airy vibes.
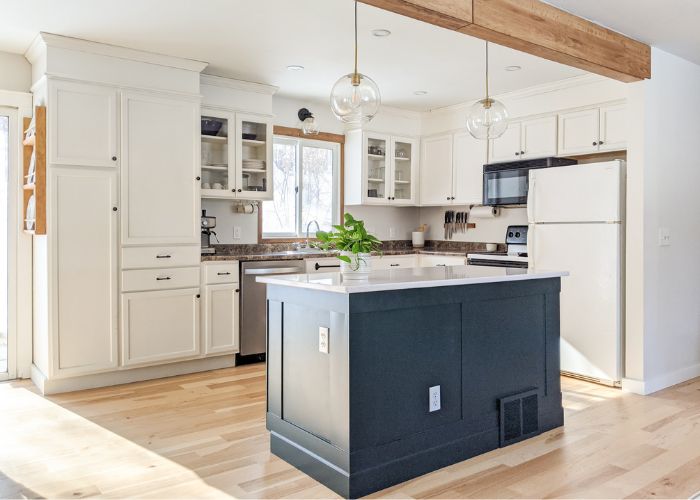
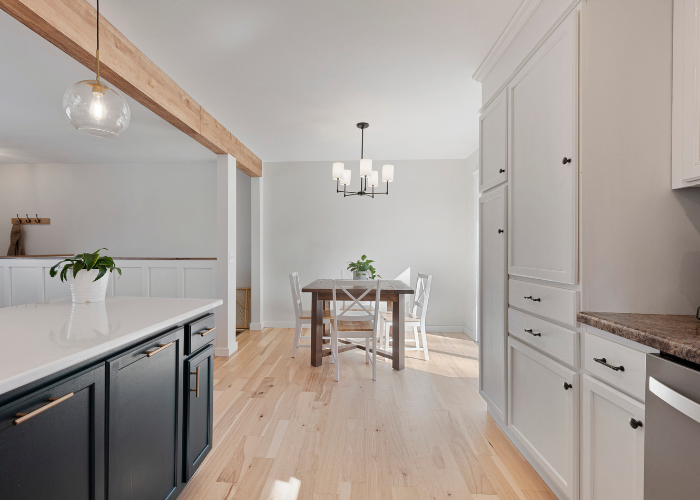
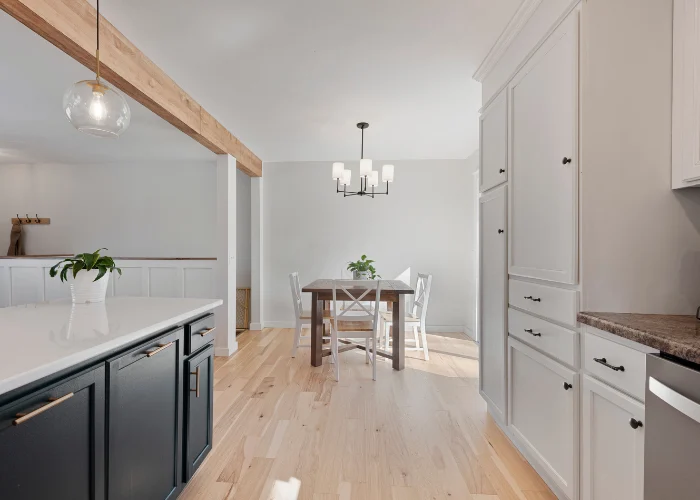
Here’s the FINAL final reveal:

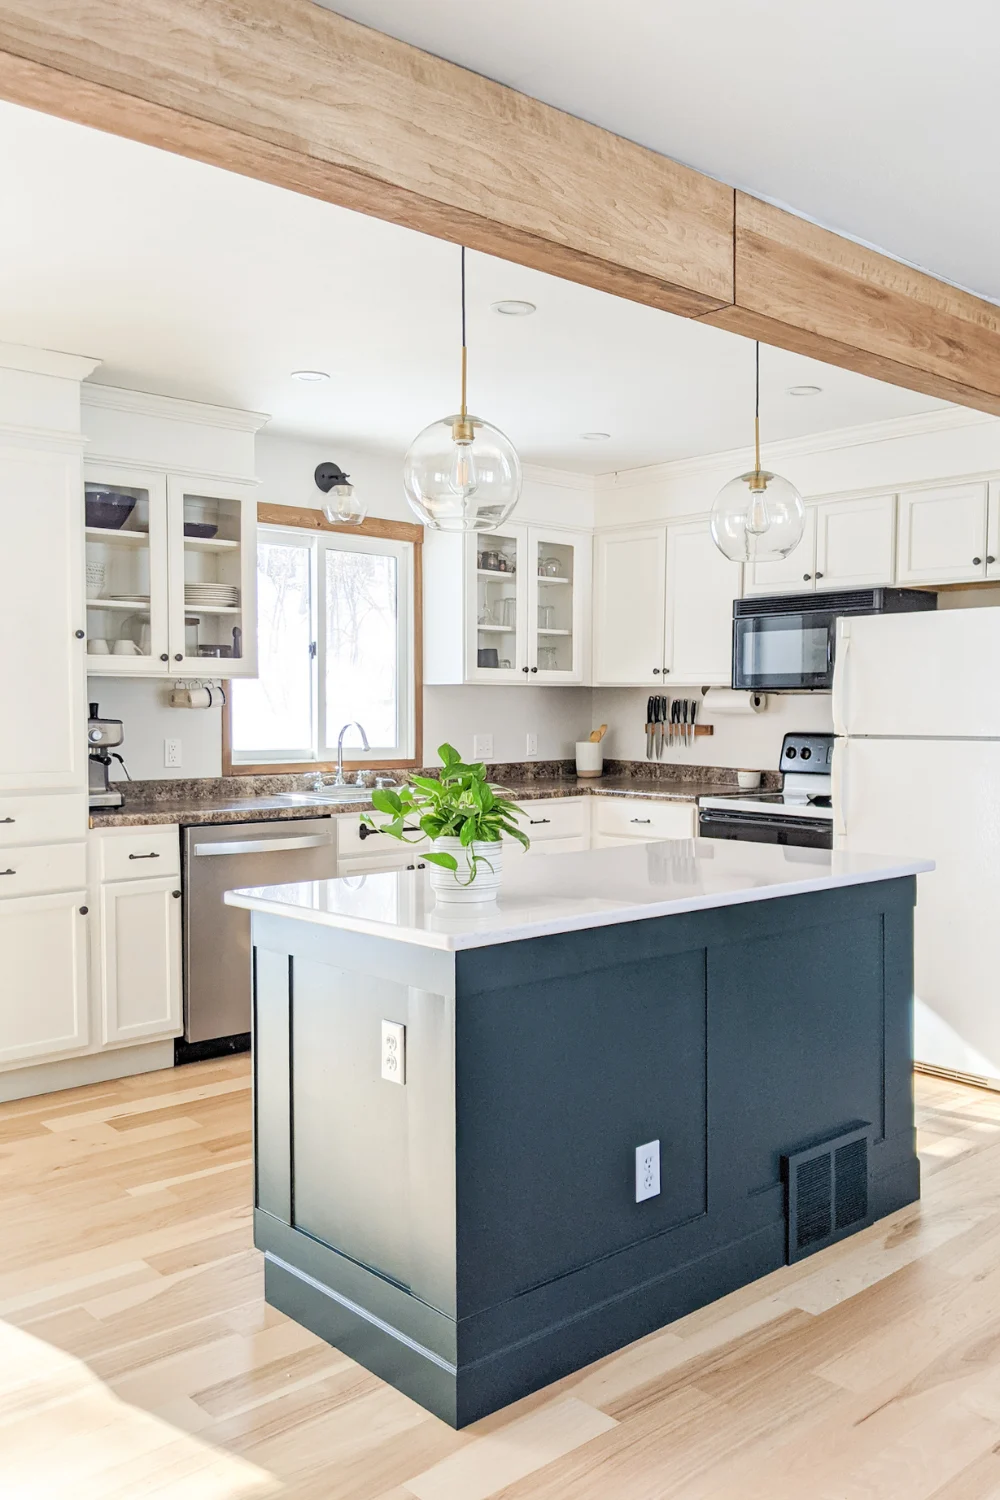
It’s a small kitchen, about 7′ x 10′, but very functional.
I stored our tableware, cups, serving bowls – the things we used every day – in the glass cabinets around the sink. It seems counterintuitive, but putting them on display meant I decluttered regularly, which helped keep things slimmed down so we didn’t overcrowd the little cabinet space available. Of course, we still had regular kids’ kitchen items. I stored their plasticware, sippy cups, etc in the closed cabinets. But just minimizing the rest of the tableware to the glass cabinets made a big difference.

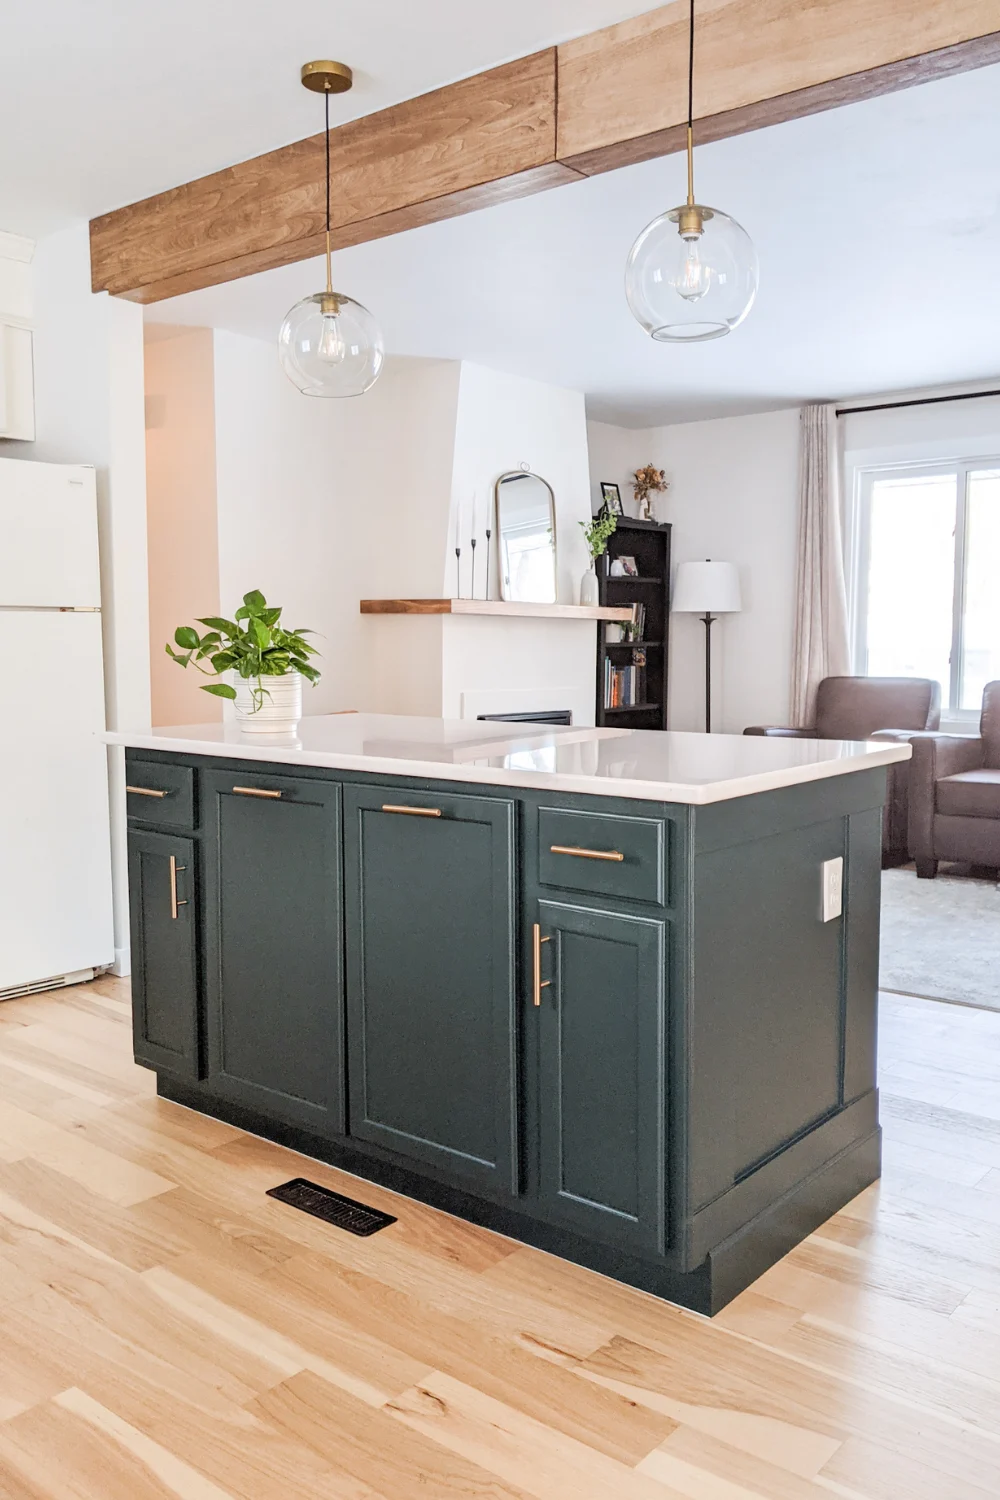
I kept the same island from the first remodel and revamped it a bit (kitchen island makeover tutorial here), which gained us quite a bit more counter space. It housed the garbage and recycling, as well as a custom pots & pans organizer.
** Side note: if you don’t have space for a permanent island – consider one on wheels that you can tuck away when not in use. I built a mobile kitchen island for some of our friends and they said it worked wonders for their small kitchen!

We set up that tall cabinet next to the back door as a small pantry. I forgot to take a photo of the inside, but we added shelves and pull out storage for the majority of our food, large appliances, and bulk items.
The photos are a bit deceiving on size. The kitchen area (fridge to end of cabinets) was about 10′ x 7′. The dining room portion (at the far end) was about 5′ x 7′. It looks quite a bit bigger in the photos thanks to wide angle lenses … but you couldn’t fit an 8×10 rug in that area. In fact, we couldn’t fit an 8×10 rug in the living room right next to the kitchen haha but that’s a different post.
I know it was kind of a round-about way to get there, so here’s a side by side of the true before and final after:
And from the other side:

It only took me 3 YEARS – and redoing all my work multiple times – to get there. Easy peasy. Just like it looks on Instagram, right?!
PAINT COLORS
Walls: Benjamin Moore Classic Gray in eggshell
Cabinets: Sherwin-Williams 7008 Alabaster in satin
Trim: Sherwin-Williams 7006 Extra White in satin
SOURCES

- Dining Room Light
- Pendant Lights
- Above Sink Sconce Light
- Brass Cabinet Pulls
- Magnetic Knife Block
- Espresso Machine (not entirely related but I LOVE this espresso machine. Ask my husband. He makes fun of how many people I tell about it)
Here’s a list of the projects with links to each of the tutorials:
- DIY Kitchen Island
- Extend Cabinets to the Ceiling
- Add Glass to Kitchen Cabinet Doors
- How to Paint Kitchen Cabinets
- Install Easy Recessed Lighting
- Install a Sconce Above the Sink
- Pots & Pans Organizer
Now go and do BIG things in your SMALL kitchen! May the small-kitchen-odds be ever in your favor.
Clearly I’ve been writing for too long and it’s getting late and I should stop.
But I hope this gave you some good inspiration and ideas!
Please let me know if you have any questions and I’ll get back to you as soon as possible.
For more project ideas, you can find me on Pinterest. And to stay up to date with the latest shenanigans, follow me on Instagram and subscribe to my YouTube.
| Tylynn |
Don’t forget to pin for later!