
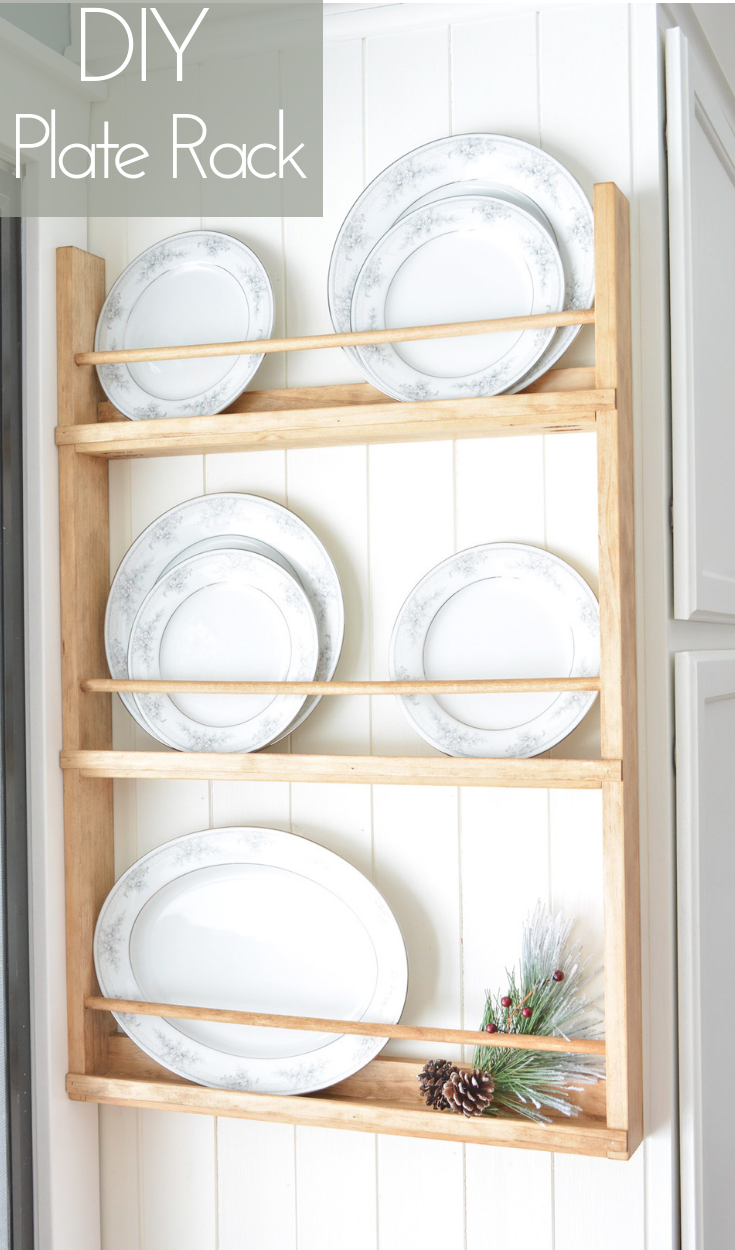
Build a DIY wall plate rack with these free plans.


This post may contain affiliate links. If you make a purchase from one of the links, I may make a small commission at NO EXTRA COST to you. This helps keep the tutorials and plans free here at Bitterroot DIY. Thank you for your support! See my full disclosure here.
Last year my mom gave me her old set of china. It’s absolutely beautiful and reminds me of all our family holidays. I was so excited to receive the set, but it’s been sitting in a box in the basement ever since I brought it home. Our kitchen is really small so there’s not much room to display fancy dishes and definitely no room for a full size china hutch. This plate rack is the perfect solution – it adds some decoration to the empty end of our cabinets, doesn’t take up too much space, and I finally get to see the dishes … even if it’s just a few!
Enjoy the free plans!
Tools & Supplies
- Miter Saw
- Orbital Sander
- Drill
- 1/2″ Forstner Bit
- Kreg Pocket Hole Jig
- 1 1/4″ Pocket Hole Screws
- Wood Glue
- Tape Measure
- Pencil
- Safety Glasses
- Ear Protection
Lumber
- 2 | 1 x 3 @ 6′
- 1 | 1 x 2 @ 6′
- 2 | 1/2″ Dowel @ 48″ (Home Depot)
- 1 | 1″ x 1/4″ General Purpose Trim @ 8′ (Home Depot)
Cuts
- 2 | 1 x 3 @ 33″ (vertical frame)
- 3 | 1 x 3 @ 21″ (shelves)
- 2 | 1 x 2 @ 21″ (supports)
- 3 | 1/2″ Dowel @ 22″
- 3 | 1″ x 1/4″ Trim @ 22 1/2″ (front trim)
Step 1.
Drill 1/2″ holes 1″ deep in the inside edge of both vertical frames at the locations marked:
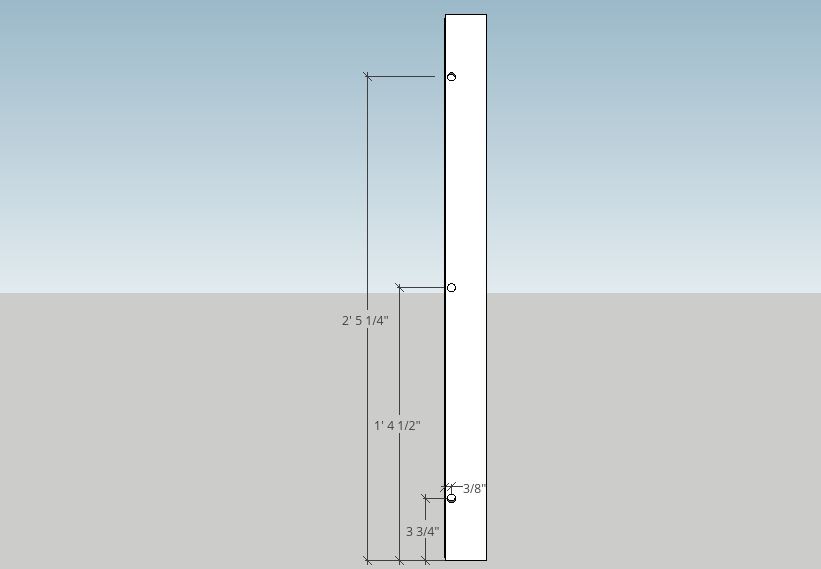
I used a 1/2″ forstner bit to drill the holes. Just make sure to keep the drill straight up and down. It helps to wrap a piece of tape around the bit at 1″ deep so you know where to stop each cut.
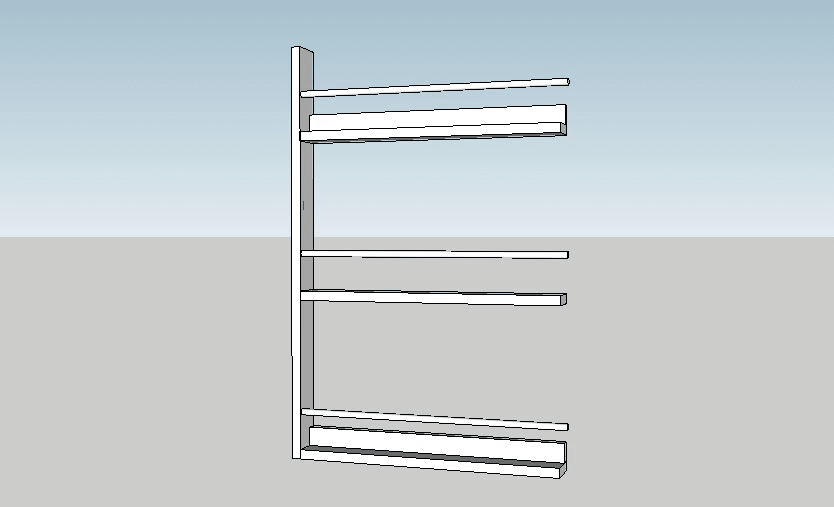
Step 2.
Attach the three shelves with wood glue and 1 1/4″ pocket hole screws. Place pocket holes on the bottom of the shelves to best hide them.


Step 3.
Place the horizontal 1 x 2 supports flush with the top and bottom shelves. Attach to the vertical frame with wood glue and 1 1/4″ pocket hole screws. Put pocket holes on the back of the supports to hide them. Use wood glue to attach each support to the shelf it sits on and clamp until the glue sets.


Step 4.
Glue the 1/2″ dowels in place on the vertical frame.

If you’re wondering why I built everything on half of a frame – fear not! I built everything onto one side so the dowels would fit correctly when I attached the other vertical frame.
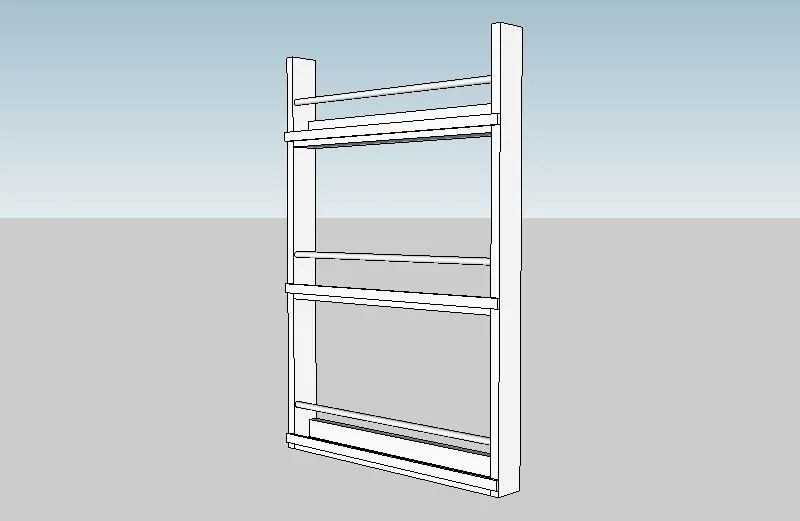
Step 5.
Position the second vertical frame even with the first half of the frame. Insert the dowels into the 1/2″ holes and attach with wood glue. Use pocket holes along the bottom of the shelves and back of the supports to attach the frame to the rest of the plate rack (same as before).


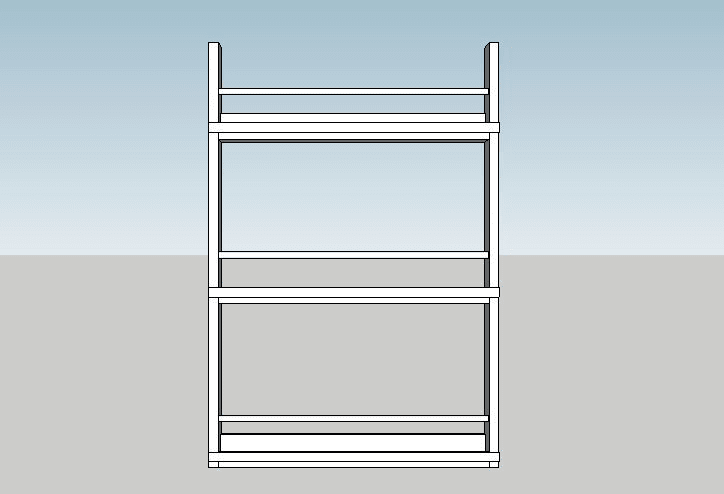
Step 6.
Place trim along the front of each shelf and attach with wood glue and 1″ finish nails.

I used a general purpose trim from Home Depot, but you can select any style of trim. The point of the trim is to prevent plates from sliding off the shelf. Position the trim 1/2″ up from the bottom of each shelf to give a good lip for the plates to rest against.

Step 7.
Sand and finish as desired! I used Watco Danish Oil in Black Walnut. I typically use stain and polyurethane to finish furniture. But, since this won’t see a lot of water or heat changes, I decided to go with oil. It’s a beautiful lighter barn wood look!


Please let me know if you have any questions and I’ll get back to you as soon as possible!
I’d love to see it if you build from these plans! Tag me on Instagram @bitterrootdiy. I’ve also saved a video of this project on my Instagram profile under highlights!


Thanks for stopping by!
For more project ideas, you can find me on Pinterest. And to stay up to date with the latest shenanigans, follow me on Instagram.
Like the project? Pin it for later!


Michelle Bergsma
Sunday 26th of July 2020
What was the cost to do this this project? I am definitely going to be building one myself!!!
tylynn_sattler
Monday 27th of July 2020
I try to stay away from cost estimates because it depends on the price of lumber in your location, as well as what type of lumber you use. It's not terribly expensive though.
Lora
Saturday 4th of April 2020
What kind of wood did you use, please?
tylynn_sattler
Monday 6th of April 2020
Pine from Home Depot
Lora Baumann
Wednesday 1st of April 2020
Planning to make your plate rack for my dining room! What kind of wood did you use? I am not sure yet if I will stain or paint mine. Thank you for the plans!@!!
tylynn_sattler
Monday 6th of April 2020
That's great! I just used pine from Home Depot.
Linda
Thursday 14th of November 2019
Pretty! How did you attach it to the wall? Linda
tylynn_sattler
Monday 2nd of December 2019
I just drove a few screws through the top and bottom 1 x 2s that run across the back. You could also add hanging hardware on the back if you don't want to screw through it.